Artifacts Management
Artifacts are inherently related to cyber incidents and are effectively various types of evidence collected during threat triage, containment, and subsequent incident response procedures. Artifacts are directly related to ORNA's incident response Tasks, and any of your team members can upload one or more artifacts to support their respective Tasks. These items will then appear within each respective Task and collectively within the Artifacts section of the platform for a centralized view.
ORNA allows for various artifact file formats, including images, PDFs, Word documents, and more, ensuring your incident resolution progress is well-documented for future review and record-keeping purposes.
To access Artifacts, navigate to the Artifacts section of the platform.
Artifacts features
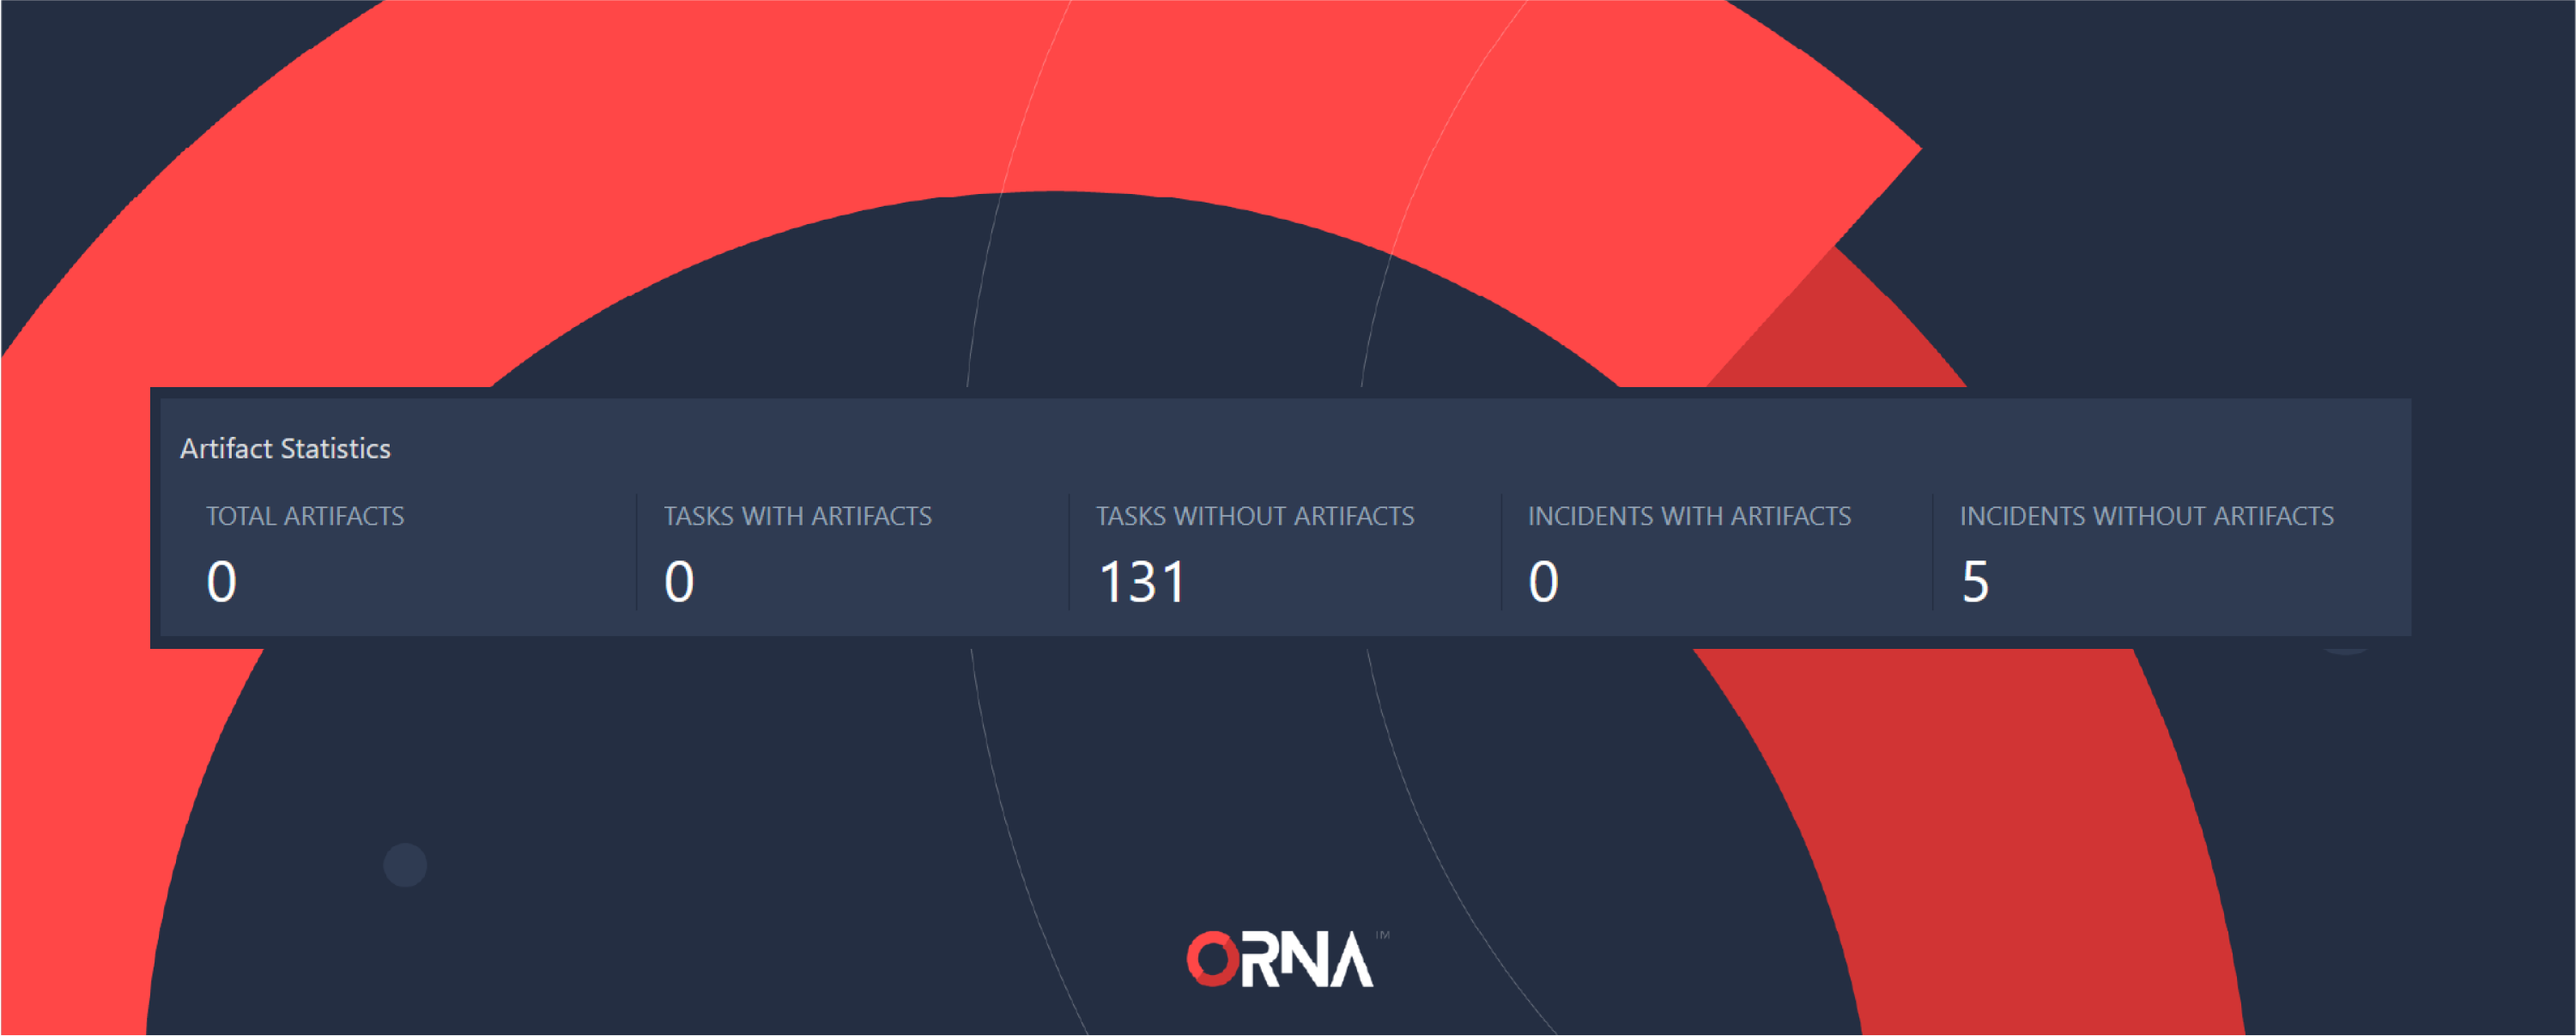
- Artifact statistics. The top bar displays the number of Total Artifacts, Tasks With Artifacts, Tasks Without Artifacts, Incidents With Artifacts, and Incidents Without Artifacts.
Artifacts KPIs
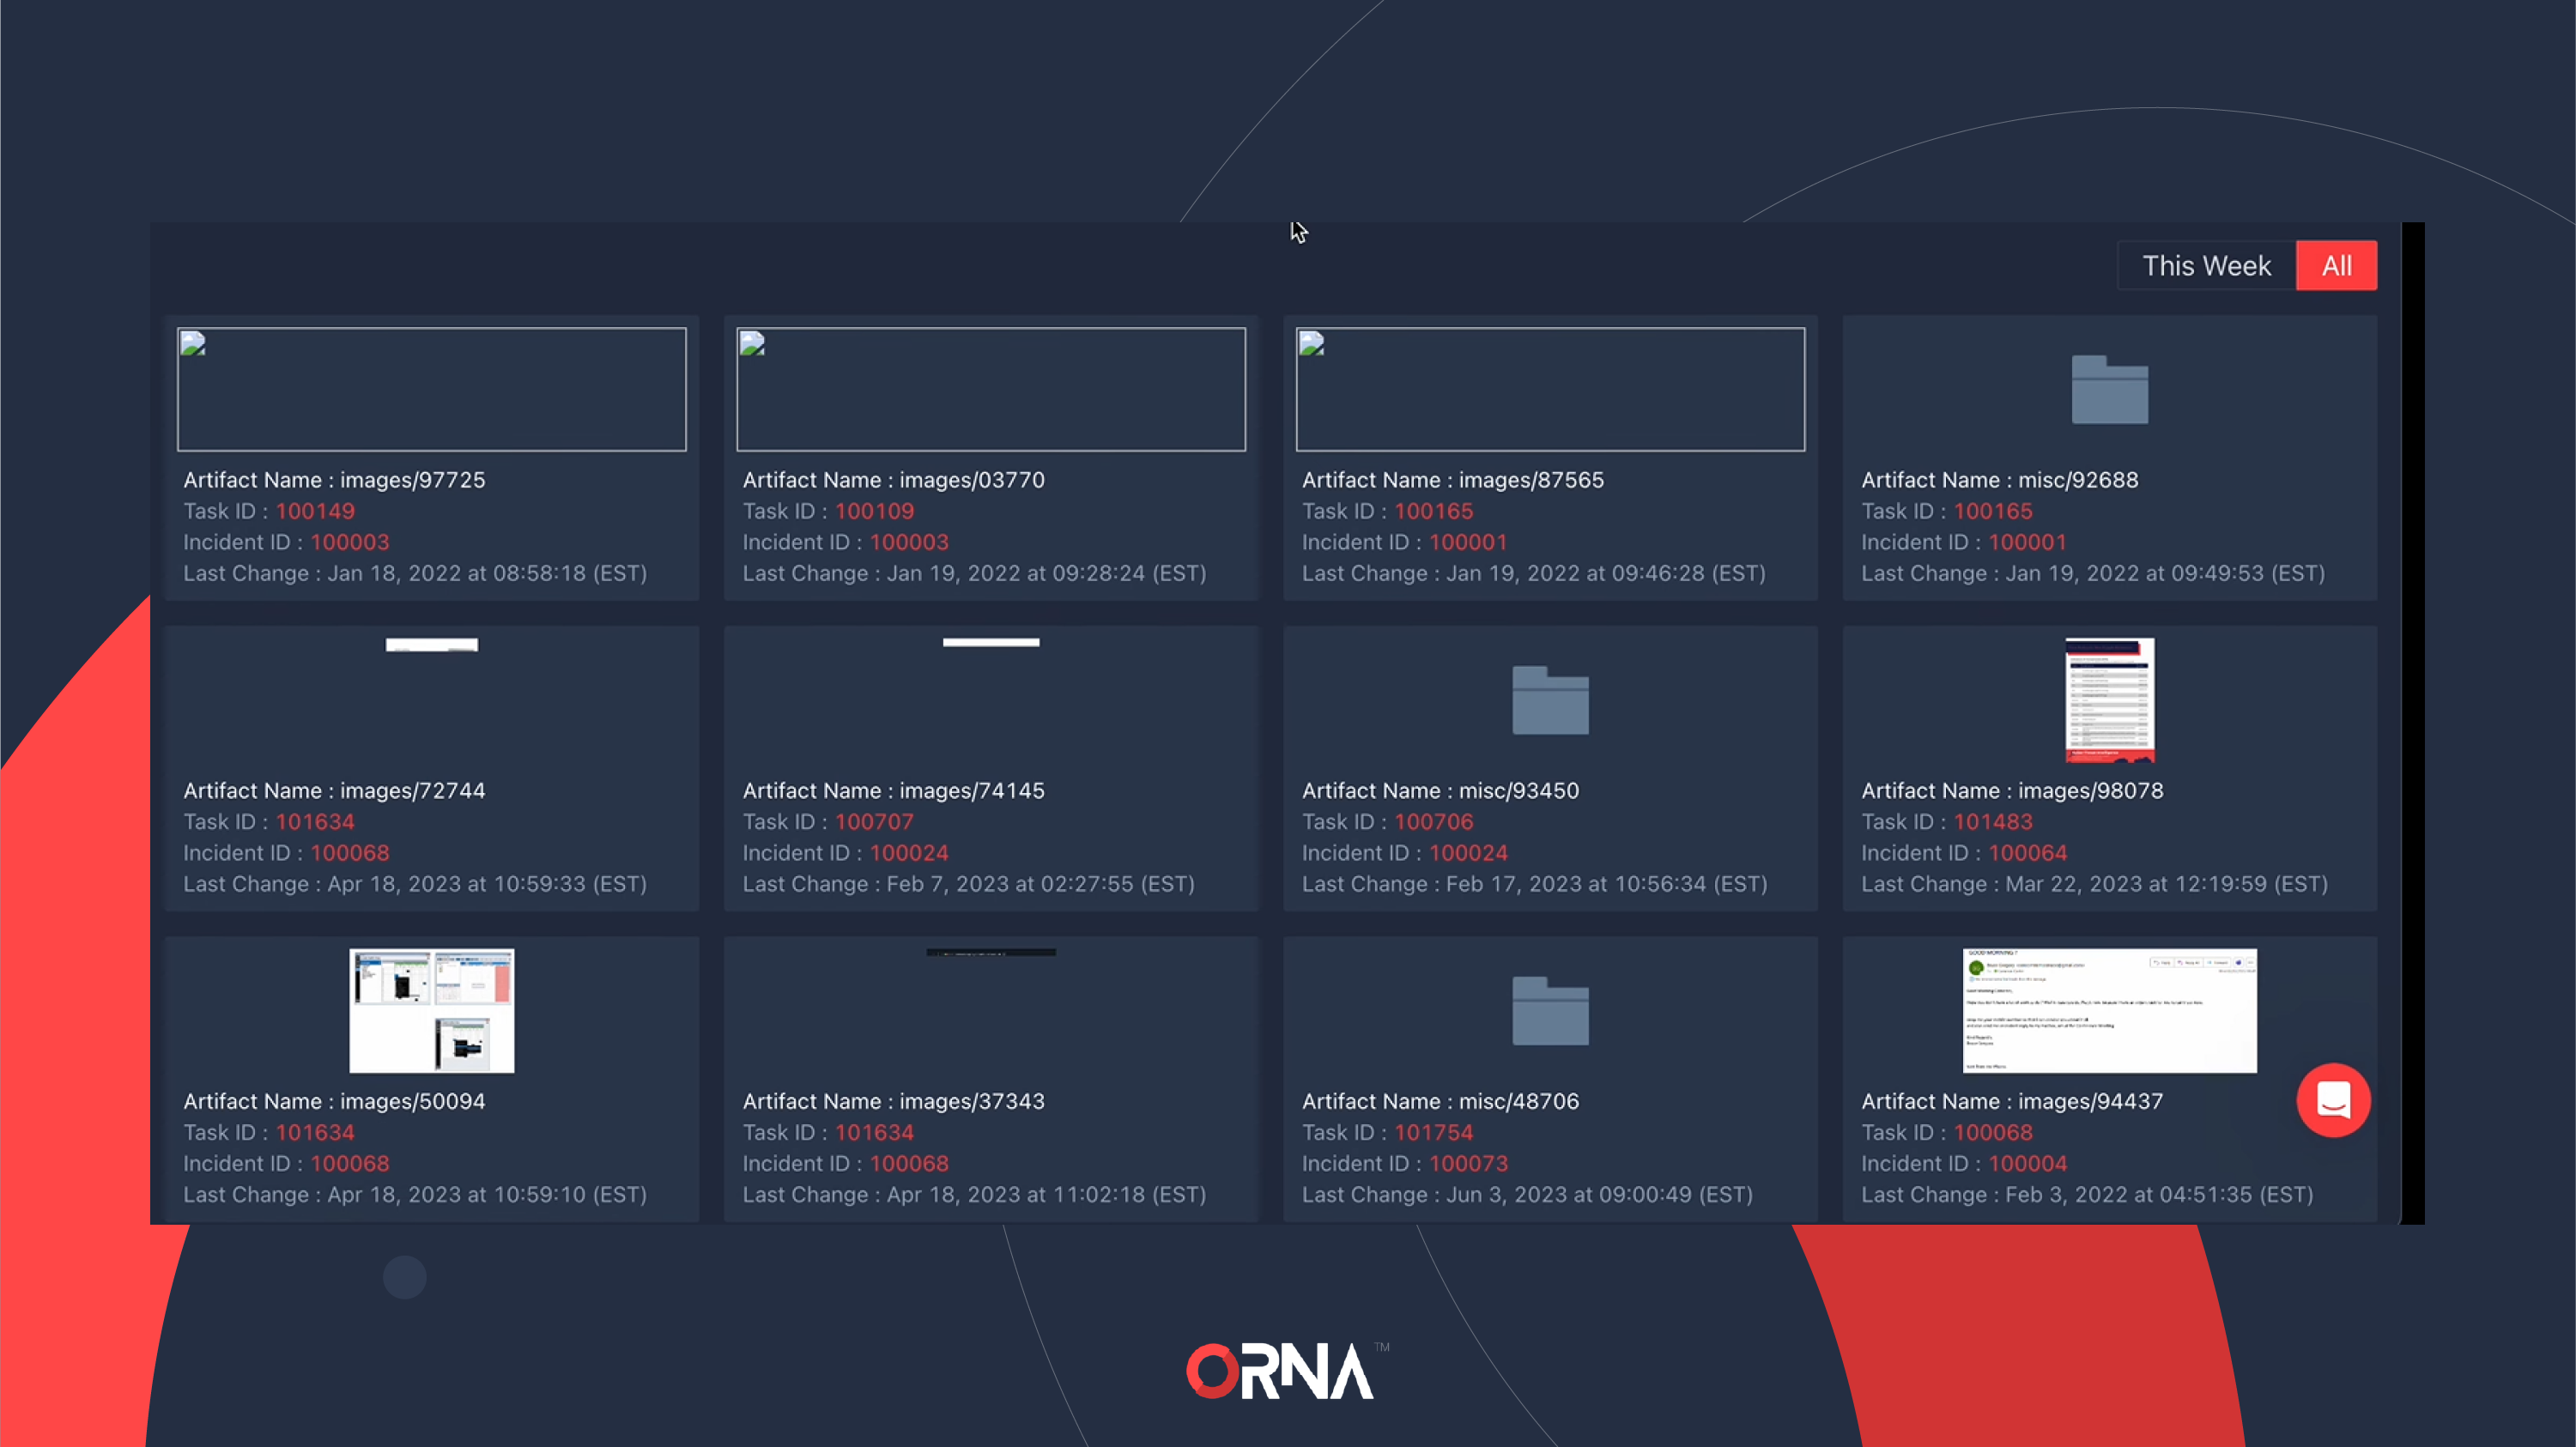
- A gallery of all Artifacts that have been attached to the Tasks of any current and past incidents. The gallery allows artifacts to be filtered by This Week or All.
- Each artifact card also displays its respective Task and Incident IDs. You can click either to navigate to the respective Task or Incident.
- Artifact preview. Click on any Artifact to preview it; note that some file formats are incompatible with the preview functionality.
- Artifact history. Click on the "..." Options menu in the top right-hand corner of the Artifact Preview window to view the history of any ORNA user's interactions with this specific artifact. This allows for precise chain-of-custody maintenance and tracking.
Artifacts browser
Adding Artifacts
- Navigate to a Task within any active (non-Resolved) incident.
- Click the "+" Add New button under the Artifacts label on the left side of the Task details, underneath the Task Description section.
- Click the "..." Select File button on the right-hand side of the popup window to select a compatible file.
- Click the Upload button to finalize.
Removing Artifacts
- Navigate to the Artifacts section of the platform.
- Click on any Artifact to preview it.
- Click on the red "X" Delete button on the right-hand side of the Preview popup window, right above the preview area.
- A confirmation popup will appear. Click on the Delete button to finalize artifact deletion. Note that you cannot undo this action.
Downloading Artifacts
- Navigate to the Artifacts section of the platform.
- Click on any Artifact to preview it.
- Click on the red "Down" Download button on the right-hand side of the Preview popup window, right above the preview area and to the right of the red "X" Delete button.
- The respective artifact file will now be downloaded to your machine. Please exercise caution, as incident-related artifacts can be damaged by nature.
Updated 9 months ago