Team Management
Team management is at the core of cybersecurity operations, particularly cyber incident response. The team in the latter function's scope is usually called the Cyber Incident Response Team (CIRT; sometimes CSIRT). Within ORNA, you’ll see it as part of technical roles, such as CIRT Leader, Core CIRT Member, and others.
ORNA’s Team Management features help you define and manage Technical (e.g., CIRT Leader) and Administrative (e.g., CFO) team members, their notifications, availability, role assignments, and more.
We recommend inviting all relevant stakeholders to ORNA as team members and assigning them built-in (such as CIRT Leader, HR, CFO, Communications, Legal, and others) or custom roles accordingly to ensure your timely preparedness to engage in incident response activities once a breach occurs.
Accessing the Team dashboard
To access the Team Management dashboard, navigate to the platform's My Team section.
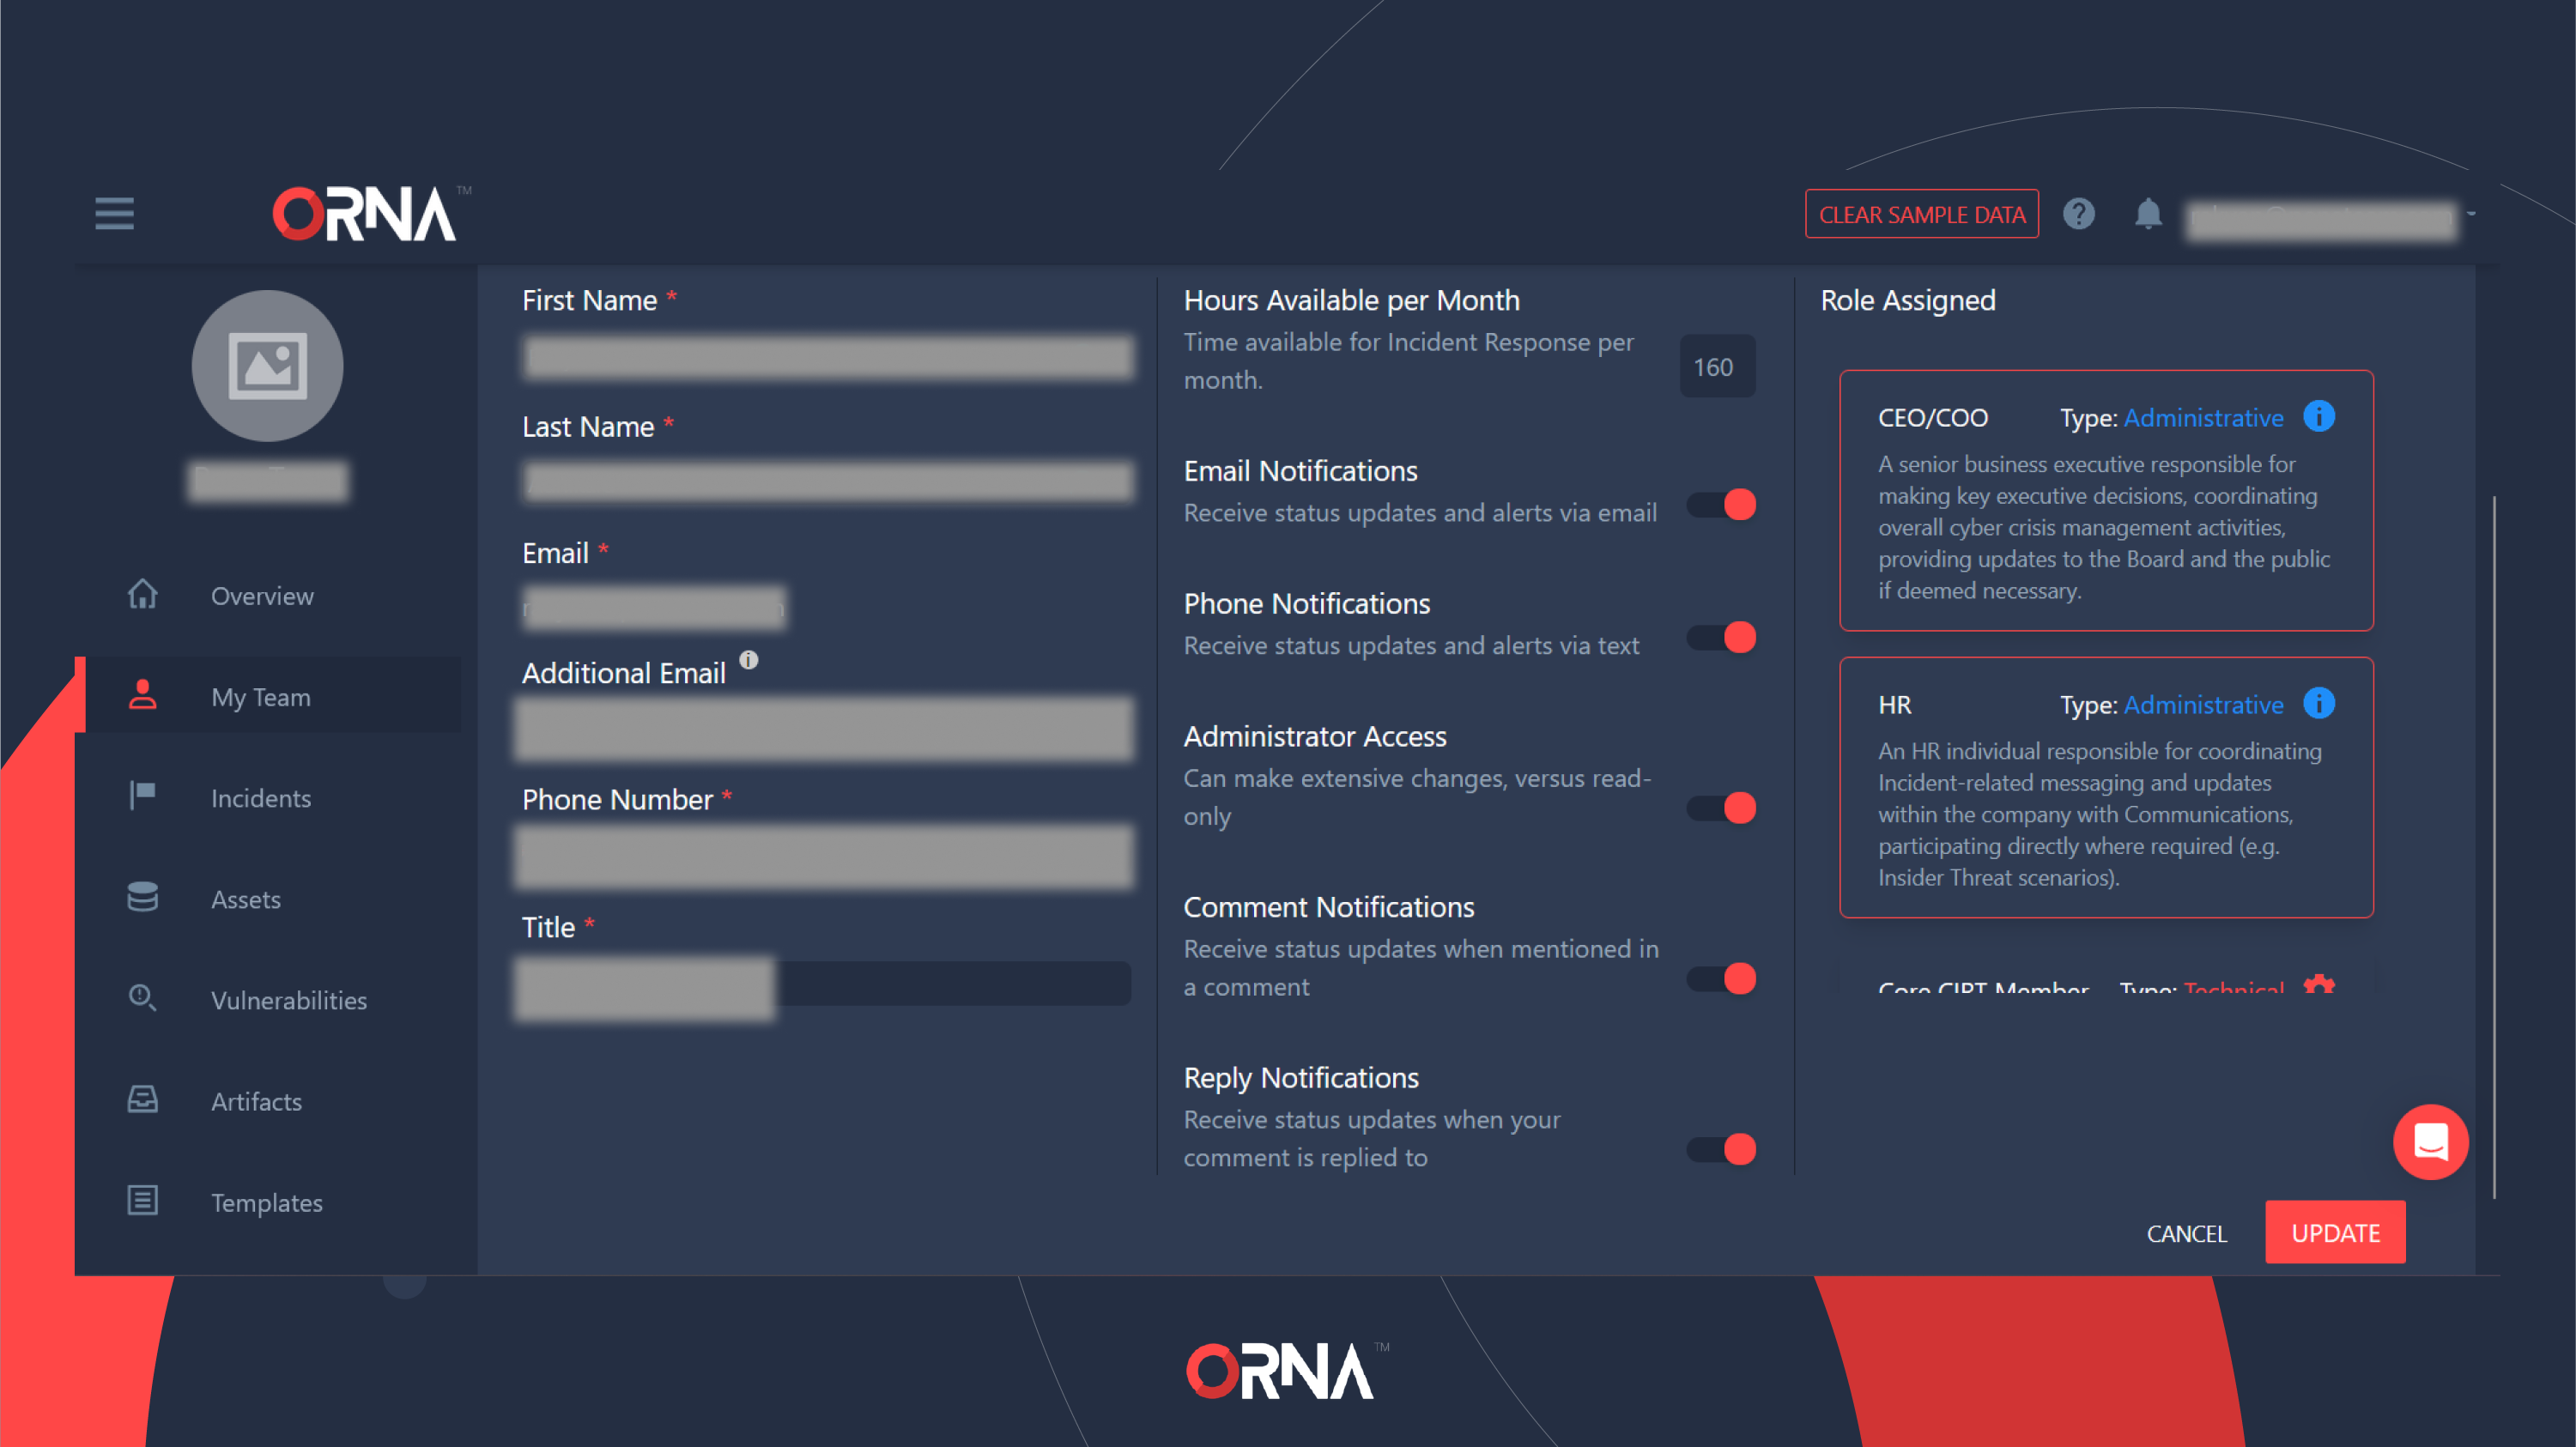
Assigning a Role
- Navigate to the My Team section on the platform.
- Click on the record of the team member that you’d like to assign a role to. This will take you to their profile details.
- Click on one or more available roles on the right-hand side of the screen to assign them. Note that multiple roles can be assigned to the same team member; however, like in an organizational structure, two team members cannot share the same role. You can create new custom roles or duplicate existing ones if required to circumvent this (see the Creating a Custom Role section of this guide).
- Click the Update button in the lower right corner of the screen to save your changes. The team member will be notified about the new role assignment.
- When a new Incident is created, all relevant Playbook tasks designed for this role (or roles) will now be auto-escalated to this team member via email or SMS, per their notification preferences.
Managing team member's Roles
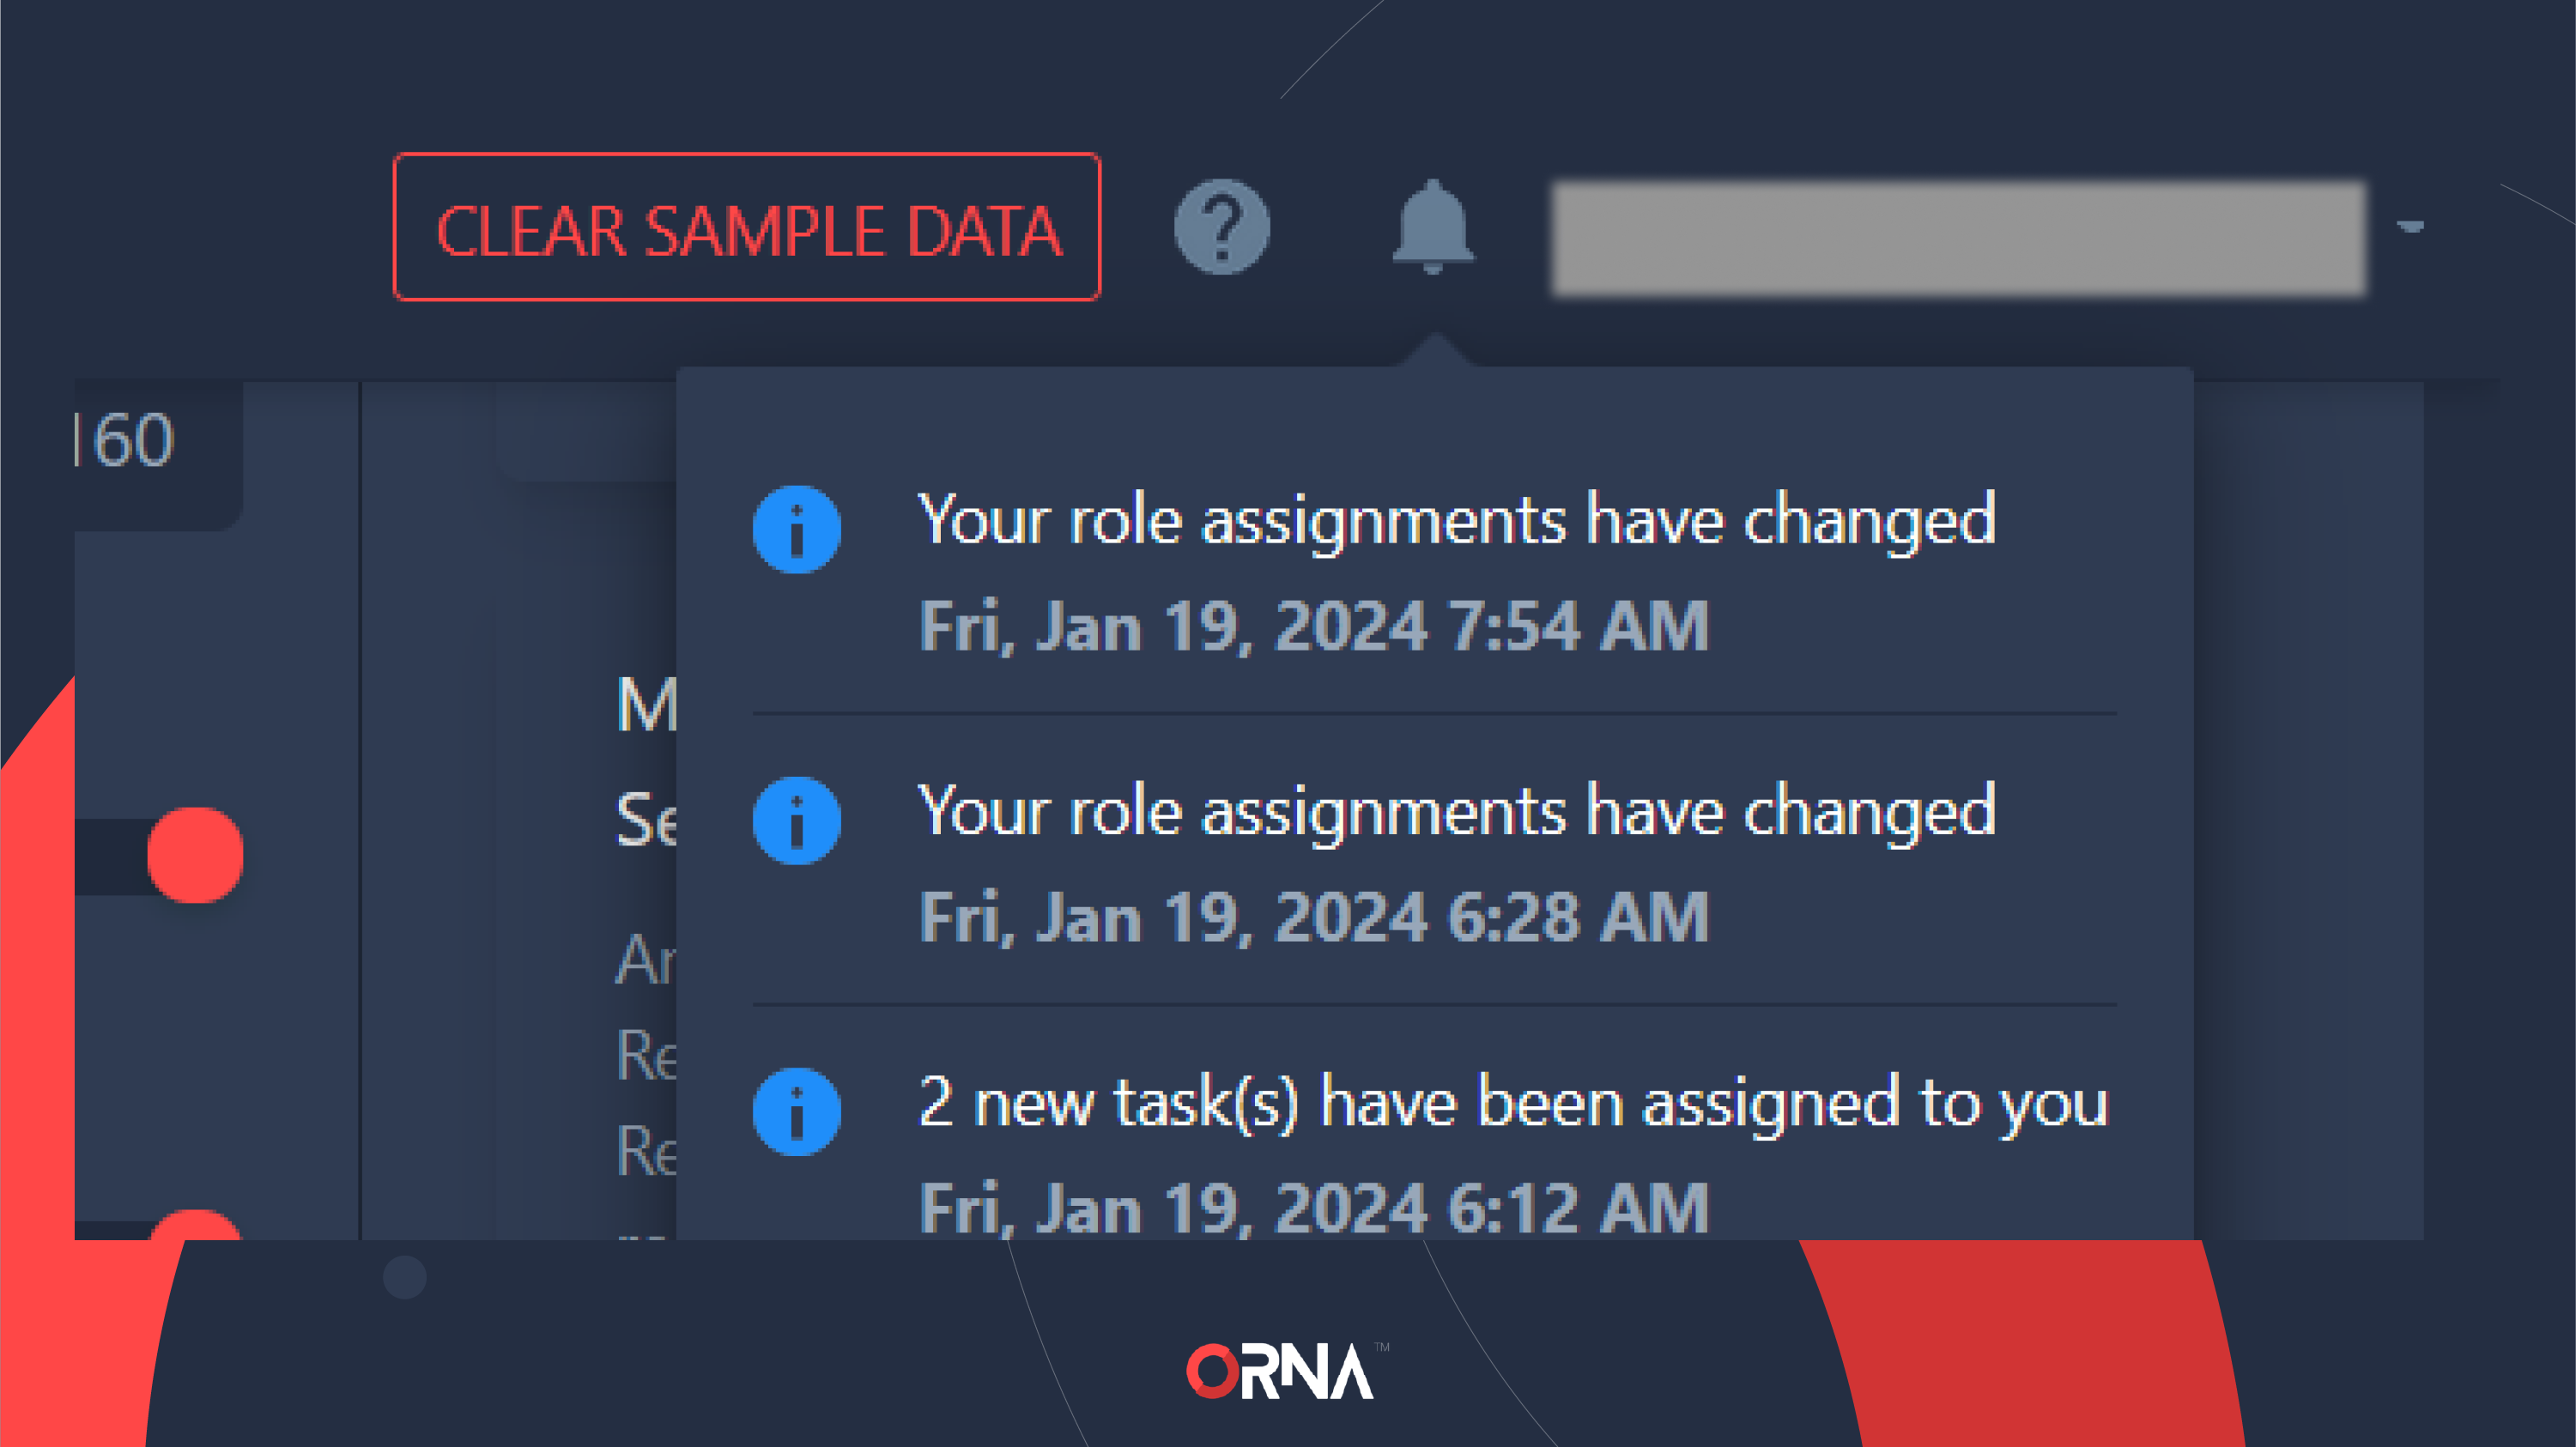
Viewing and clearing notifications
Creating a Custom Role
- Navigate to the My Team section on the platform.
- Click on the Roles link in the screen's top section (between My Team and Responsibilities) to browse the existing roles, built-in by default and custom, if any.
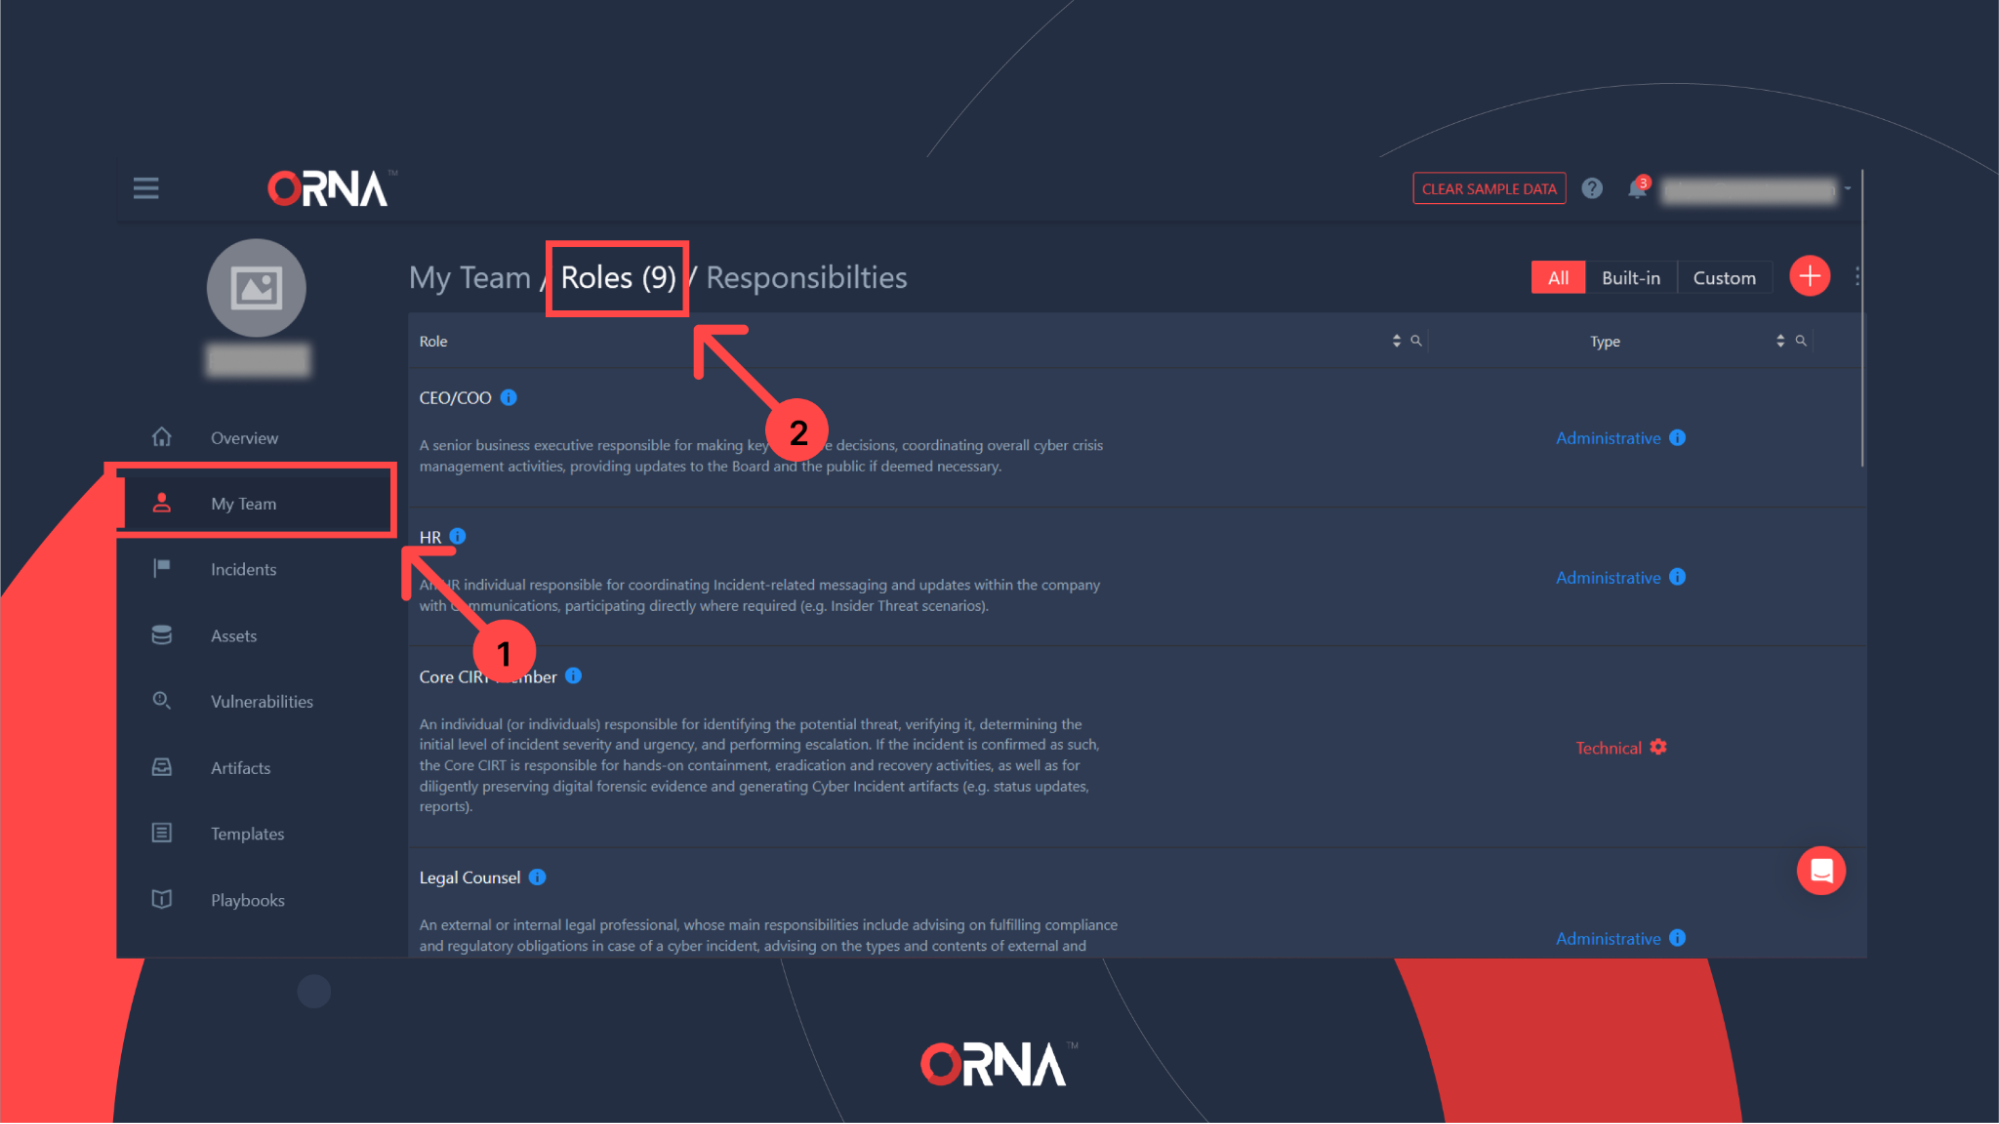
Creating a custom Role
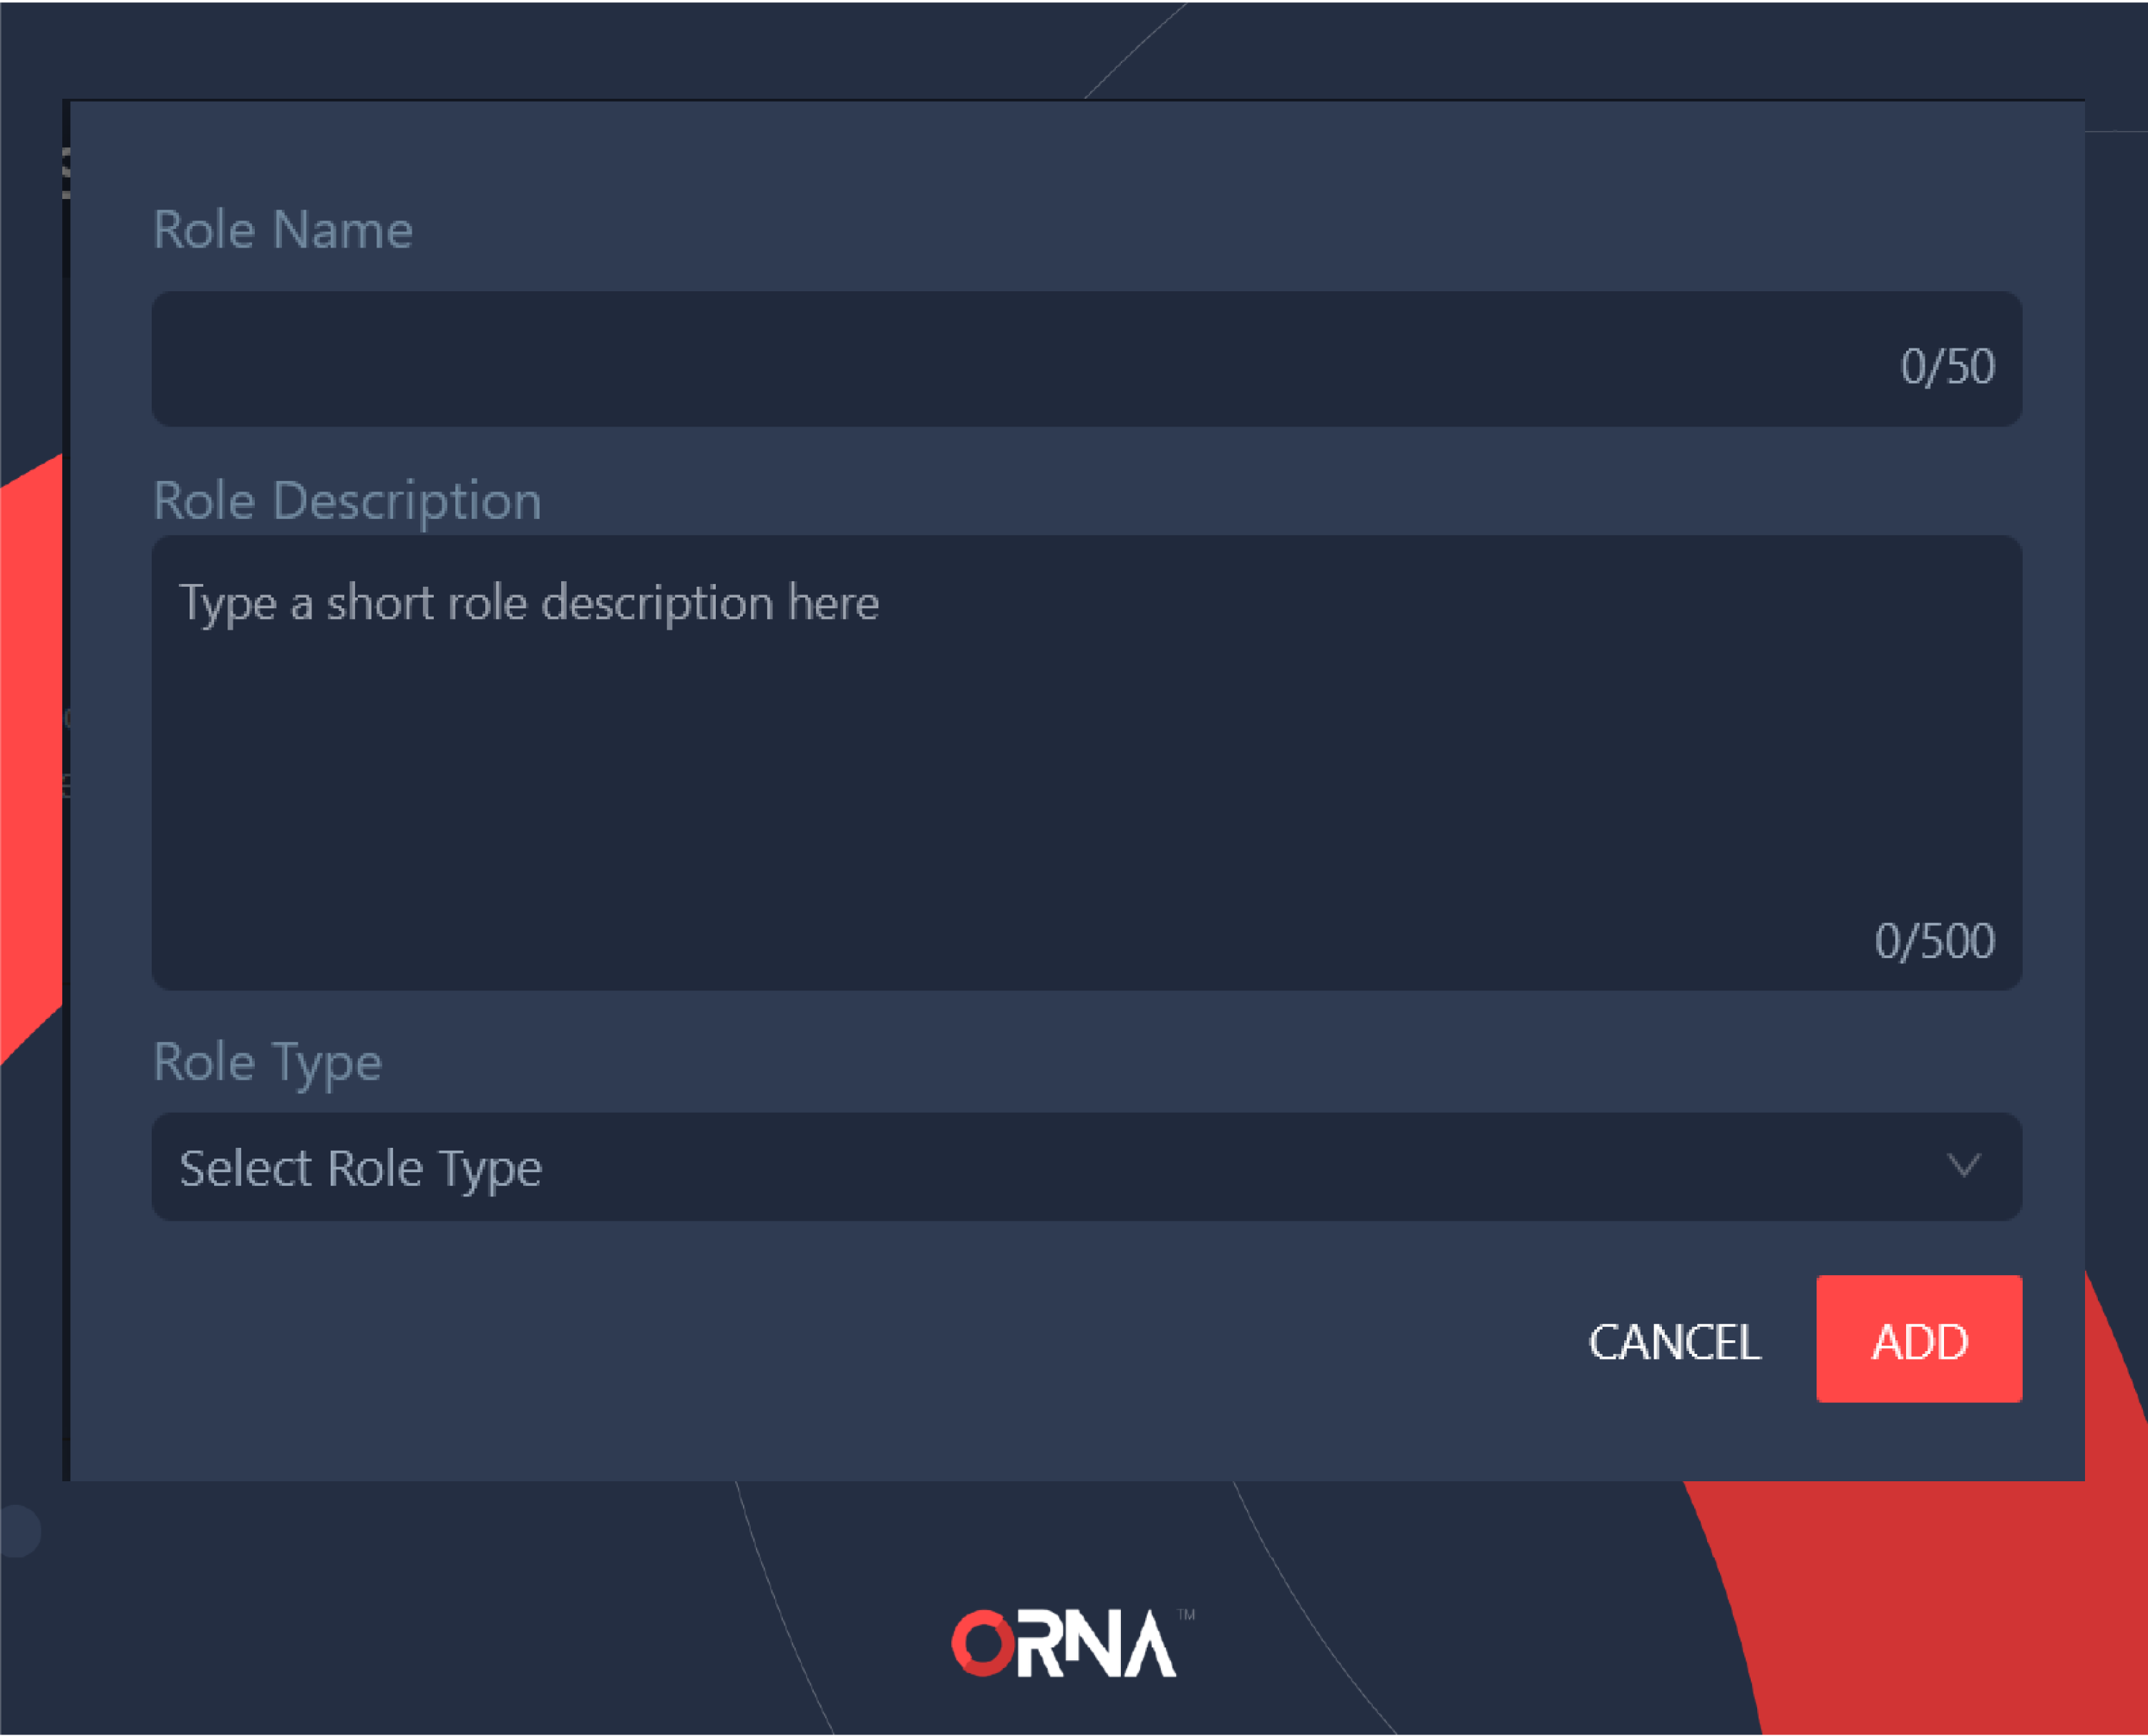
- Click the “+” Add button in the upper right corner of the screen to create a new role.
- Enter the name and short description of the new role in the popup window, and select the type that best suits this role’s duties, whether Technical (e.g., an IT or InfoSec professional) or Administrative (e.g., HR, executive, or legal professional).
- Click the Add button to finalize creating the role.
- This role can now be assigned to any team member or used in the Playbook Designer as a default escalation role for Tasks.
Populating custom Role details
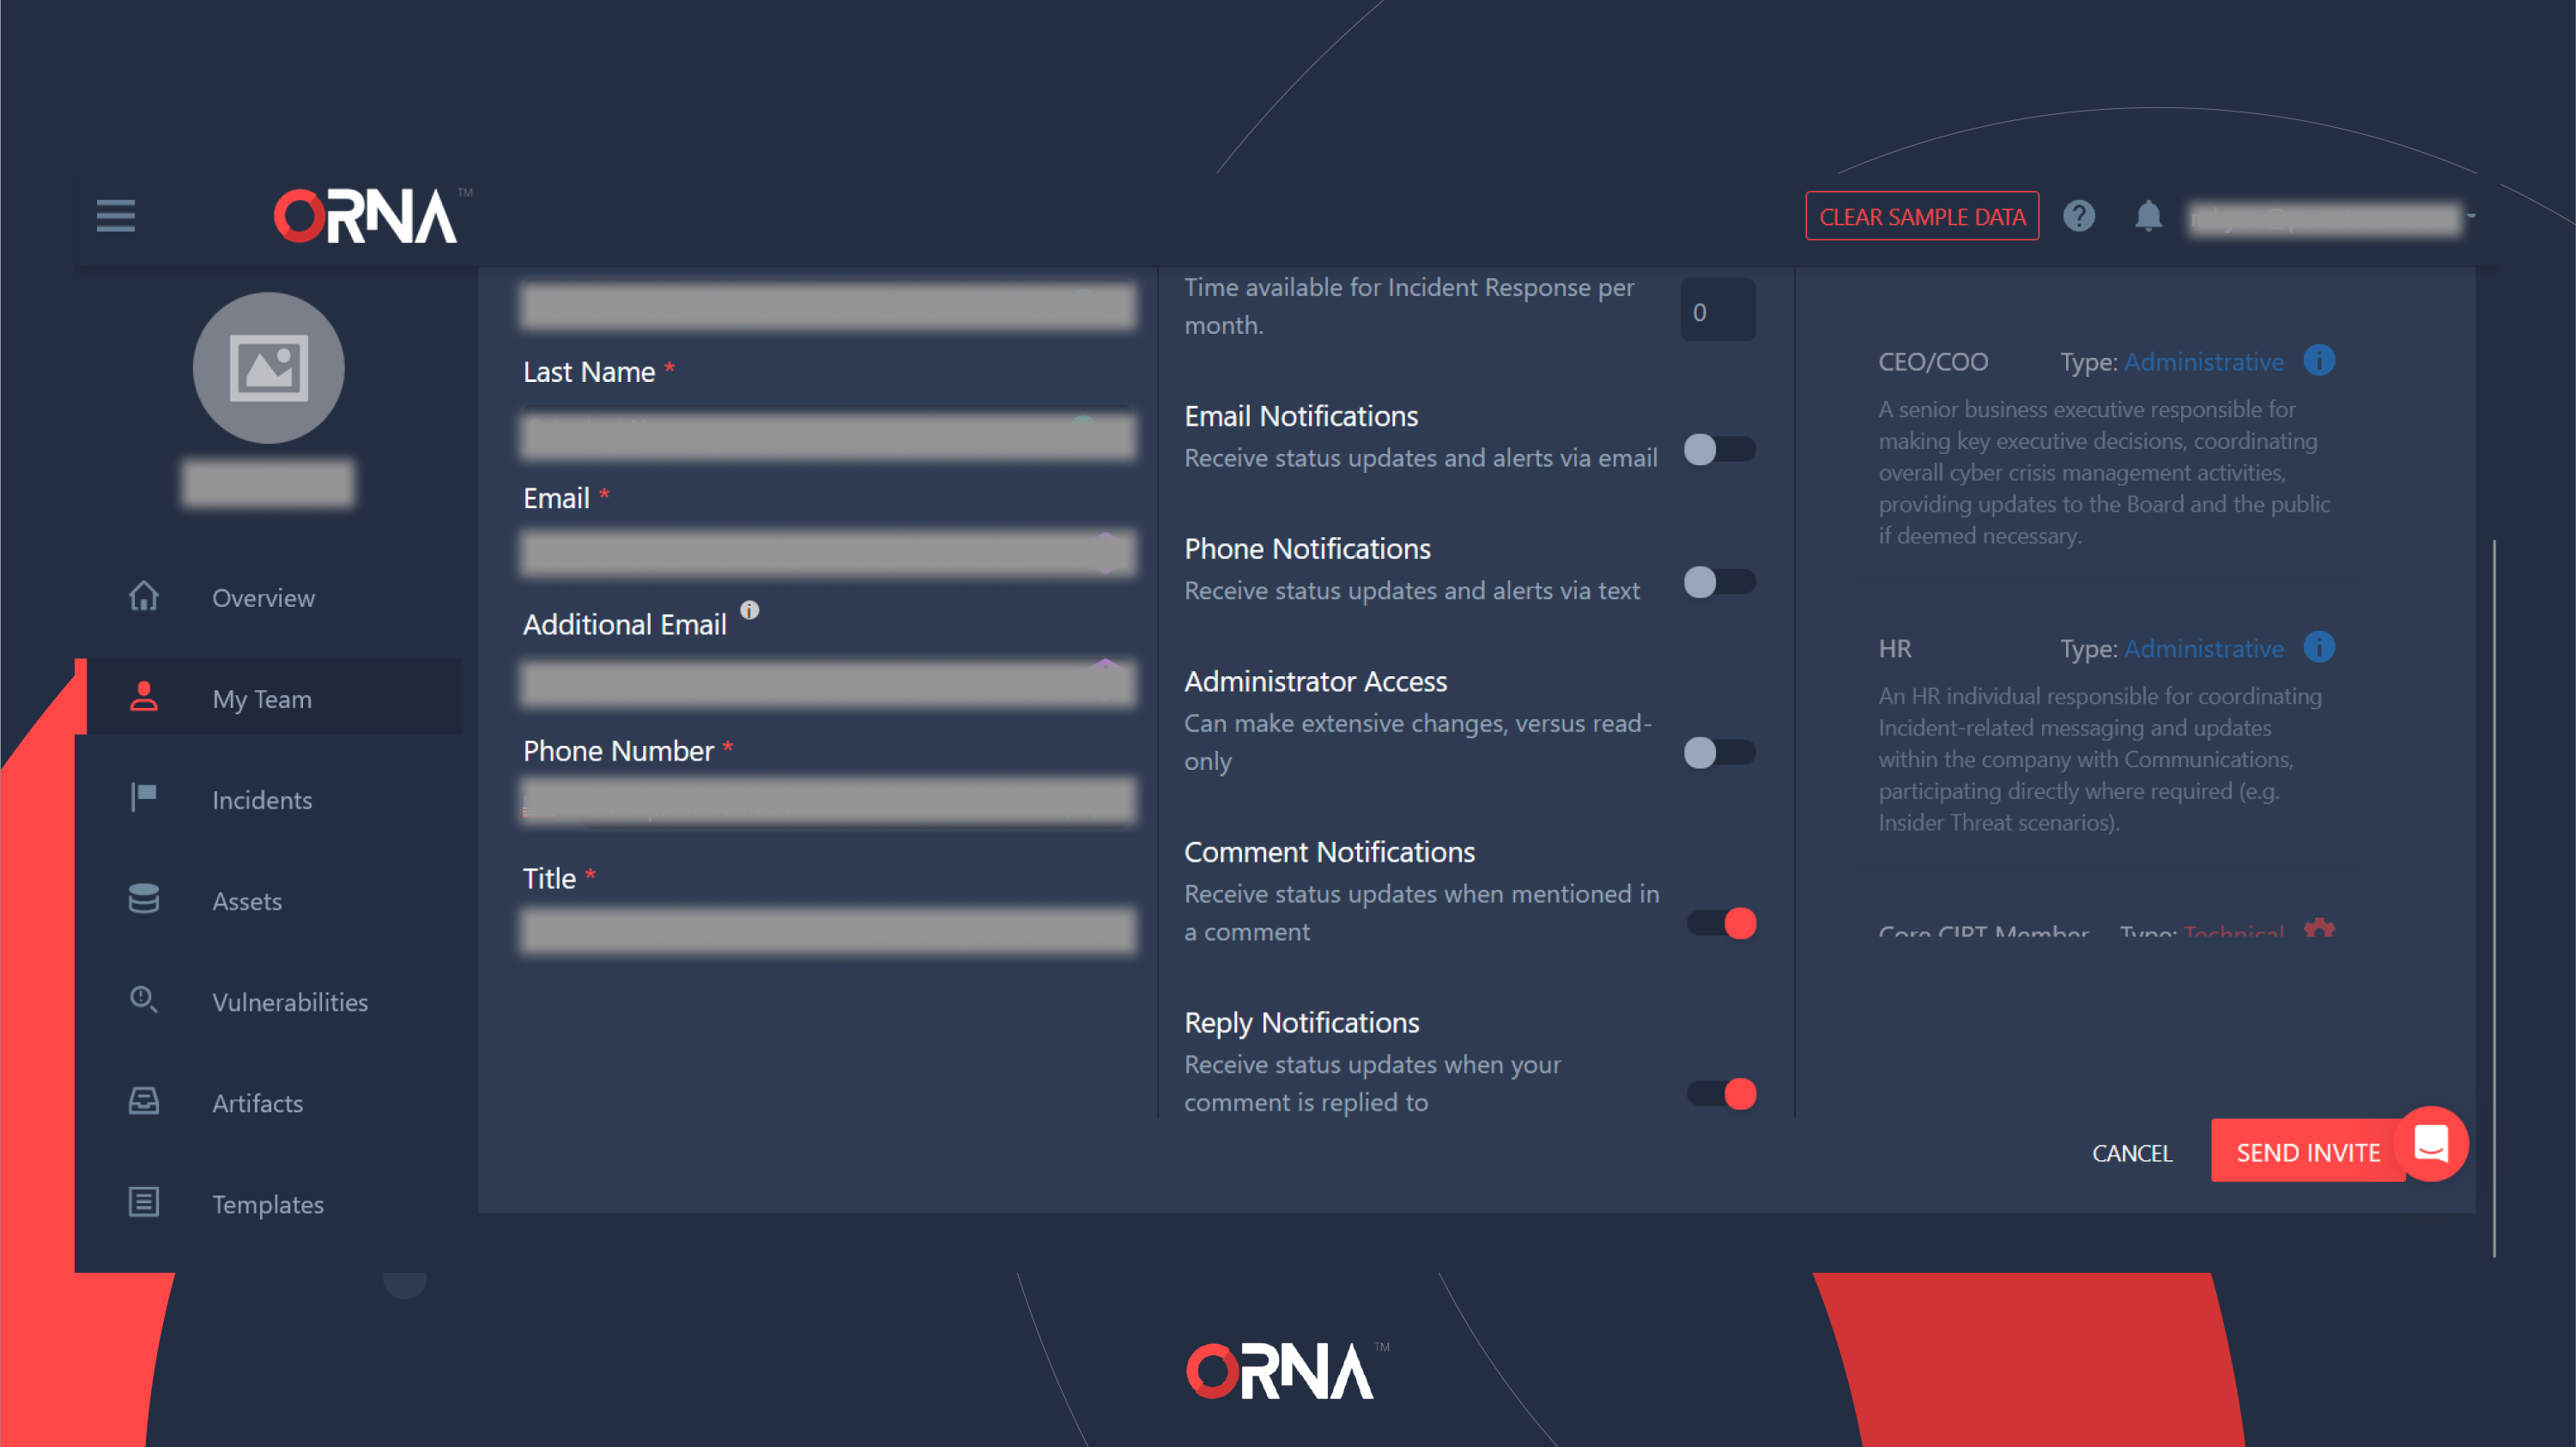
Inviting team members
- Navigate to the My Team section on the platform.
- Click the “+” Add button in the upper right corner of the screen.
- Populate the new team member’s details as needed. Pay particular attention to defining the correct Email and Phone Numbers (both are used to send Incident updates and escalate Playbook tasks during incidents) and Role assignments.
- After populating the profile details, click the Send Invite button in the lower right corner of the screen. Your new team member will receive an email invitation to join the platform.
- Note that ORNA does NOT use a per-seat pricing model; you can invite as many team members to the platform as you like without affecting your subscription.
Creating a new team member account
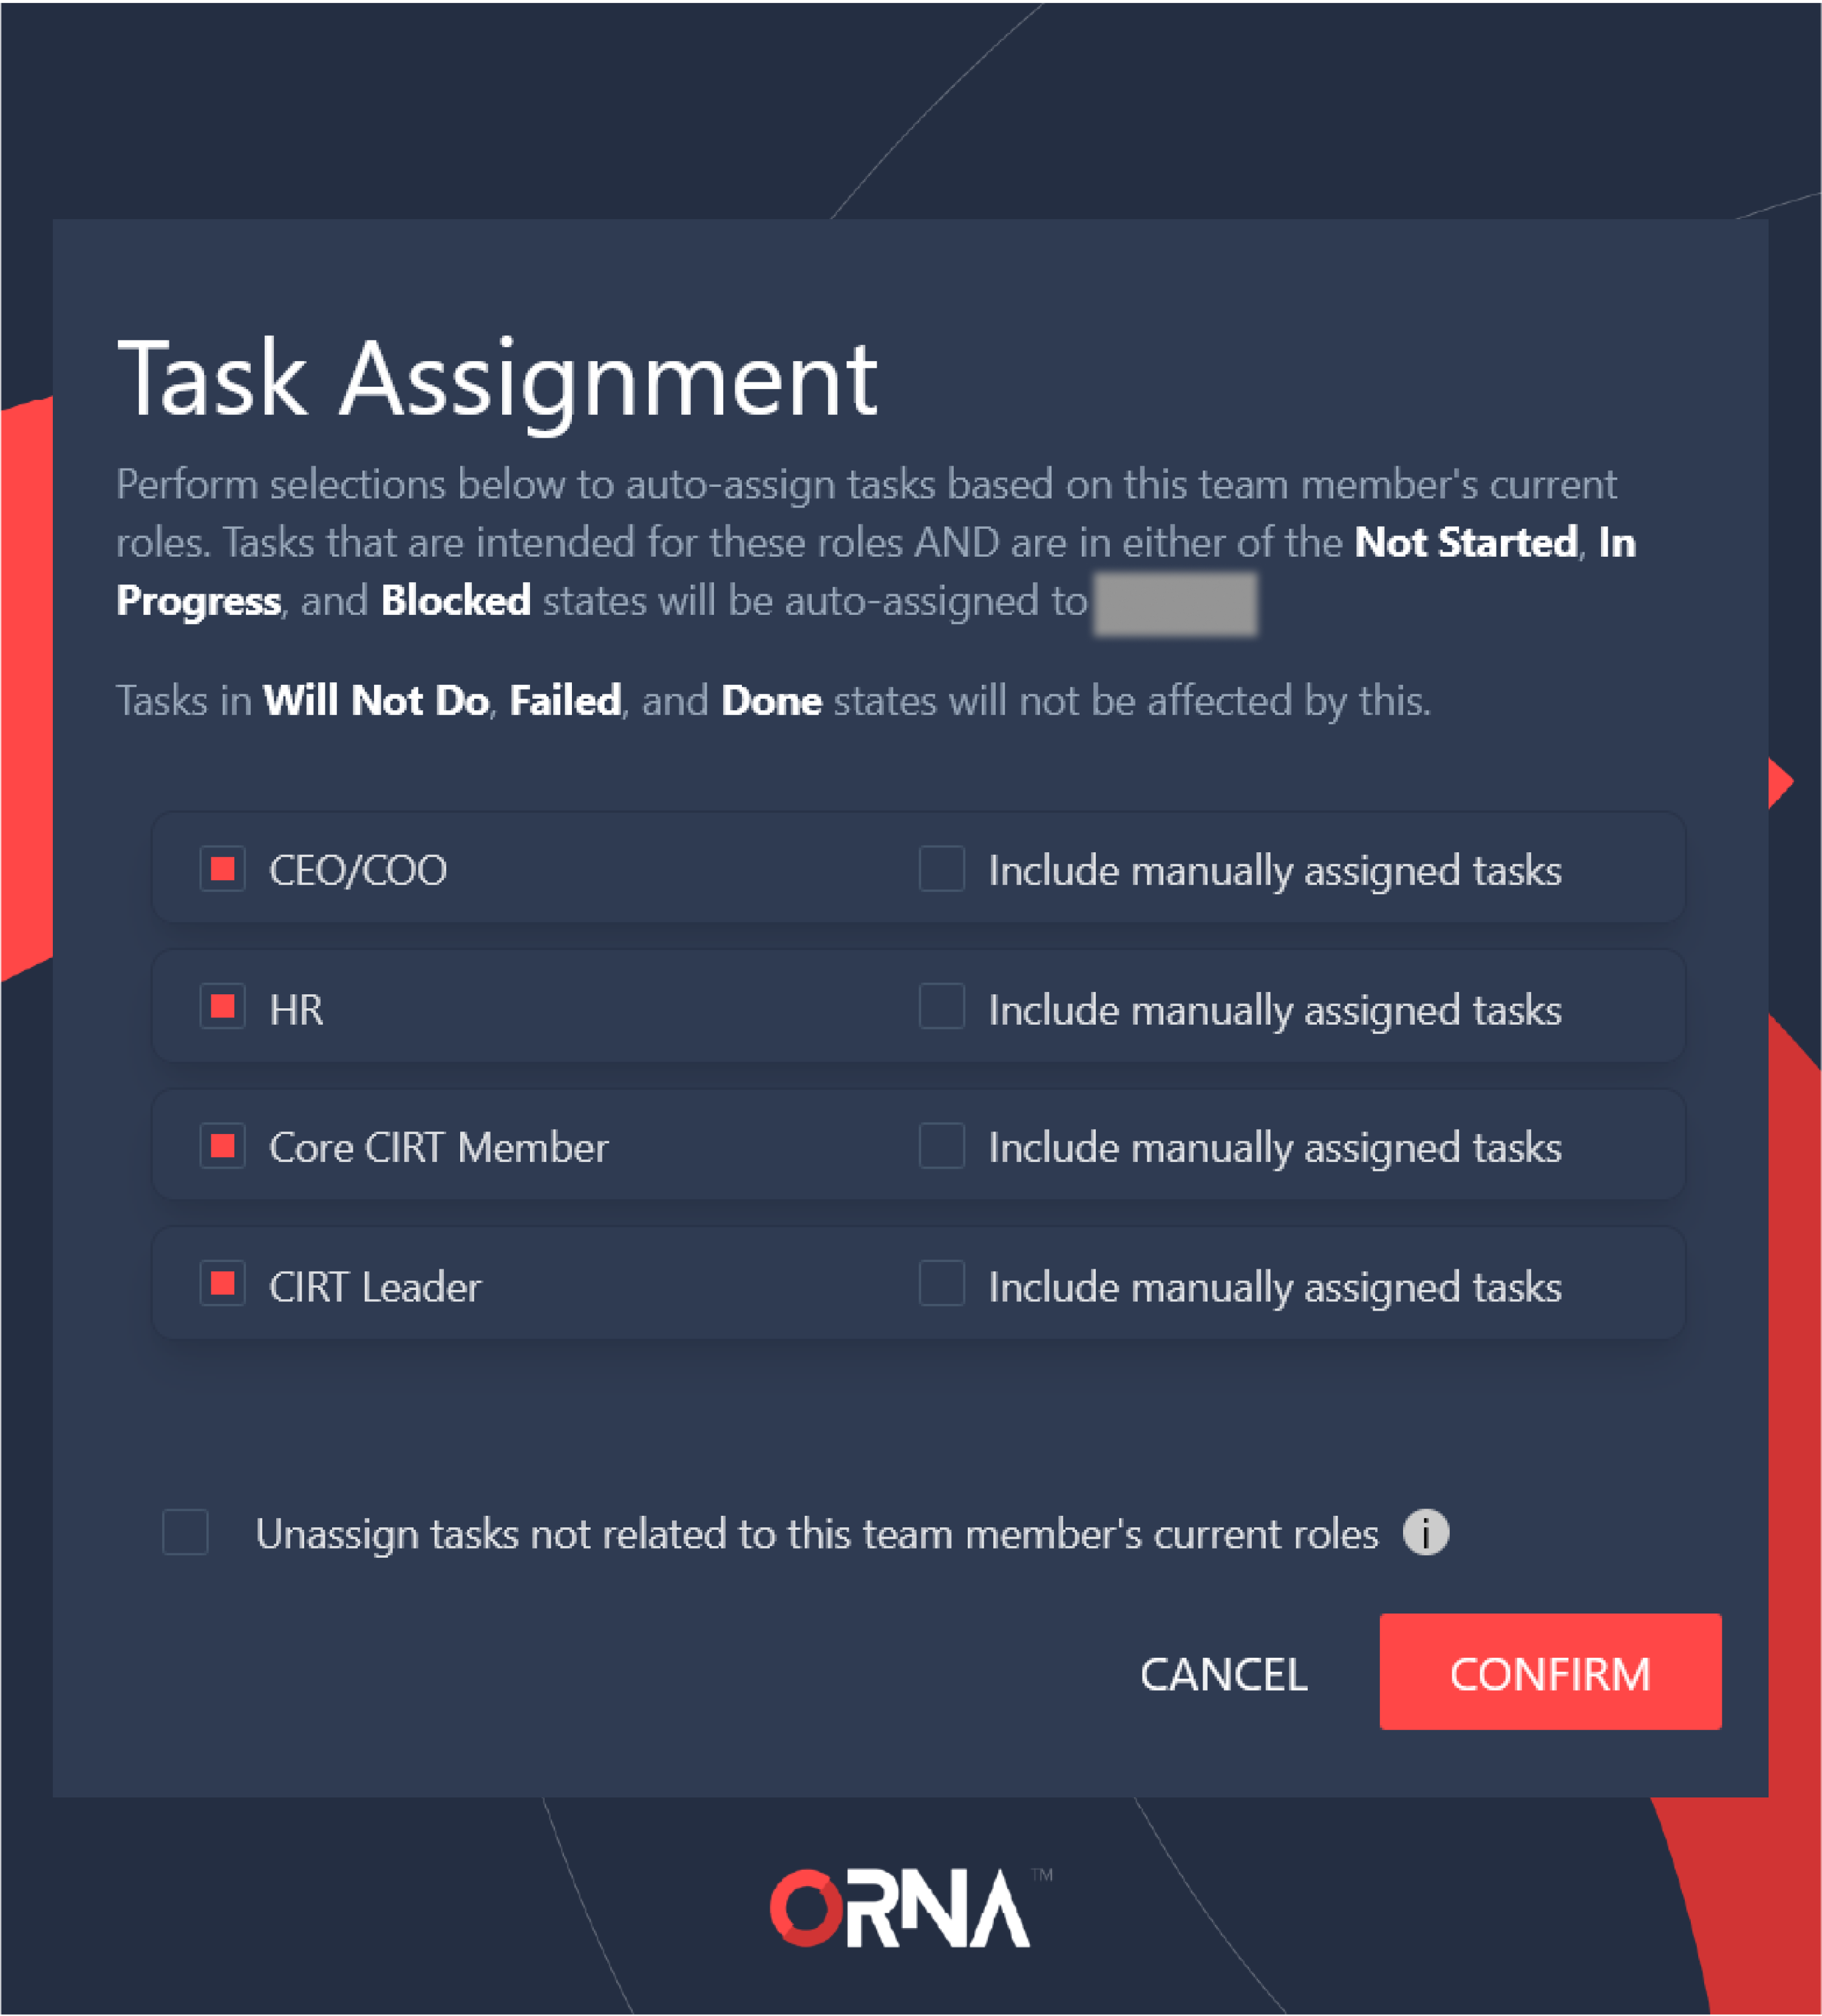
Manually re-assigning other roles’ Tasks
- Navigate to the My Team section on the platform.
- Click the “...” Options button in the top right-hand corner of the screen and select “Auto-assign tasks” from the menu.
- This feature is designed to “move” tasks in bulk from one team member to another mid-incident, for example, in cases where the original team member has become unavailable or your team composition changed suddenly.
- Select which role’s tasks you’d like reassigned to this team member. You can also include tasks that weren’t auto-escalated as part of a Playbook but were assigned manually.
- Click “Confirm” to finalize bulk task reassignment.
Manually reassigning Tasks from one Role to another in bulk
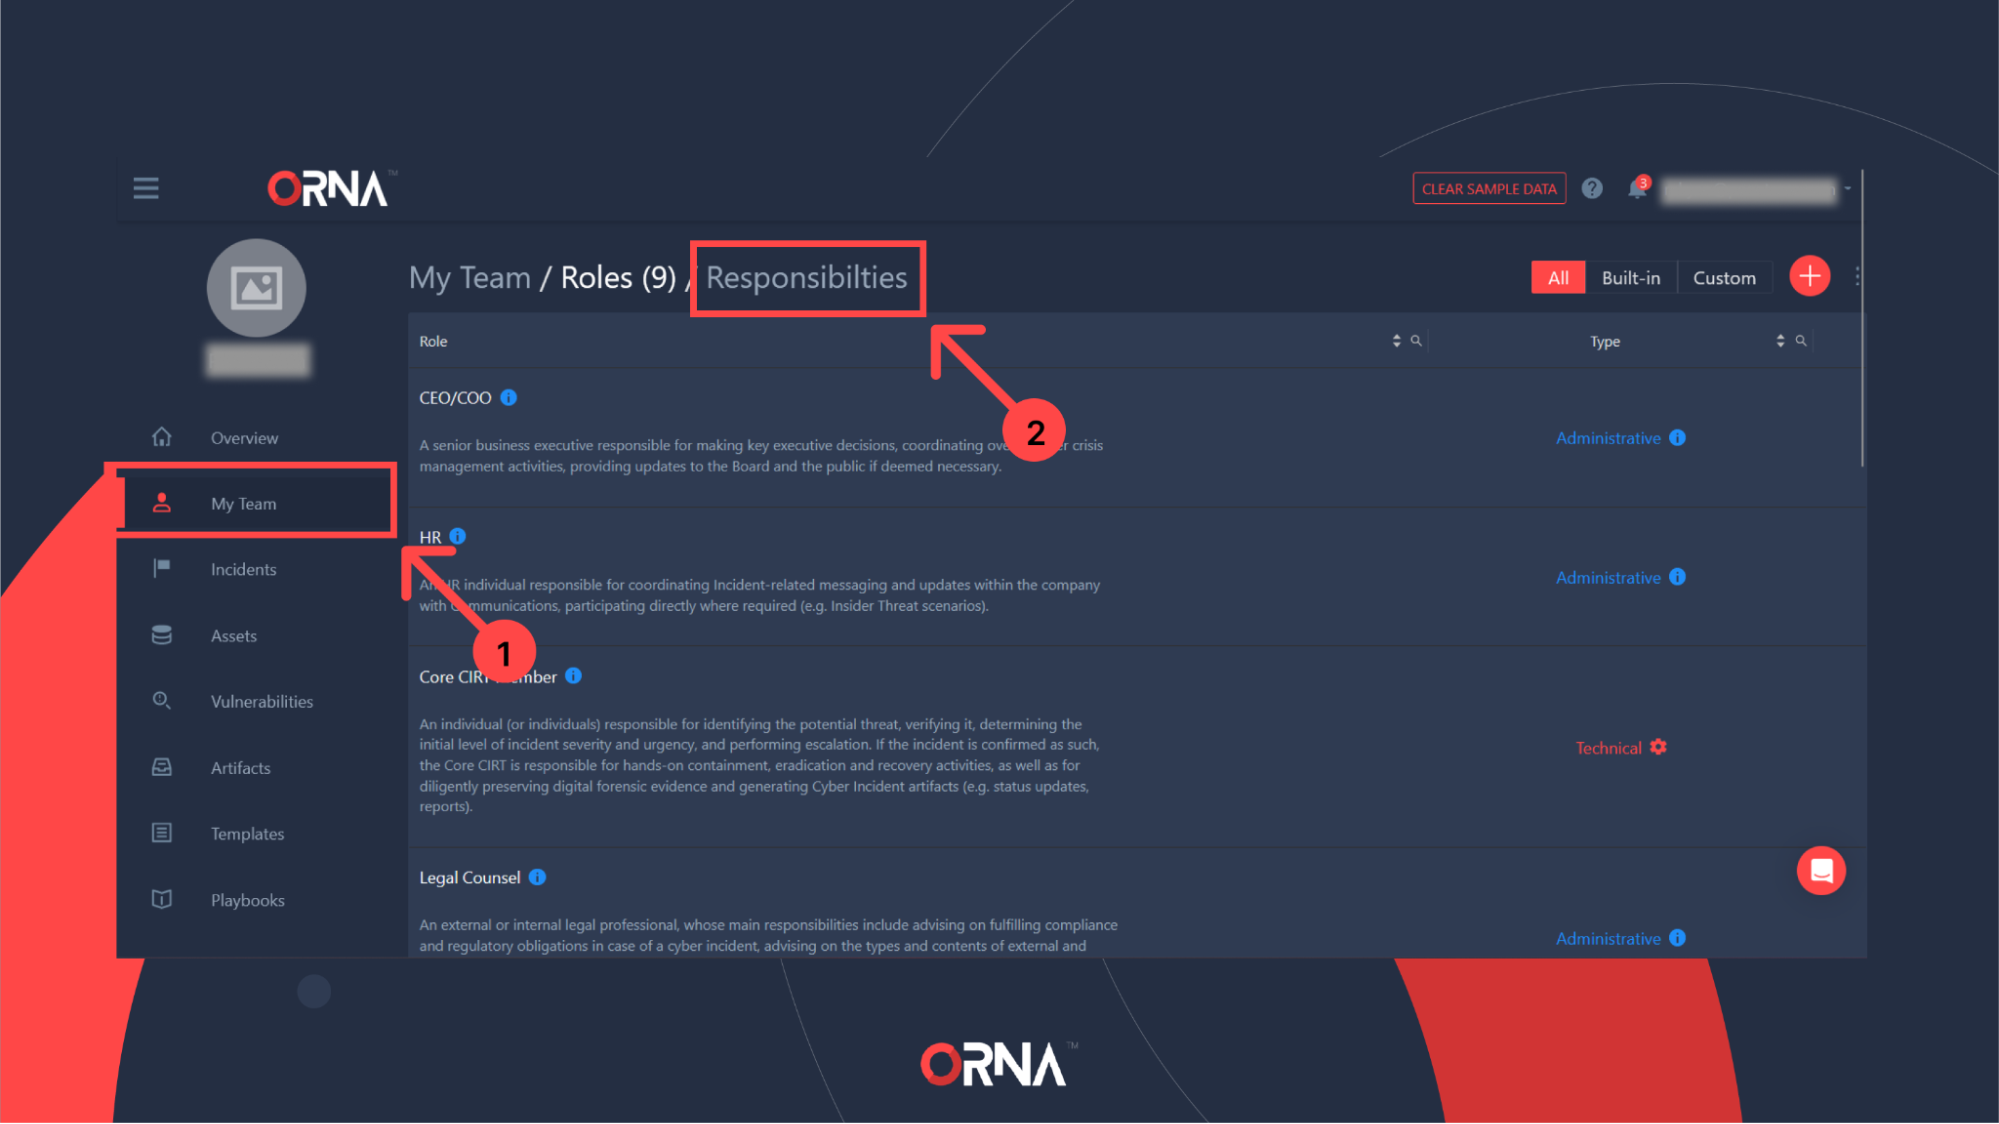
Managing team responsibilities using RACI
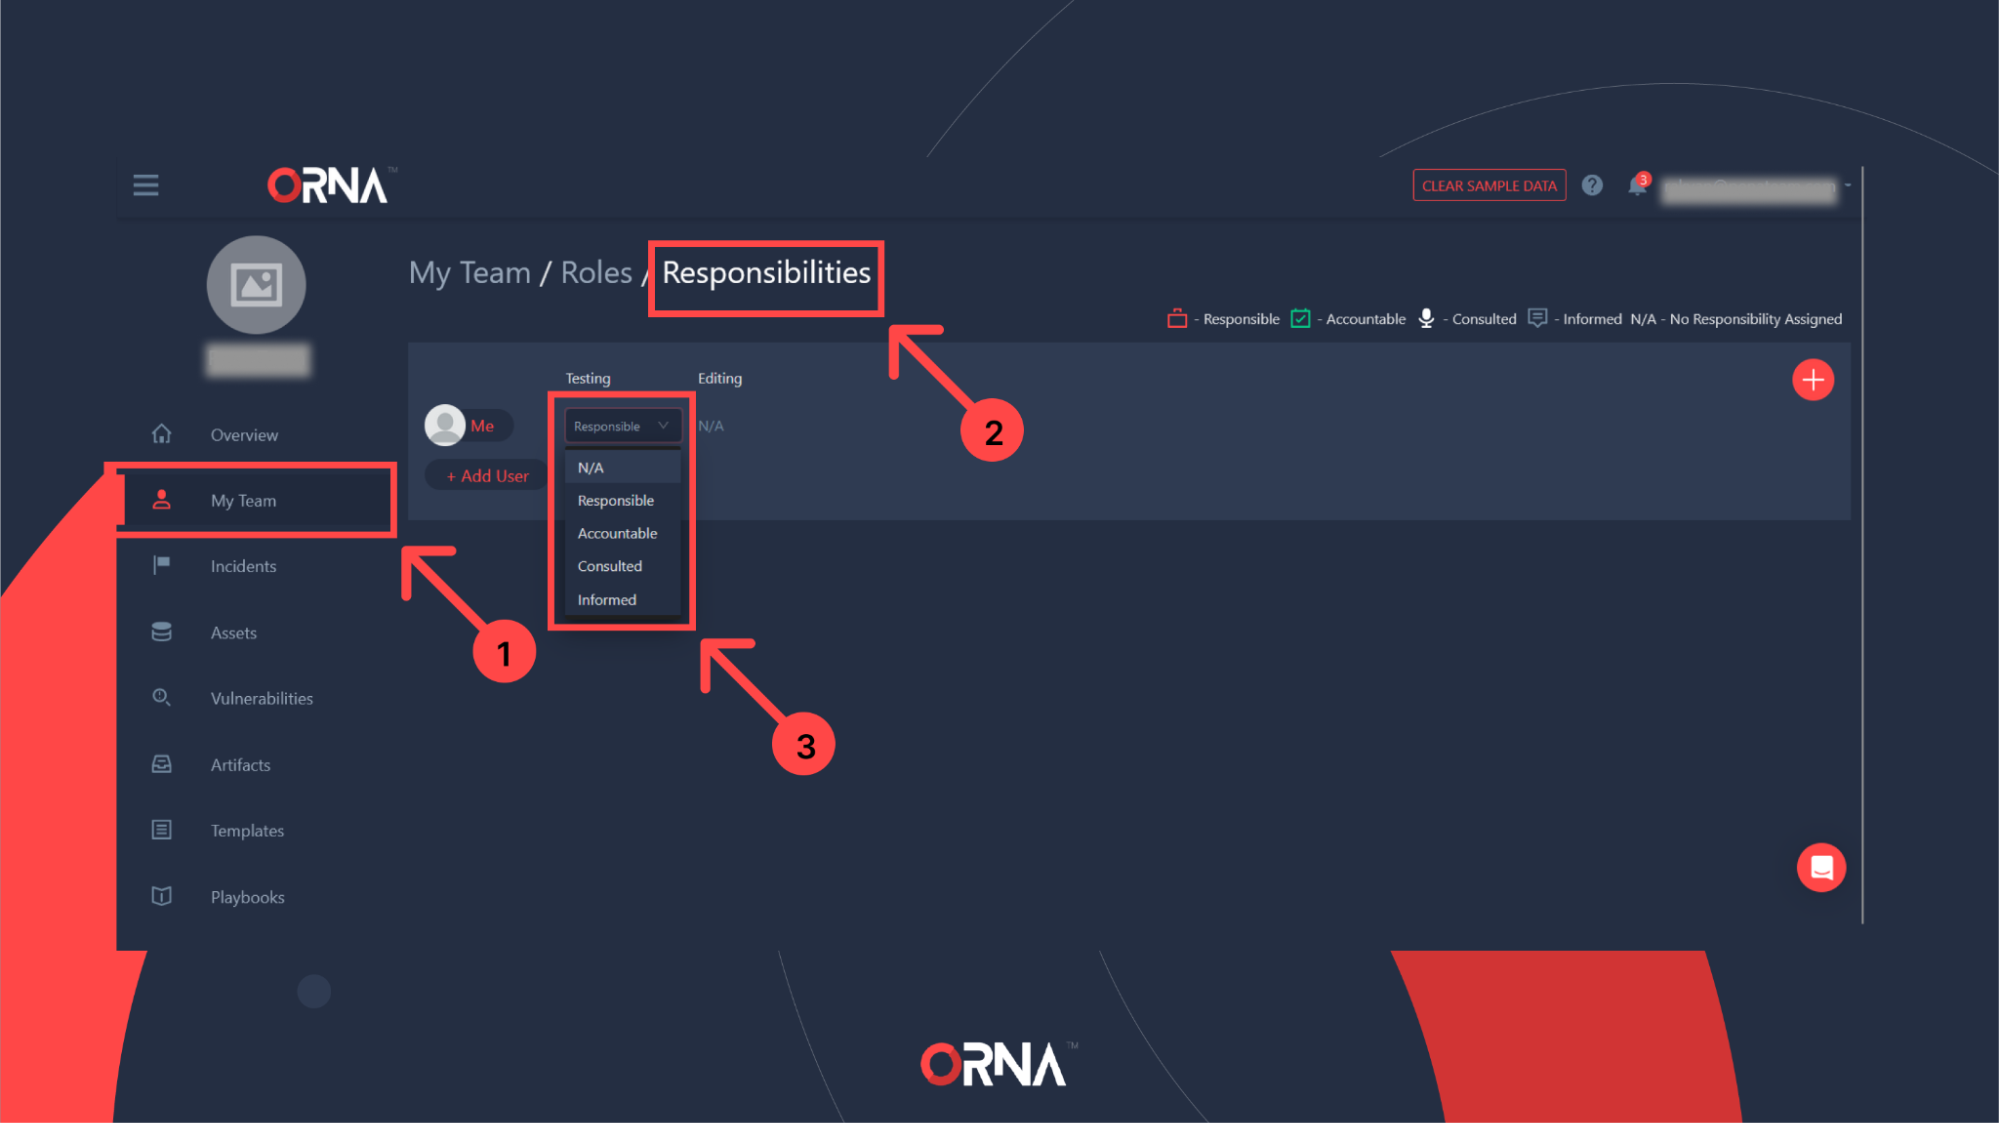
- Navigate to the My Team section on the platform.
- Click on the Responsibilities link in the screen's top section (to the right of My Team and Roles) to browse any assigned responsibilities per the Responsible, Accountable, Consulted, Informed (RACI) chart. Note that this is purely an informational feature that can guide new members’ Playbook and Role customizations and communications styles.
Viewing the RACI board
- Click on the “+“ Add button in the upper right corner of the screen to add a new responsibility.
- A popup window will appear. Enter the name (e.g., firewall management, daily incident reporting) and a short description of the new responsibility.
- Click Create to finalize.
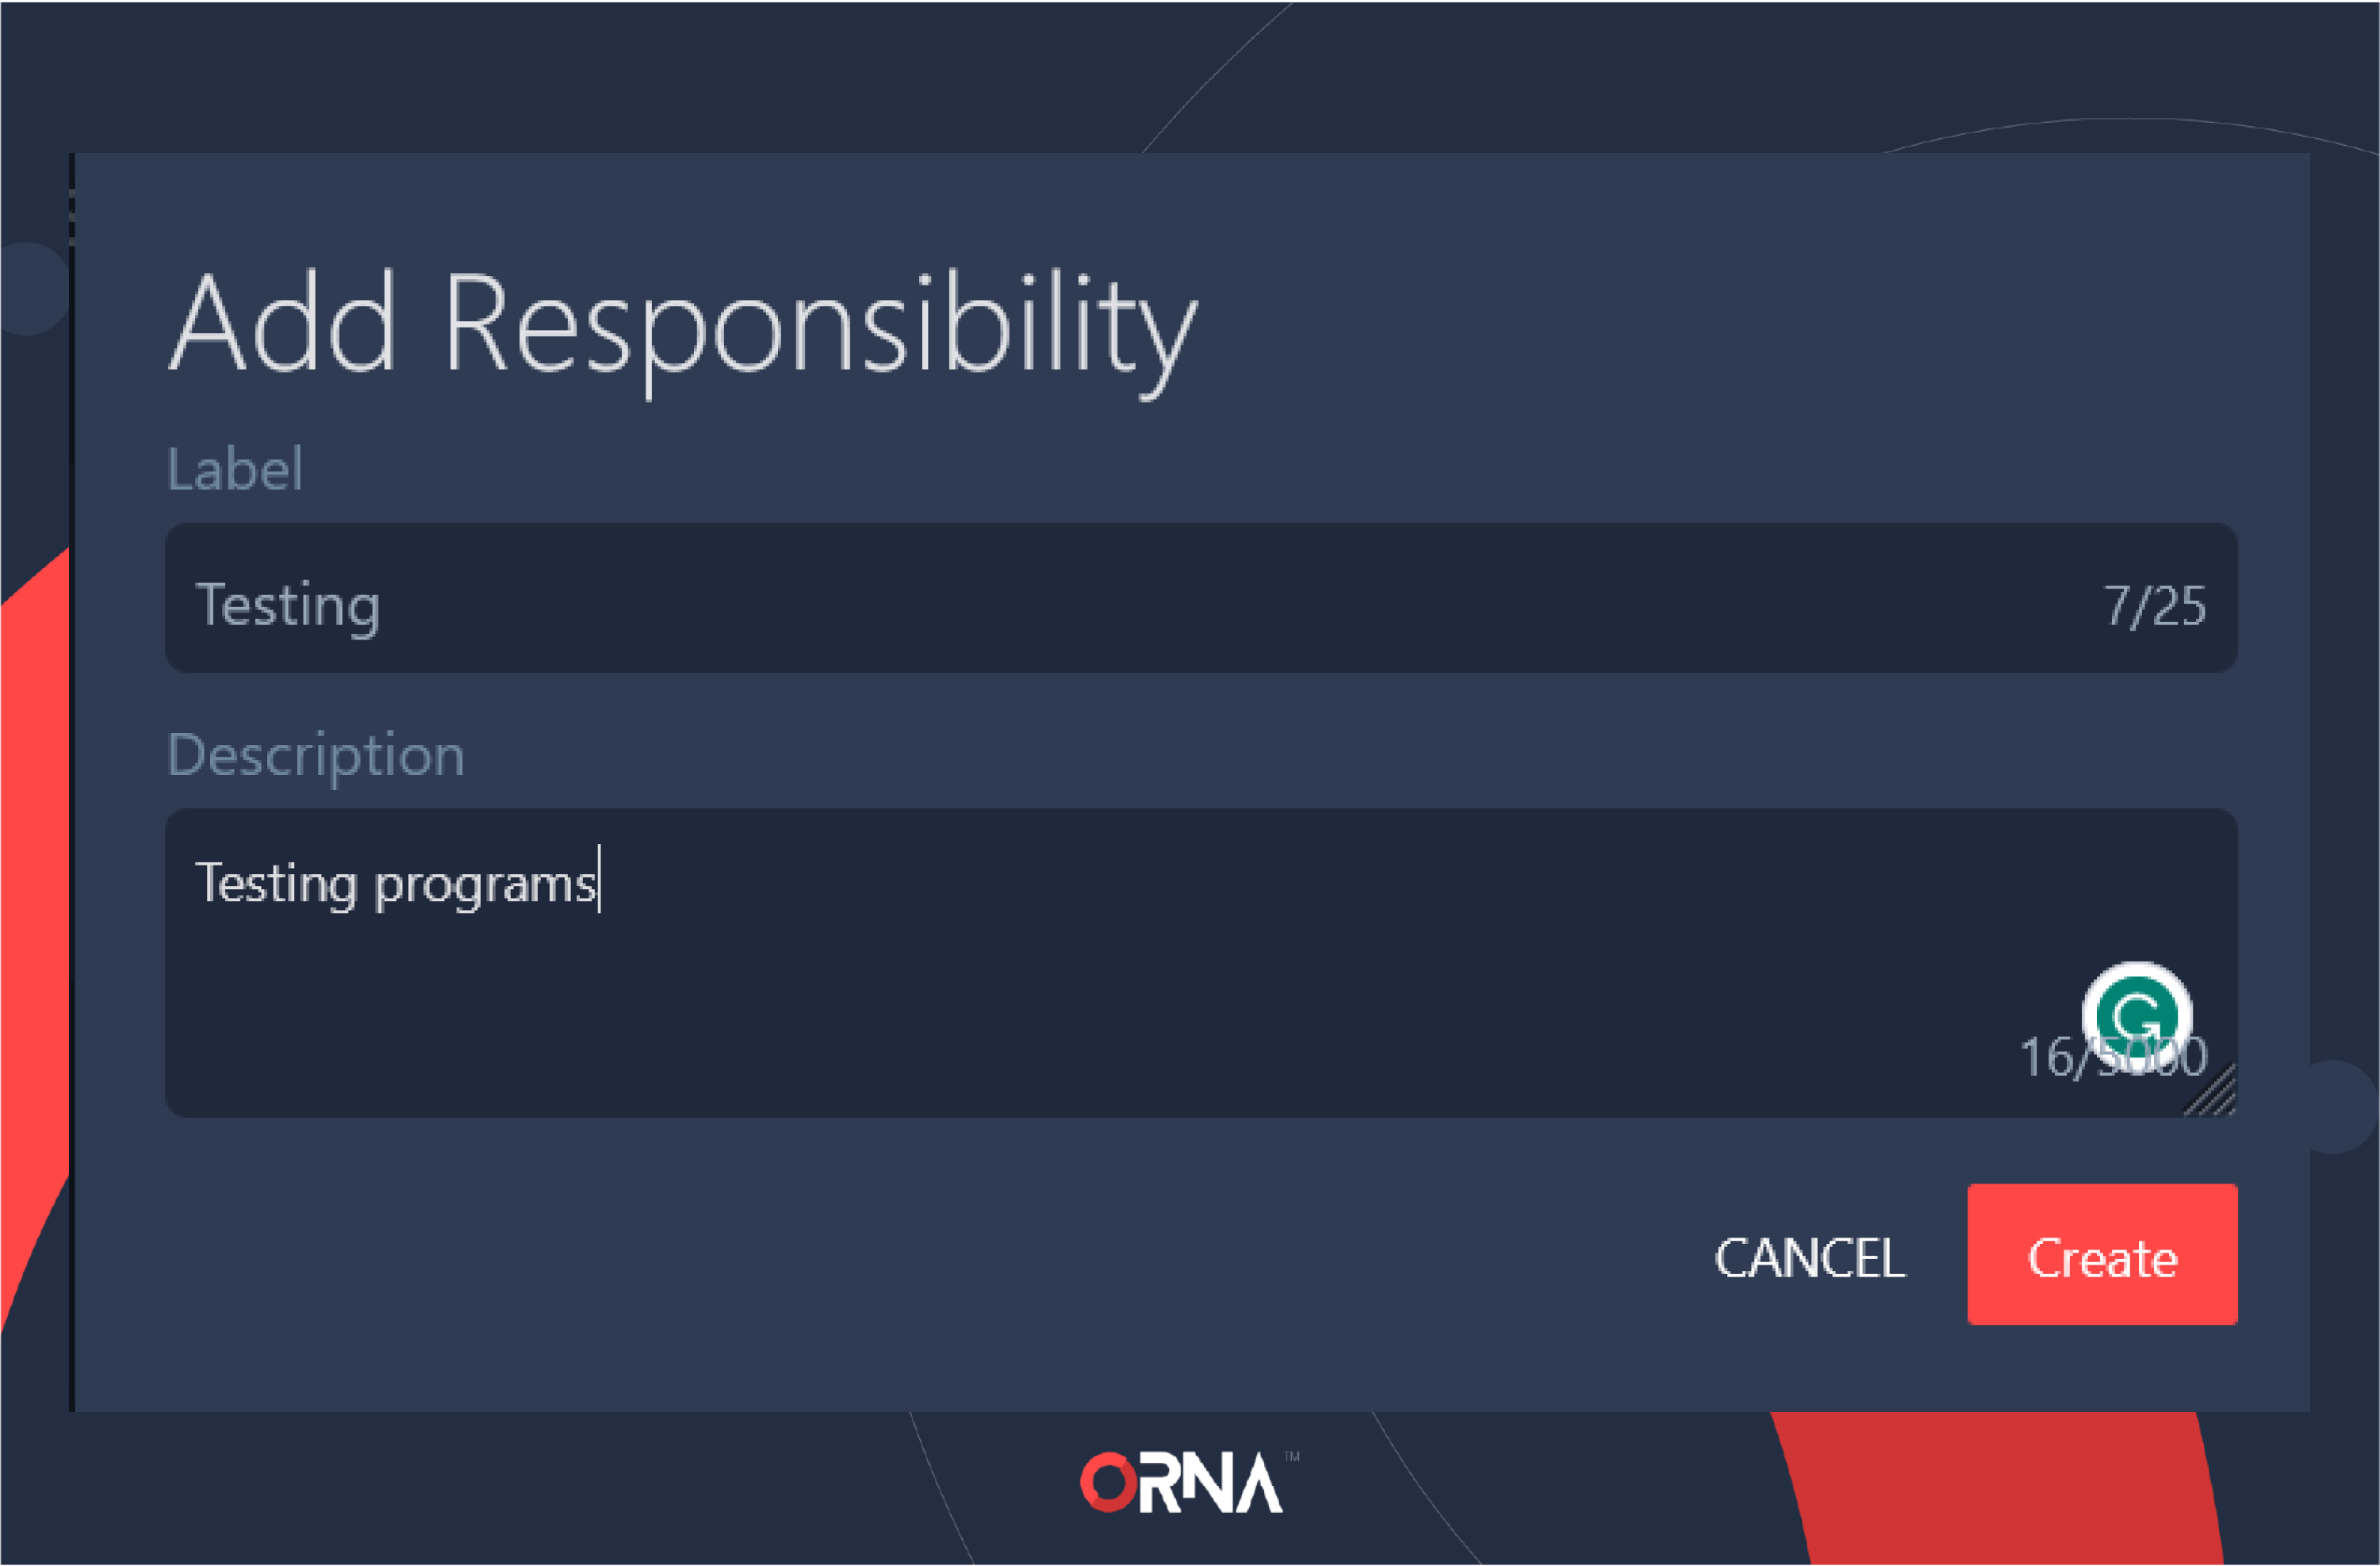
Creating a new Responsibility
Assigning a responsibility
- Navigate to the My Team section on the platform.
- Click on the Responsibilities link in the screen's top section (to the right of My Team and Roles) to browse any assigned responsibilities per the Responsible, Accountable, Consulted, Informed (RACI) chart.
- Use the dropdown list in the desired responsibility column in the team member’s row to change the responsibility status to Responsible, Accountable, Consulted, or Informed.
Assigning Responsibilities using the RACI board
Updated 9 months ago