Incident Response
ORNA’s Incident Response feature set follows the SANS framework. It is designed to streamline incident response procedures for significant security breaches, minimizing downtime and financial and reputation damage to your organization.
ORNA uses highly detailed incident response Playbooks, which contain detailed step-by-step Tasks outlining the actions a given team member should carry out as part of the most efficient and effective response. The goal is to eliminate guesswork regardless of the type or complexity of the attack.
ORNA comes with a host of built-in Playbooks available immediately, such as Ransomware, Denial of Service, Insider Threat, Phishing, and others; you can customize them or create your own using the Playbook Designer.
NoteTo learn more about ORNA's Playbooks, as well as customizing them or creating your own, browse the Playbook Management section of this guide.
You can create a new Incident by upgrading an Alert or manually creating one. Browse this guide's Alert Management or Incident Management sections to learn more about either incident creation option.
Managing the CIRT team
Once a new Incident is created, ORNA will automatically assign all Tasks within the selected Playbook to relevant team members per their assigned Roles. To view and manage your own and your team’s tasks, follow these steps:
- Navigate to the Incident Details screen by clicking on an Incident record either in the Overview dashboard or the Incidents section.
- View the incident resolution progress at a glance using the Task management board divided into SANS incident response stages: Identification, Containment, Eradication, Recovery, and Lessons Learned.
- Easily change Task status by dragging it to the desired stage, such as Done, Failed, Blocked, and others.
- Click on any Task to view its details, such as Description, Outcomes, and specific, step-by-step resolution Actions.
- Perform the relevant Actions and check the checkbox once you finished them.
- Upload Artifacts (evidence) relevant to the Task using the “Add New” function.
- Stuck? Get live 24/7 incident response assistance from our expert SecOps team using the support chat in the bottom right corner of the screen.
Assigning Playbook tasks
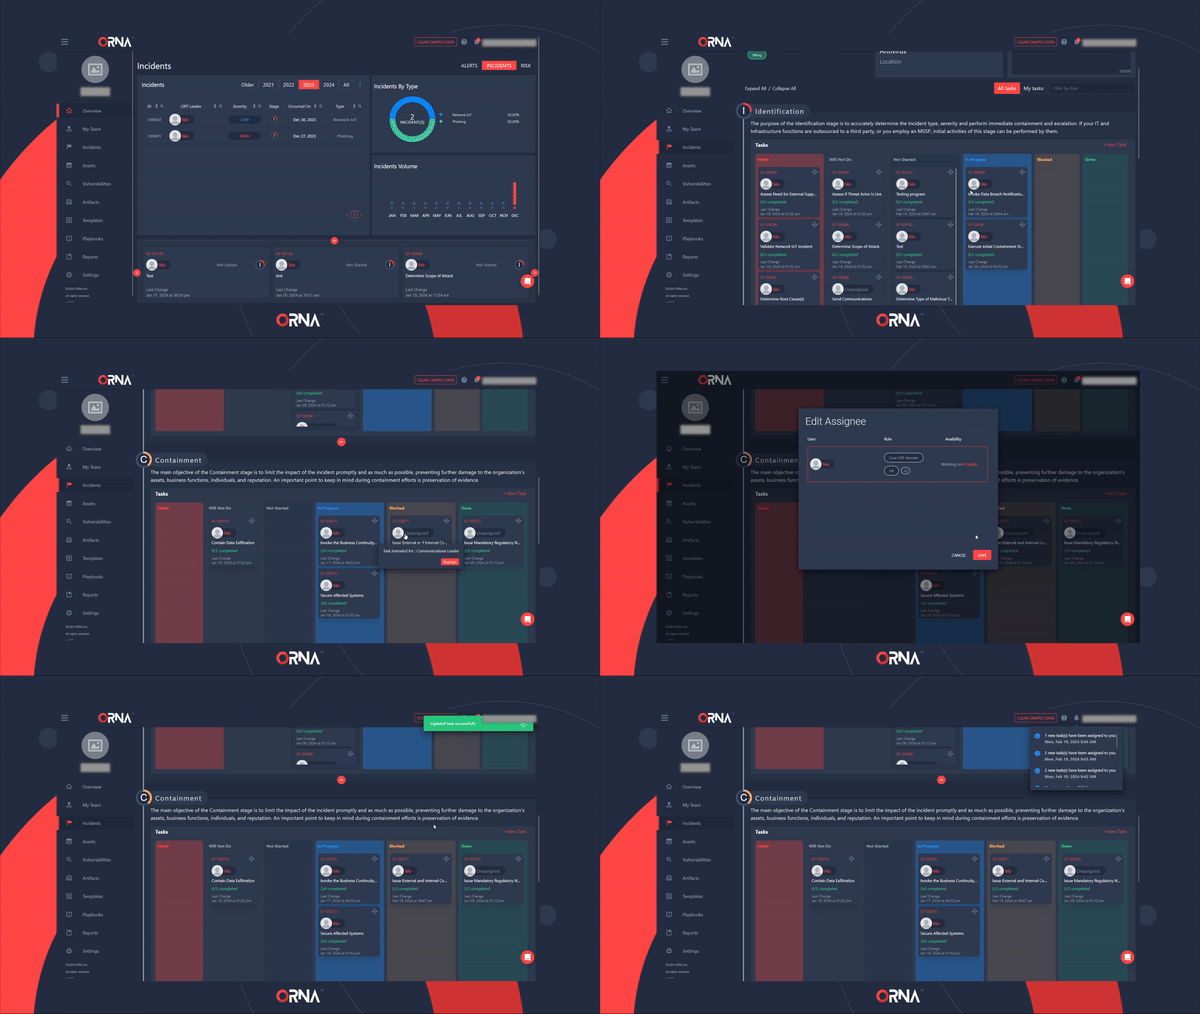
To manually reassign an existing task, follow the steps below:
- Navigate to the Incident Details screen by clicking on an Incident record either in the Overview dashboard or the Incidents section.
- Expand one of the SANS incident response stages (e.g., Identification) to view the current Task roster.
- Hover over the team member’s profile picture and icon (or the “Unassigned” icon if the task does not have an assignee) within any task’s card and click the Reassign button within the popup window.
- Select another team member that you’d like to assign the Task to
- Click “Save” to confirm. The Task will be reassigned to the selected team member, and they will get a notification via email or SMS, per their profile preferences.

Manually reassigning a single Task in an active Incident
Creating a new Task
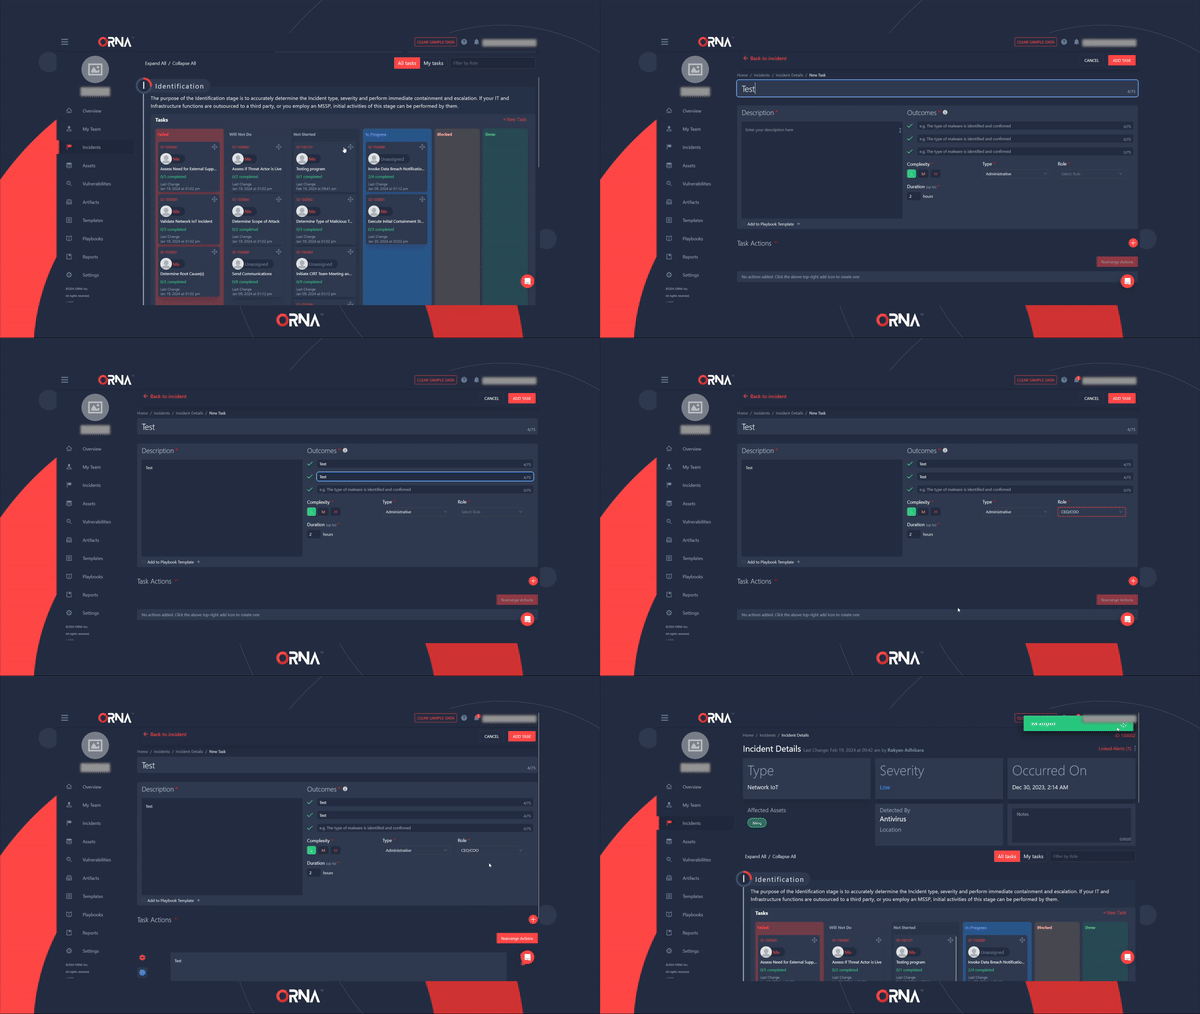
To add a custom task to an incident, follow the steps below:
- Navigate to the Incident Details screen by clicking on an Incident record either in the Overview dashboard or the Incidents section.
- Expand one of the SANS incident response stages (e.g., Identification) to view the current Task roster.
- In the upper right corner of the task board, click + New Task to start creating a new Task for this incident resolution stage.
- Populate the desired details, such as Description, Outcomes, and Actions.
NoteTo add this new Task to the Playbook permanently used for this Incident, check the “Add to Playbook Template” option underneath the Description section. Otherwise, this task will be a one-off only.
- Don’t forget to assign the newly created task to a team member following this guide's Assigning Playbook tasks section.

Creating a custom Task in an active Incident
Resolving Incidents
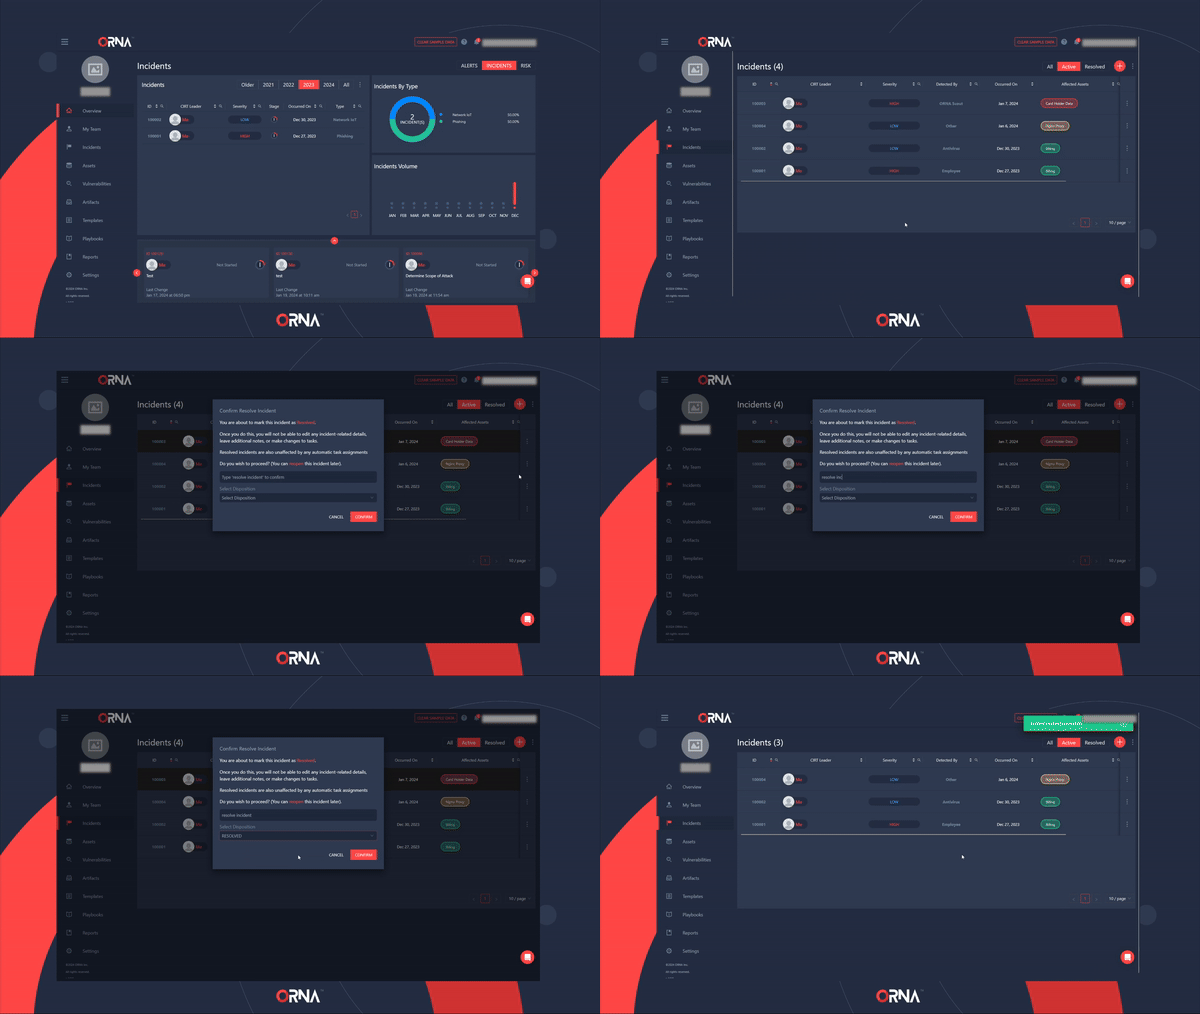
To resolve an active incident, follow the steps below:
- Navigate to the Incident Details screen by clicking on an Incident record either in the Overview dashboard or the Incidents section.
- Click the “...” Options button in the top right corner of the Incident Details screen and select “Resolve” from the list.
- Alternatively, navigate to the Incidents section and use the “...” Options button on the right-hand side of the Incident record for the same effect.
- Type “resolve incident” in the confirmation popup, select the desired disposition label (“Ignore” for a false positive, “Resolved” for an actual incident), and click Confirm.
- This Incident will now be marked as Resolved, and you can generate a highly detailed report for it in the Reports section.

Generating a PDF report for a resolved Incident
Updated 9 months ago
