Playbook Management
Playbooks are sets of pre-defined procedures and actions for all members of the CIRT team in response to a particular type of incident or breach. ORNA’s Playbooks follow the SANS Incident Response methodology and include highly detailed incident scenario-specific tasks and actions for various business functions, such as IT, HR, Communications, Legal, Compliance, and Executive Management.
A Playbook is initiated when a user creates an Incident of a relevant type either manually (by using the manual Incident creation flow available via the Incidents section) or by upgrading an Alert to an Incident (by clicking on the “New Incident” button within the Alert Details window).
Each Playbook provides critical guidance for all relevant members of your CIRT team, intending to minimize financial and reputation damage stemming from the breach, speed up recovery, and prevent it from happening again.
To browse your existing Playbooks, customize them using the Playbook Designer, or create new Playbooks, navigate to the Playbooks section of the platform.
Playbook Designer features
- The list of your current Playbooks, including a host of highly detailed Playbooks included with your initial ORNA subscription, covering the most common and damaging types of cyberattacks and breaches: Ransomware, Phishing, Denial of Service, Insider Threat, 3rd Party Breach, Network IoT, and Other.
- A Search feature that allows you to find a specific Playbook to explore in detail.
- The “Add” feature, enabling you to create a new custom Playbook from scratch or from a pre-defined template.
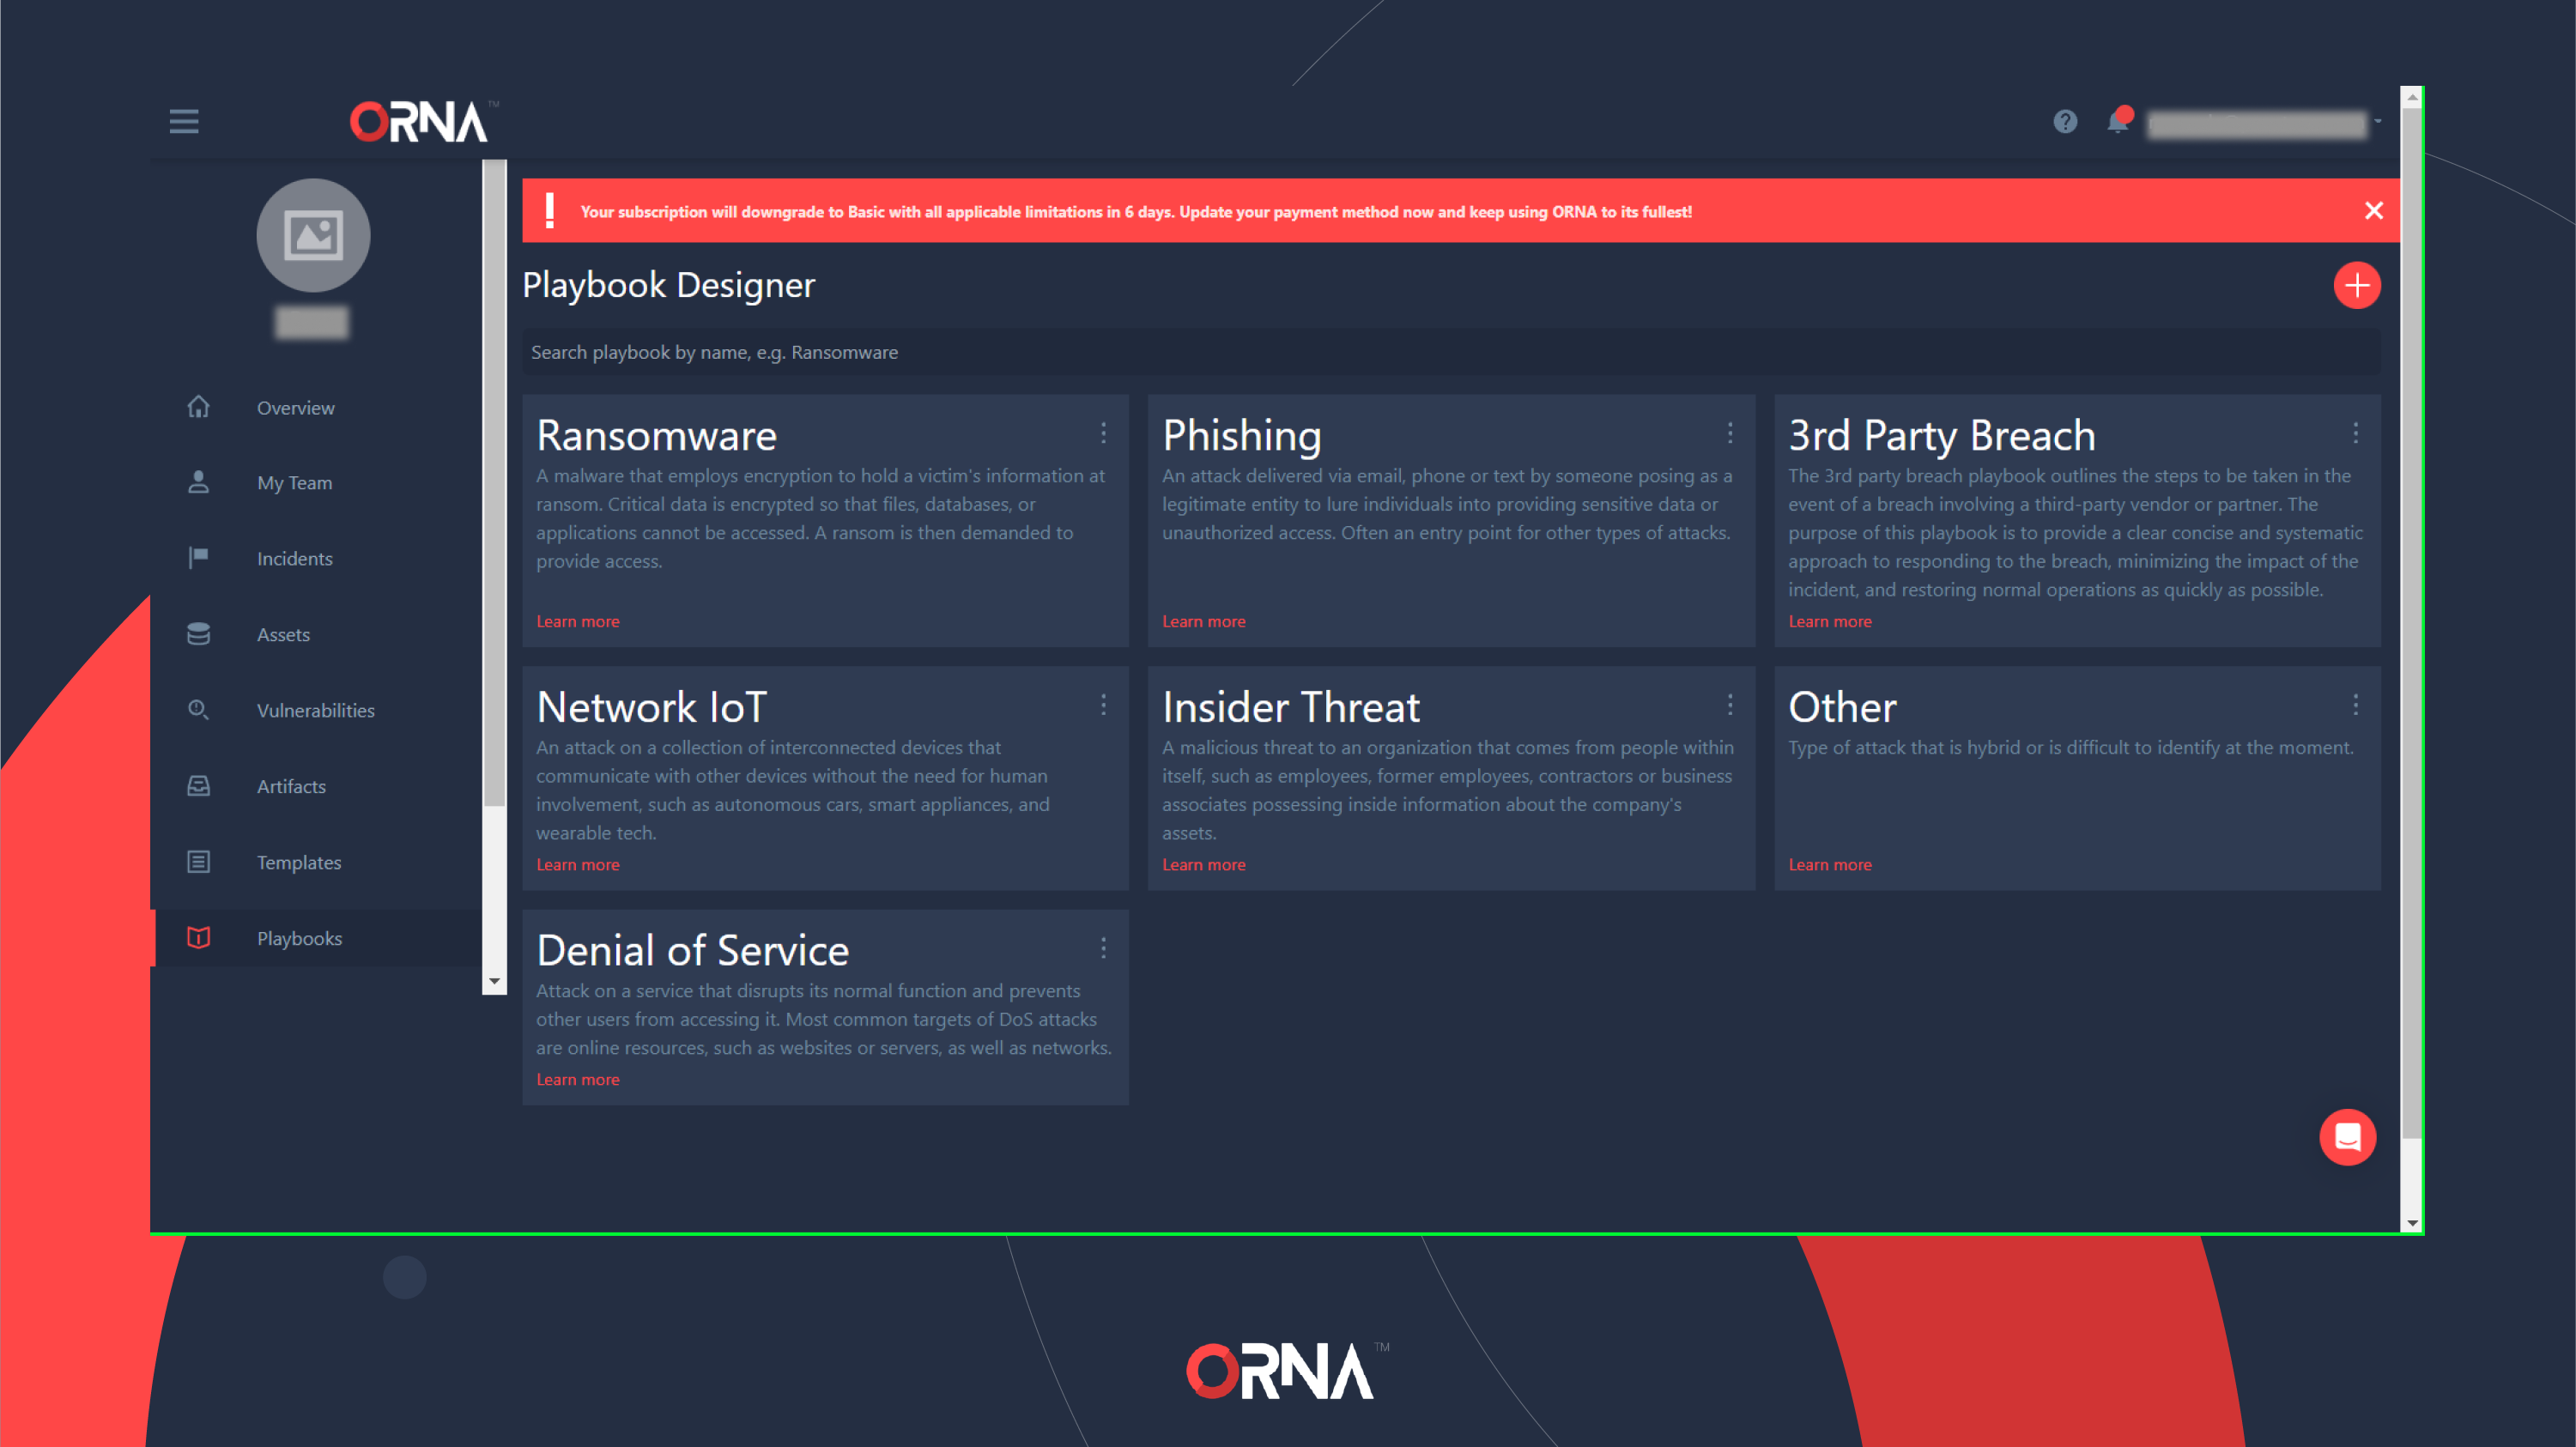
Playbook Designer (Playbook selection view)
Editing Playbooks
- Navigate to the Playbooks section on the sidebar of the platform.
- Click on the card of the Playbook that you’d like to edit.
- Expand any given Incident Resolution Stage (such as Identification) to view the summary of all Tasks within it. Tasks are actionable items that are automatically escalated and assigned to specific team members per their Roles.
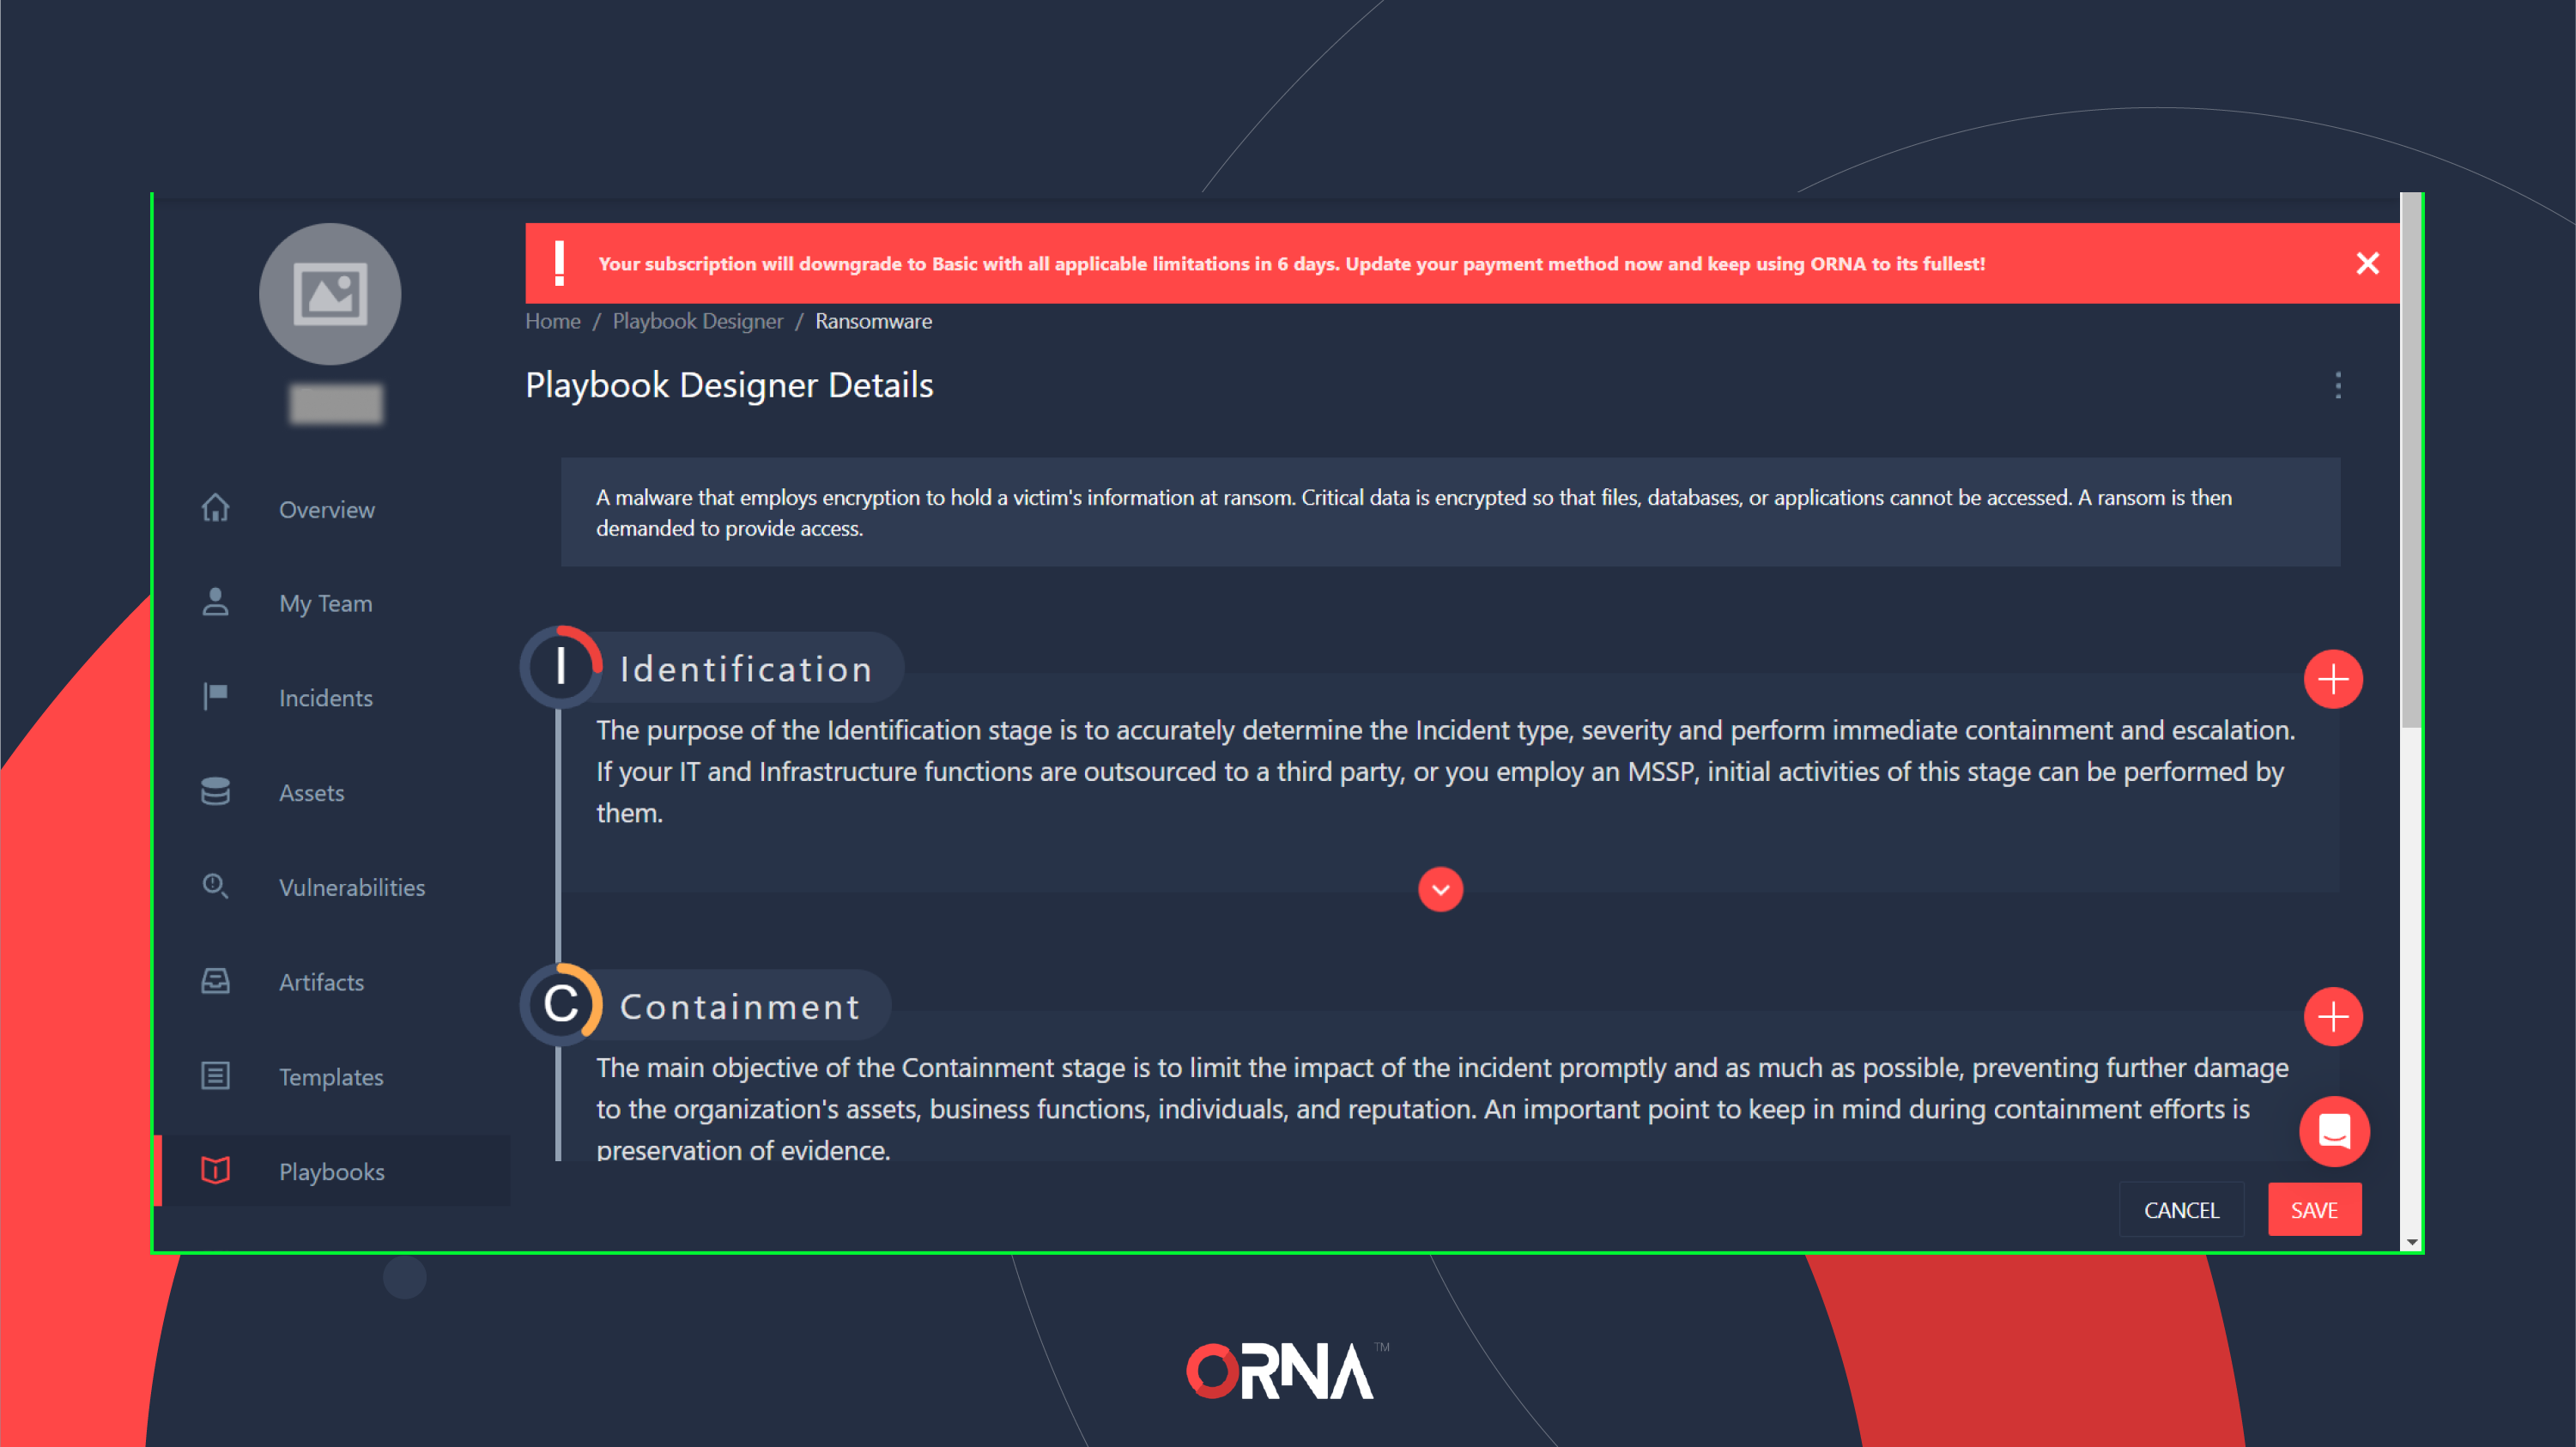
Playbook Designer (individual Playbook overview)
- You can rearrange Tasks, move them between stages, and add new Tasks to each stage by clicking the “+” Add button in the top right-hand corner of each respective stage.
- You can also copy or delete any Task using the two respective icons on the right-hand side of each Task row.
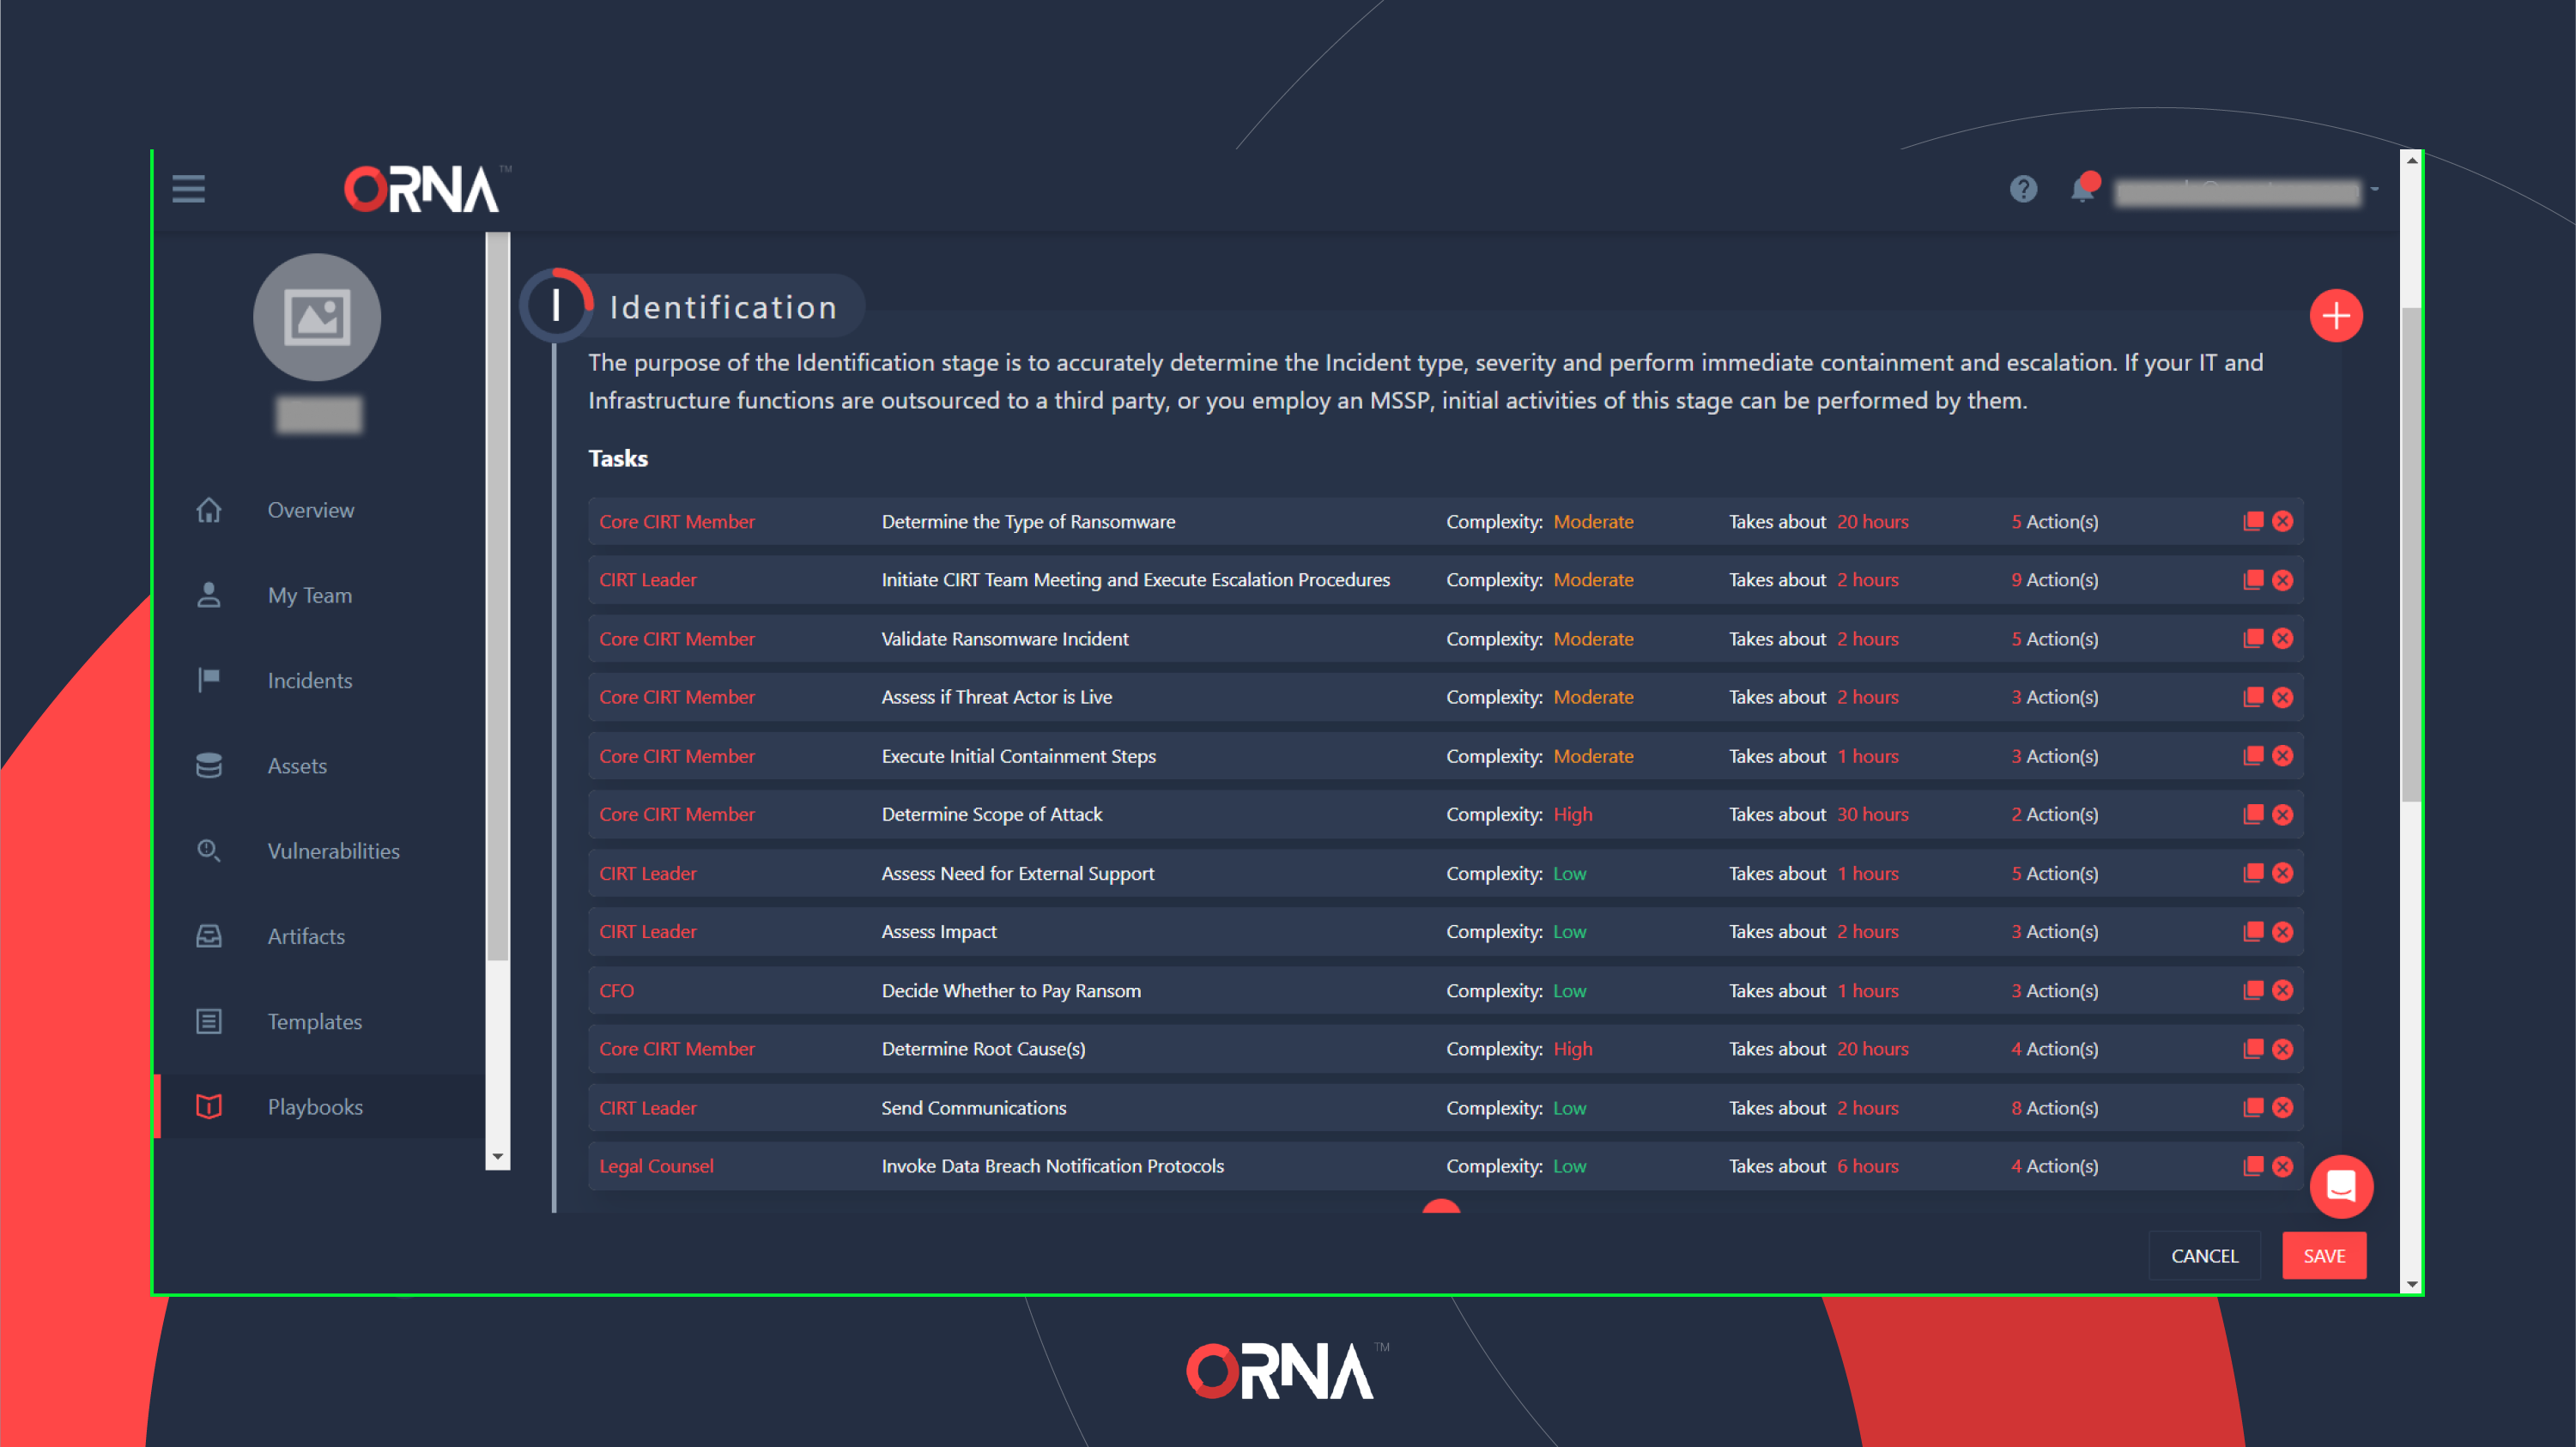
Playbook Designer (individual Playbook's Task list)
- Click on any Task to view and edit its details, including Name, Description, Outcomes, Duration, and the default assigned Role to which the Task will be auto-escalated in case of an incident, as well as to edit or rearrange the task’s more granular Actions.
- Don’t forget to click the “Save” button in the bottom right corner of the screen to save the changes you’ve made to a Playbook and any given Task. Your progress will be lost otherwise.
Creating a new Playbook
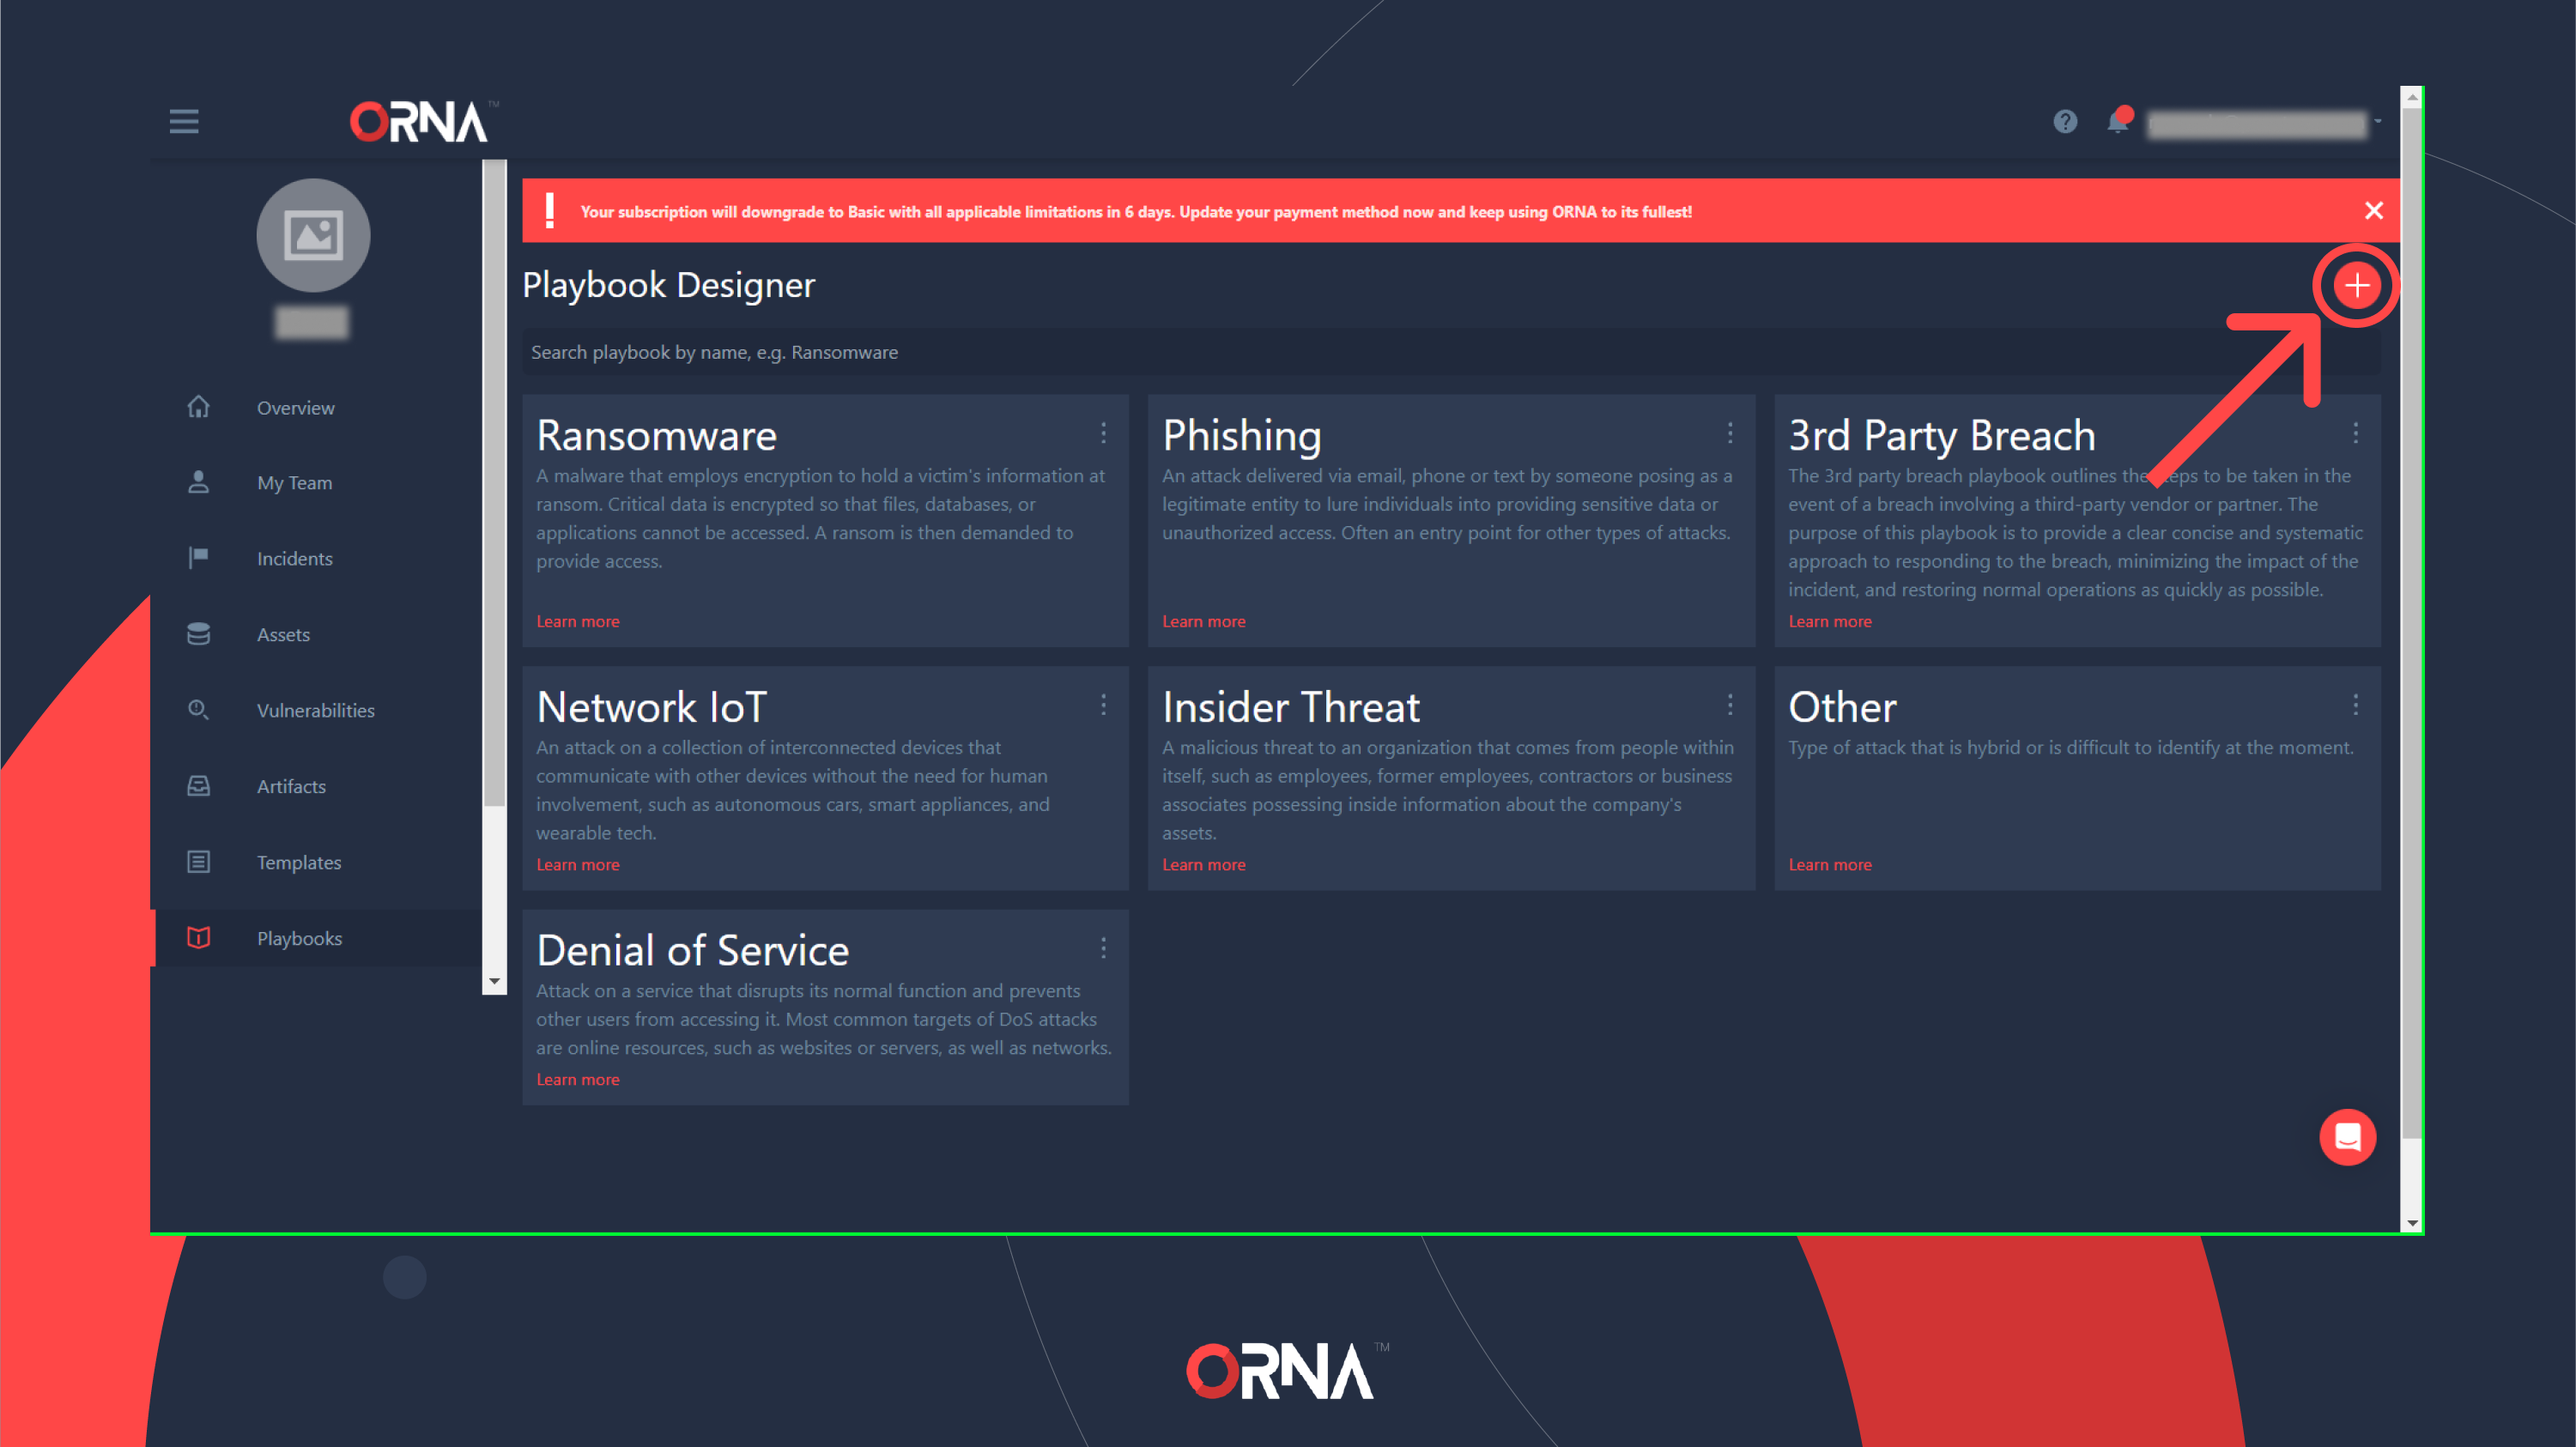
- Navigate to the Playbooks section on the sidebar of the platform.
- Click the “+” Add button in the top right-hand corner of the Playbook Designer.
Creating a new Playbook
- Type the name of the new Playbook and its brief description; then, select whether you’d like to create this Playbook from scratch (i.e., empty with no Tasks included by default) or from an existing template, in which case this newly created Playbook will include all content from the selected Playbook right away.
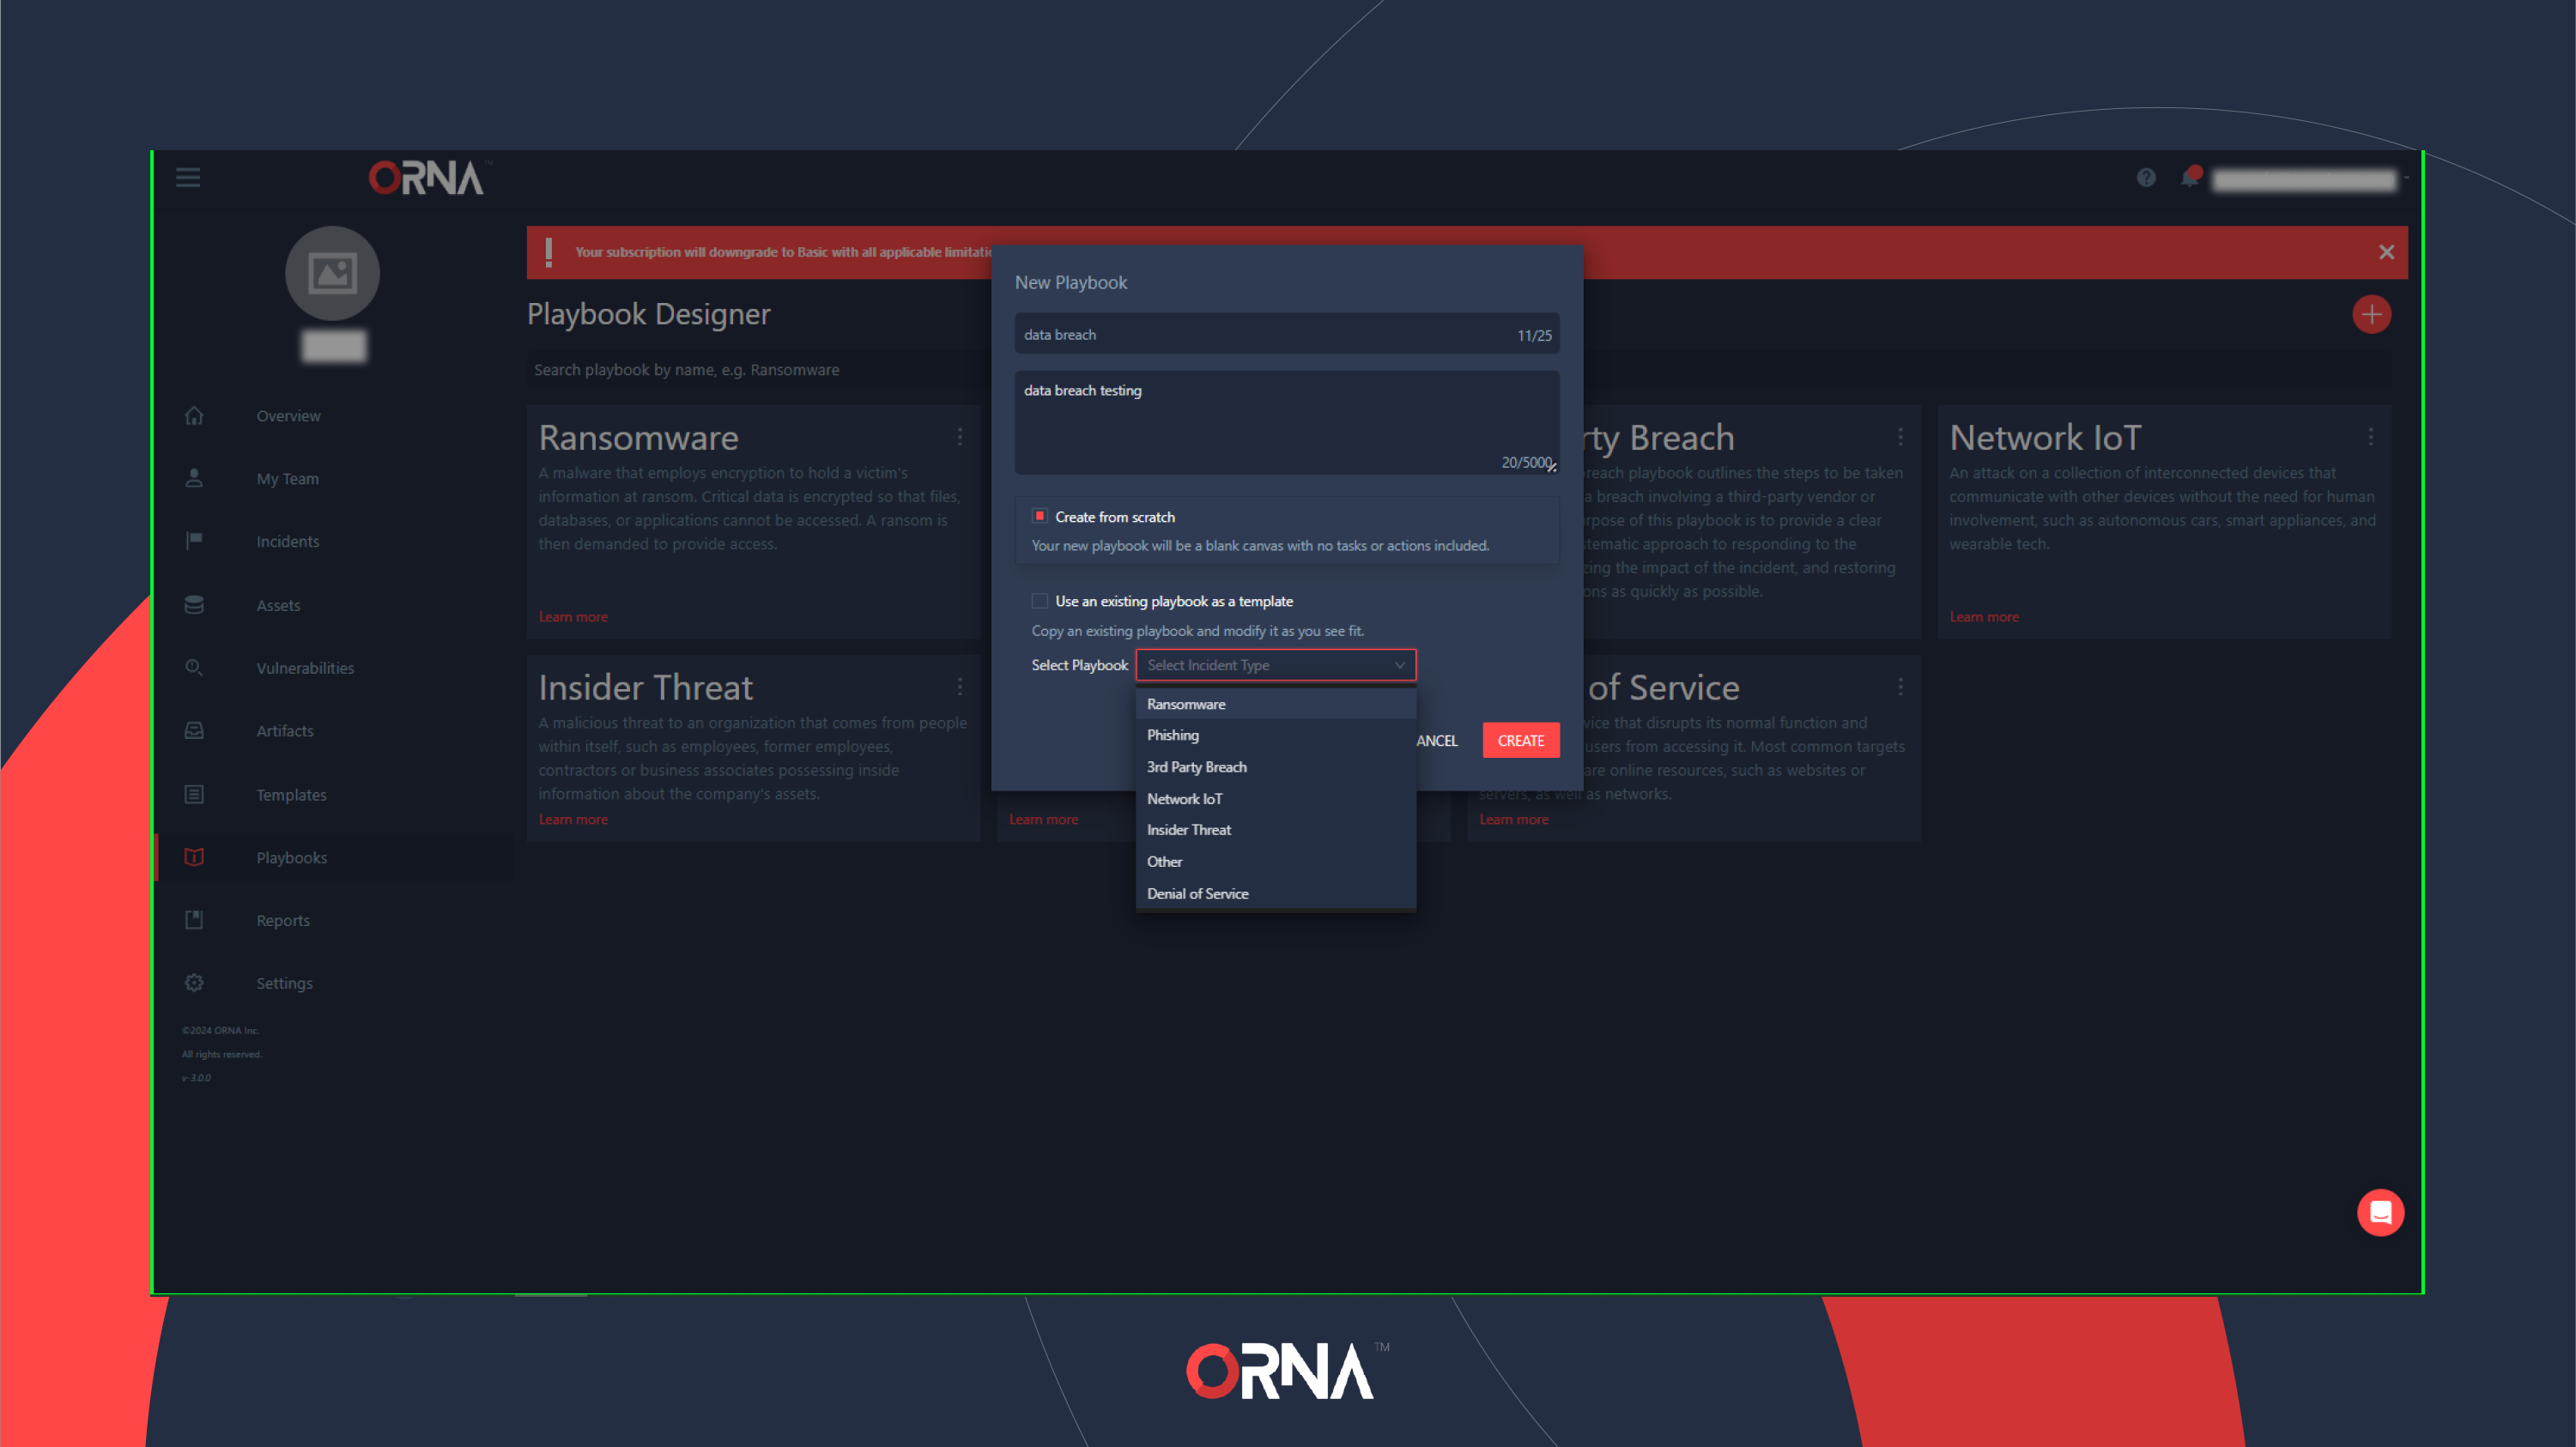
Populating the details of a new Playbook
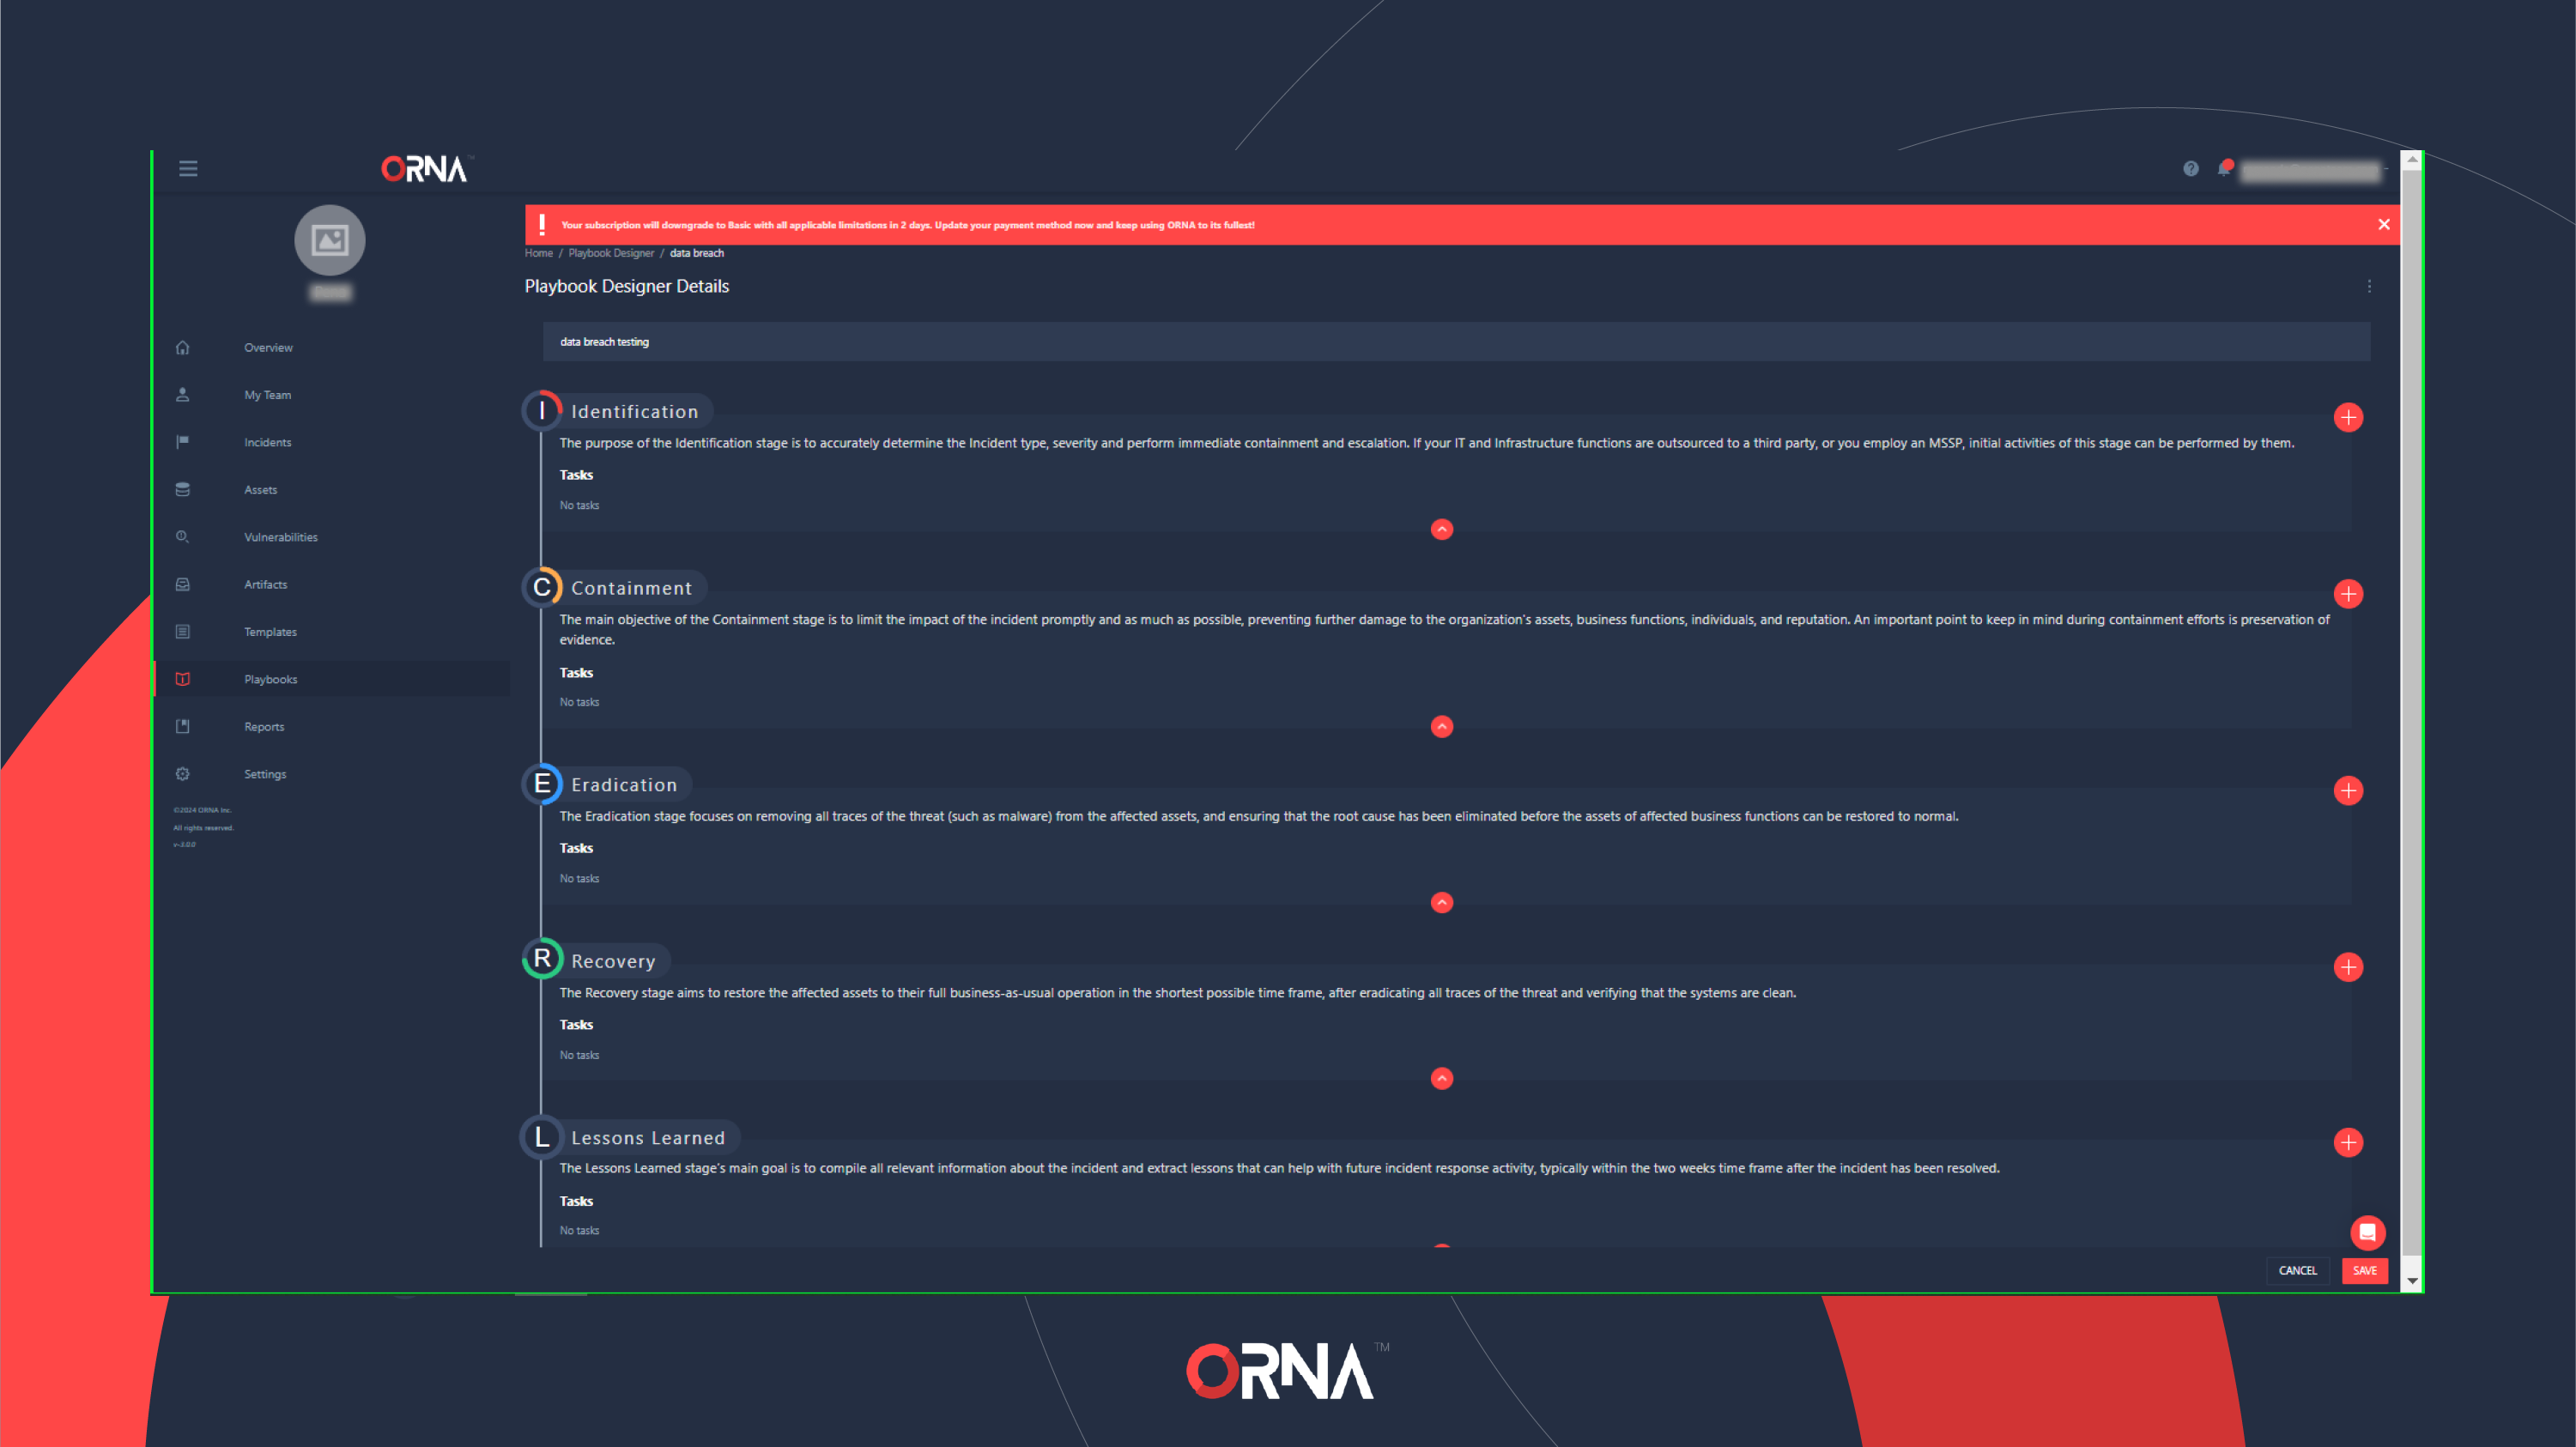
Playbook Designer (individual Playbook overview with Stage details collapsed)
- Expand any given Incident Resolution Stage (such as Identification) to view the summary of all Tasks. Tasks are actionable items that automatically escalate and are assigned to specific team members per their assigned Roles.
- You can rearrange Tasks and move them between stages.
- You can add a new Task to each stage by clicking the “+” Add button in the top right-hand corner of each respective stage.
- You can also copy or delete any Task using the two respective icons on the right-hand side of each Task row.
- Click on any Task to view and edit its details, including Name, Description, Outcomes, Duration, and the default assigned Role to which the Task will be auto-escalated in case of an incident, as well as to edit or rearrange the task’s more granular Actions.
- Don’t forget to click the “Save” button in the bottom right corner of the screen to save the changes you’ve made to a Playbook and any given Task. Your progress will be lost otherwise.
Updated 9 months ago