Asset Management
ORNA’s Asset management features allow you to monitor and manage risks across your organization's entire attack surface, including hardware (such as servers, laptops, or even smart door locks), software (such as CRM, ERP, or email), processes (for example, shipping or customer onboarding), persons (typically, someone rather important, such as C-suite executives, directors, lead engineers, and so on), data (such as Protected Health Information or PHI), and Other (just in case nothing else fits).
Registering all relevant or in-scope assets within the platform is an essential first step to understanding your organization's estate and its exposure to cyber risk, allowing relevant teams to identify mission-critical assets (also called Crown Jewels), employ appropriate security measures to protect them proactively, and monitor all potentially malicious events associated with these resources.
Asset Management features
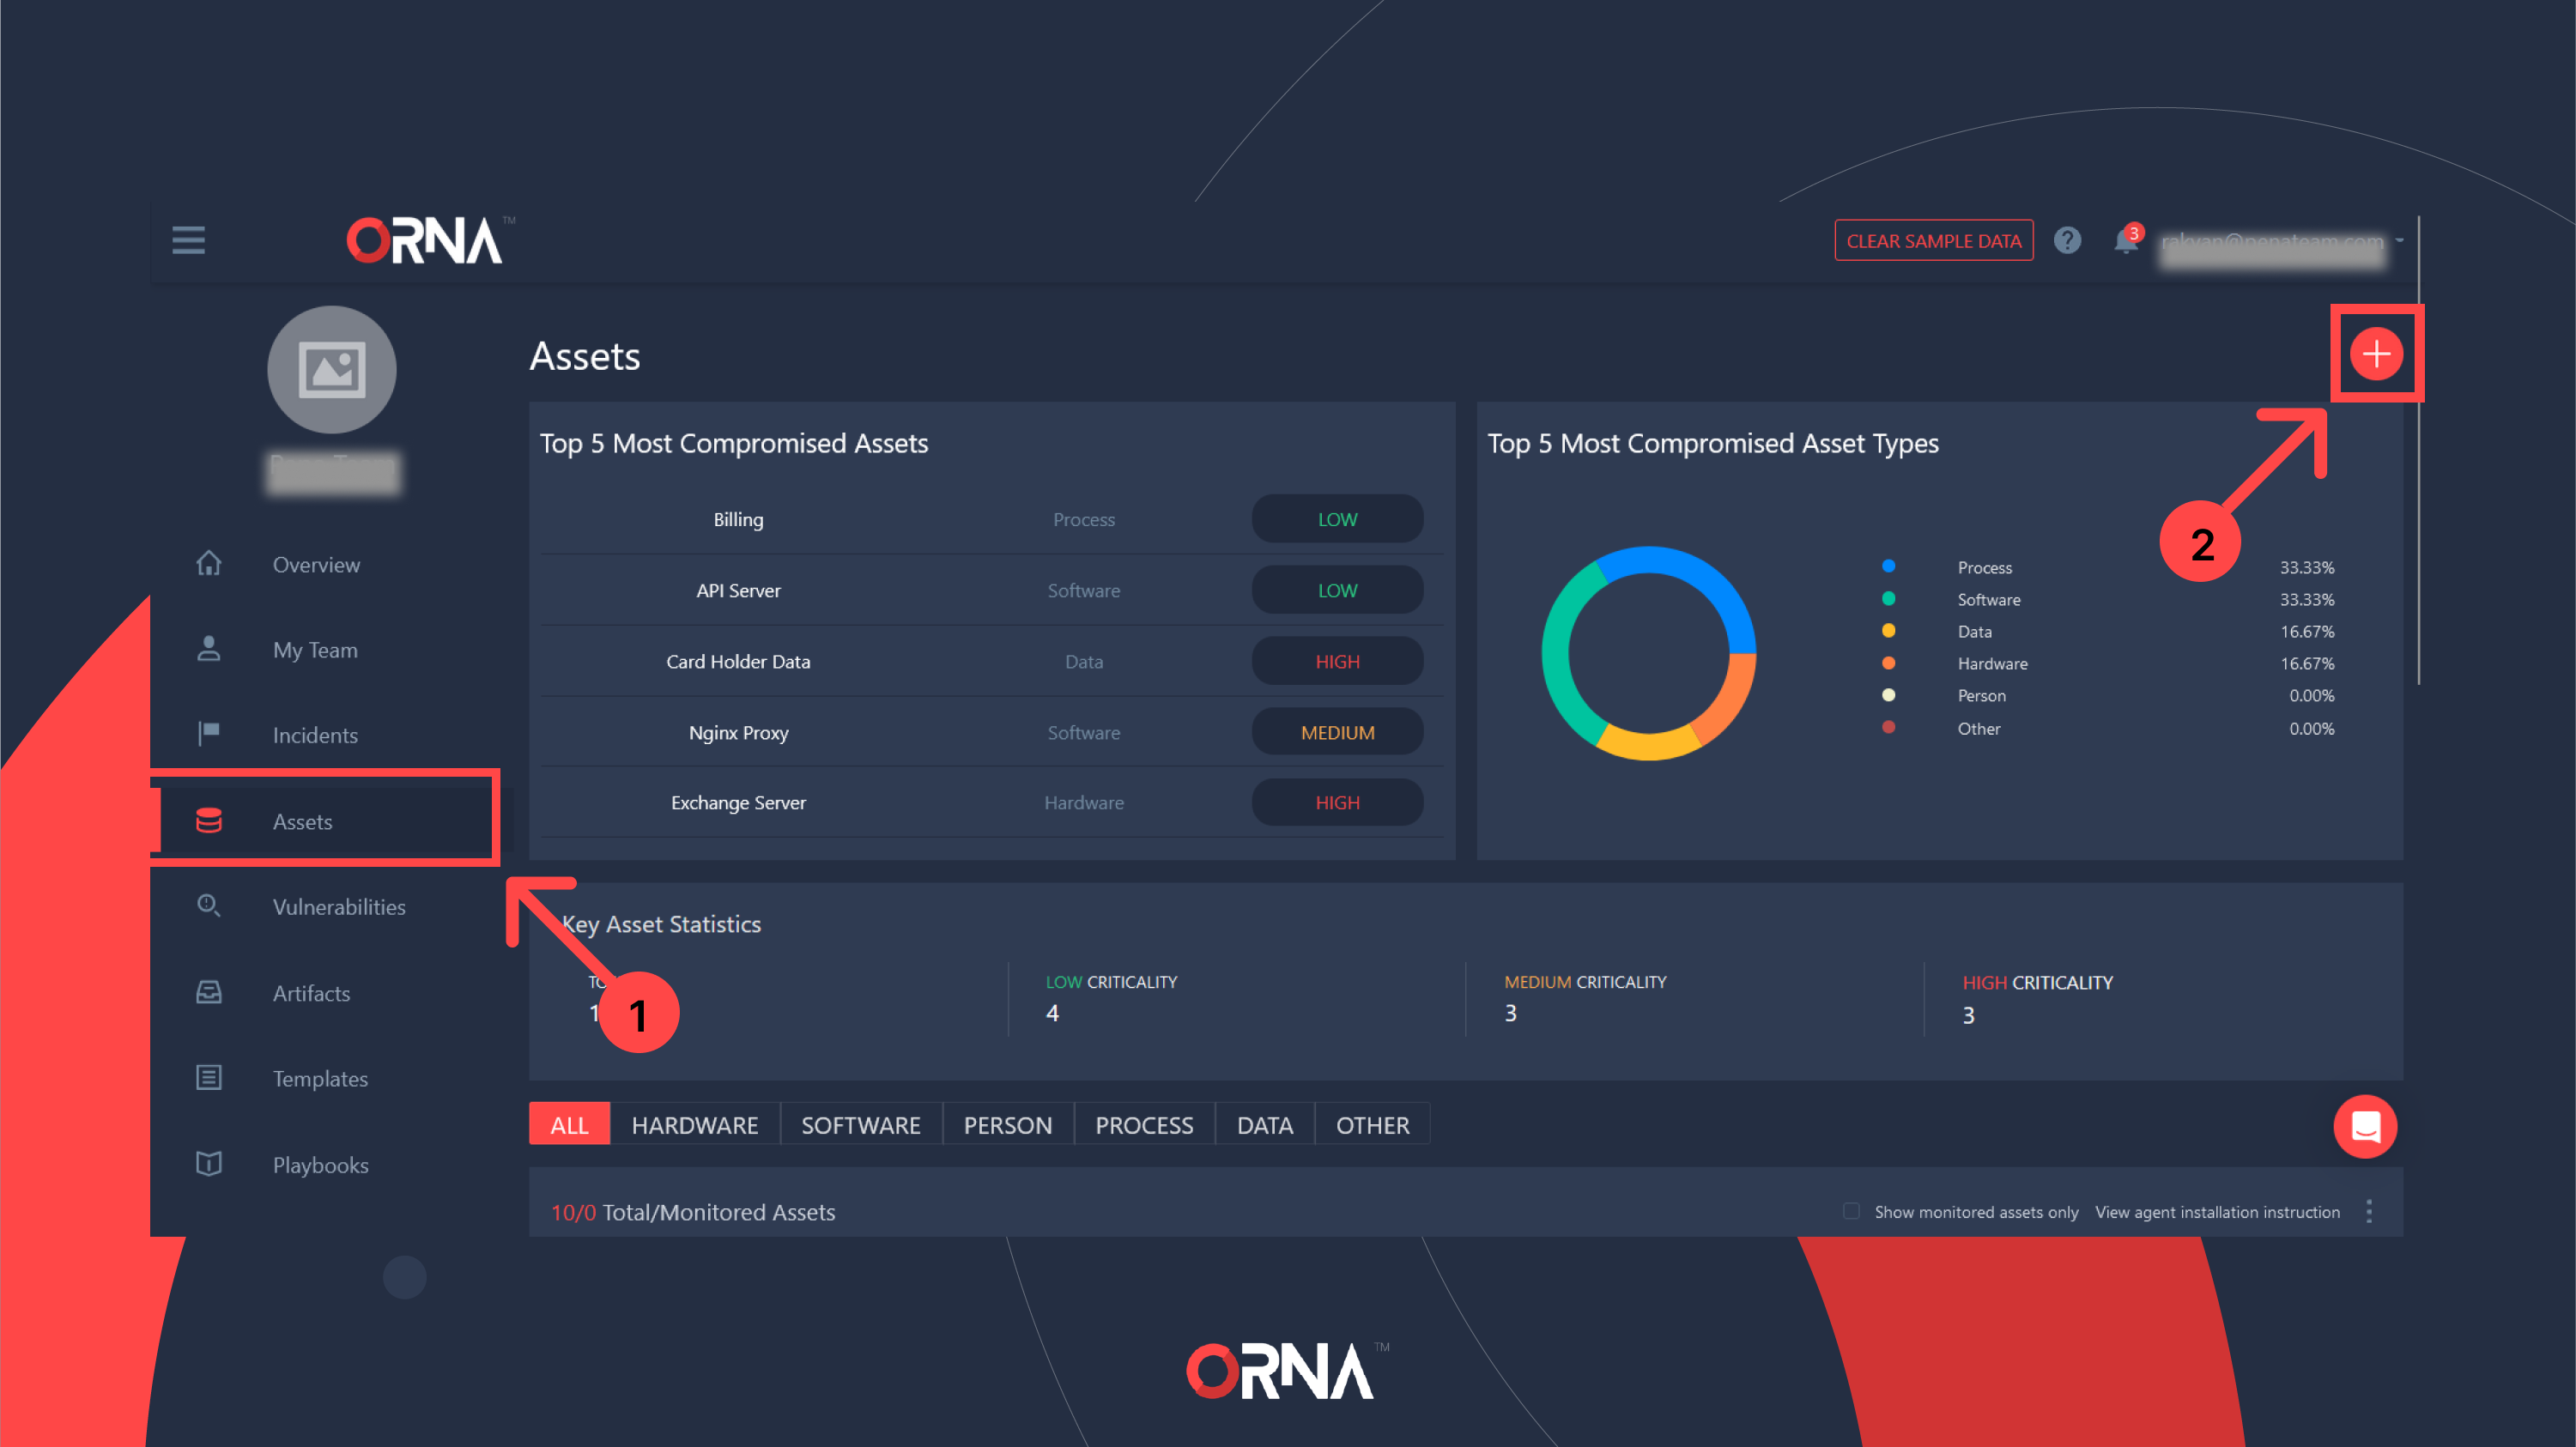
- The list of Top 5 Most Compromised Assets.
- A pie chart of the Top 5 Most Compromised Asset Types.
- Key Asset Statistics include the total registered assets and the assets with Low, Medium, and High criticality separately.
- The list of all registered assets with each asset’s name, monitored/non-monitored status (the green eye icon), and other vital details, along with typical ORNA list features, such as sorting by category, the type of asset, searching for assets by name, and more. Each asset’s record also contains the history of all interactions and changes.
- The count of total versus monitored assets. Note that only the monitored assets affect your subscription cost.
- A subsection that guides you through the instructions to install ORNA’s threat monitoring agent is called Scout.
Accessing the Asset dashboard
To access the Assets dashboard, navigate to the Assets section of the platform.
Registering an Asset
There are multiple ways to automatically register, import, or manually add a new Asset.
Option 1: Automatically using ORNA Scout
- Navigate to the Assets section of the platform and click on the View agent installation instructions link at the top of the assets table.
- The platform will display a mini window with instructions for installing ORNA’s Scout monitoring agent, including downloading the ORNA Scout automatic installer and the License key for using the agent.
Automatically installing ORNA's Scout monitoring agent (Option 1)
- After Scout is installed, it runs continuously in the background, enabling ORNA’s Alerts Dashboard Vulnerabilities Dashboard and performing automatic thread detection, de-duplication, triage, and containment functions for all Assets on which the agent is installed.
- Assets that have the functional Scout agent installed and running are considered Monitored Assets, indicated by the green eye icon next to the name of the respective asset’s record row. Assets for which the telemetry cannot be received will have a white eye icon instead; you can contact your ORNA support team using the 24/7 chat functionality in the bottom right corner to investigate and resolve any issues. Finally, non-monitored assets will have neither green nor white eye icons next to their name.
Option 2: Manually using the CSV import feature
- Navigate to the Assets section of the platform and click the “+” Add button in the top right corner of the screen. Then, click on the “import from .csv” link in the top right corner of the dialog window.
- Follow the instructions provided to import a variety of assets in bulk. Note that if issues are detected within any records in your CSV upload, you can fix them immediately without re-uploading the file.
Option 3: Manually, one by one
- Navigate to the Assets section of the platform and click the “+” Add button in the top right corner of the screen.
Manually adding a new Asset (Option 3)
- Enter the required asset details. Note that the details required may vary depending on the Asset Type. For example, you can manually indicate that a particular Hardware type asset is Monitored, i.e., it is expected to have ORNA’s Scout monitoring agent installed. The platform will then continuously try to establish telemetry. Manually marking the asset as Monitored will NOT automatically install the Scout agent; you must do it manually after adding the asset to ORNA. To do so, click on the View agent installation instructions link at the top of the assets table and follow the provided instructions.
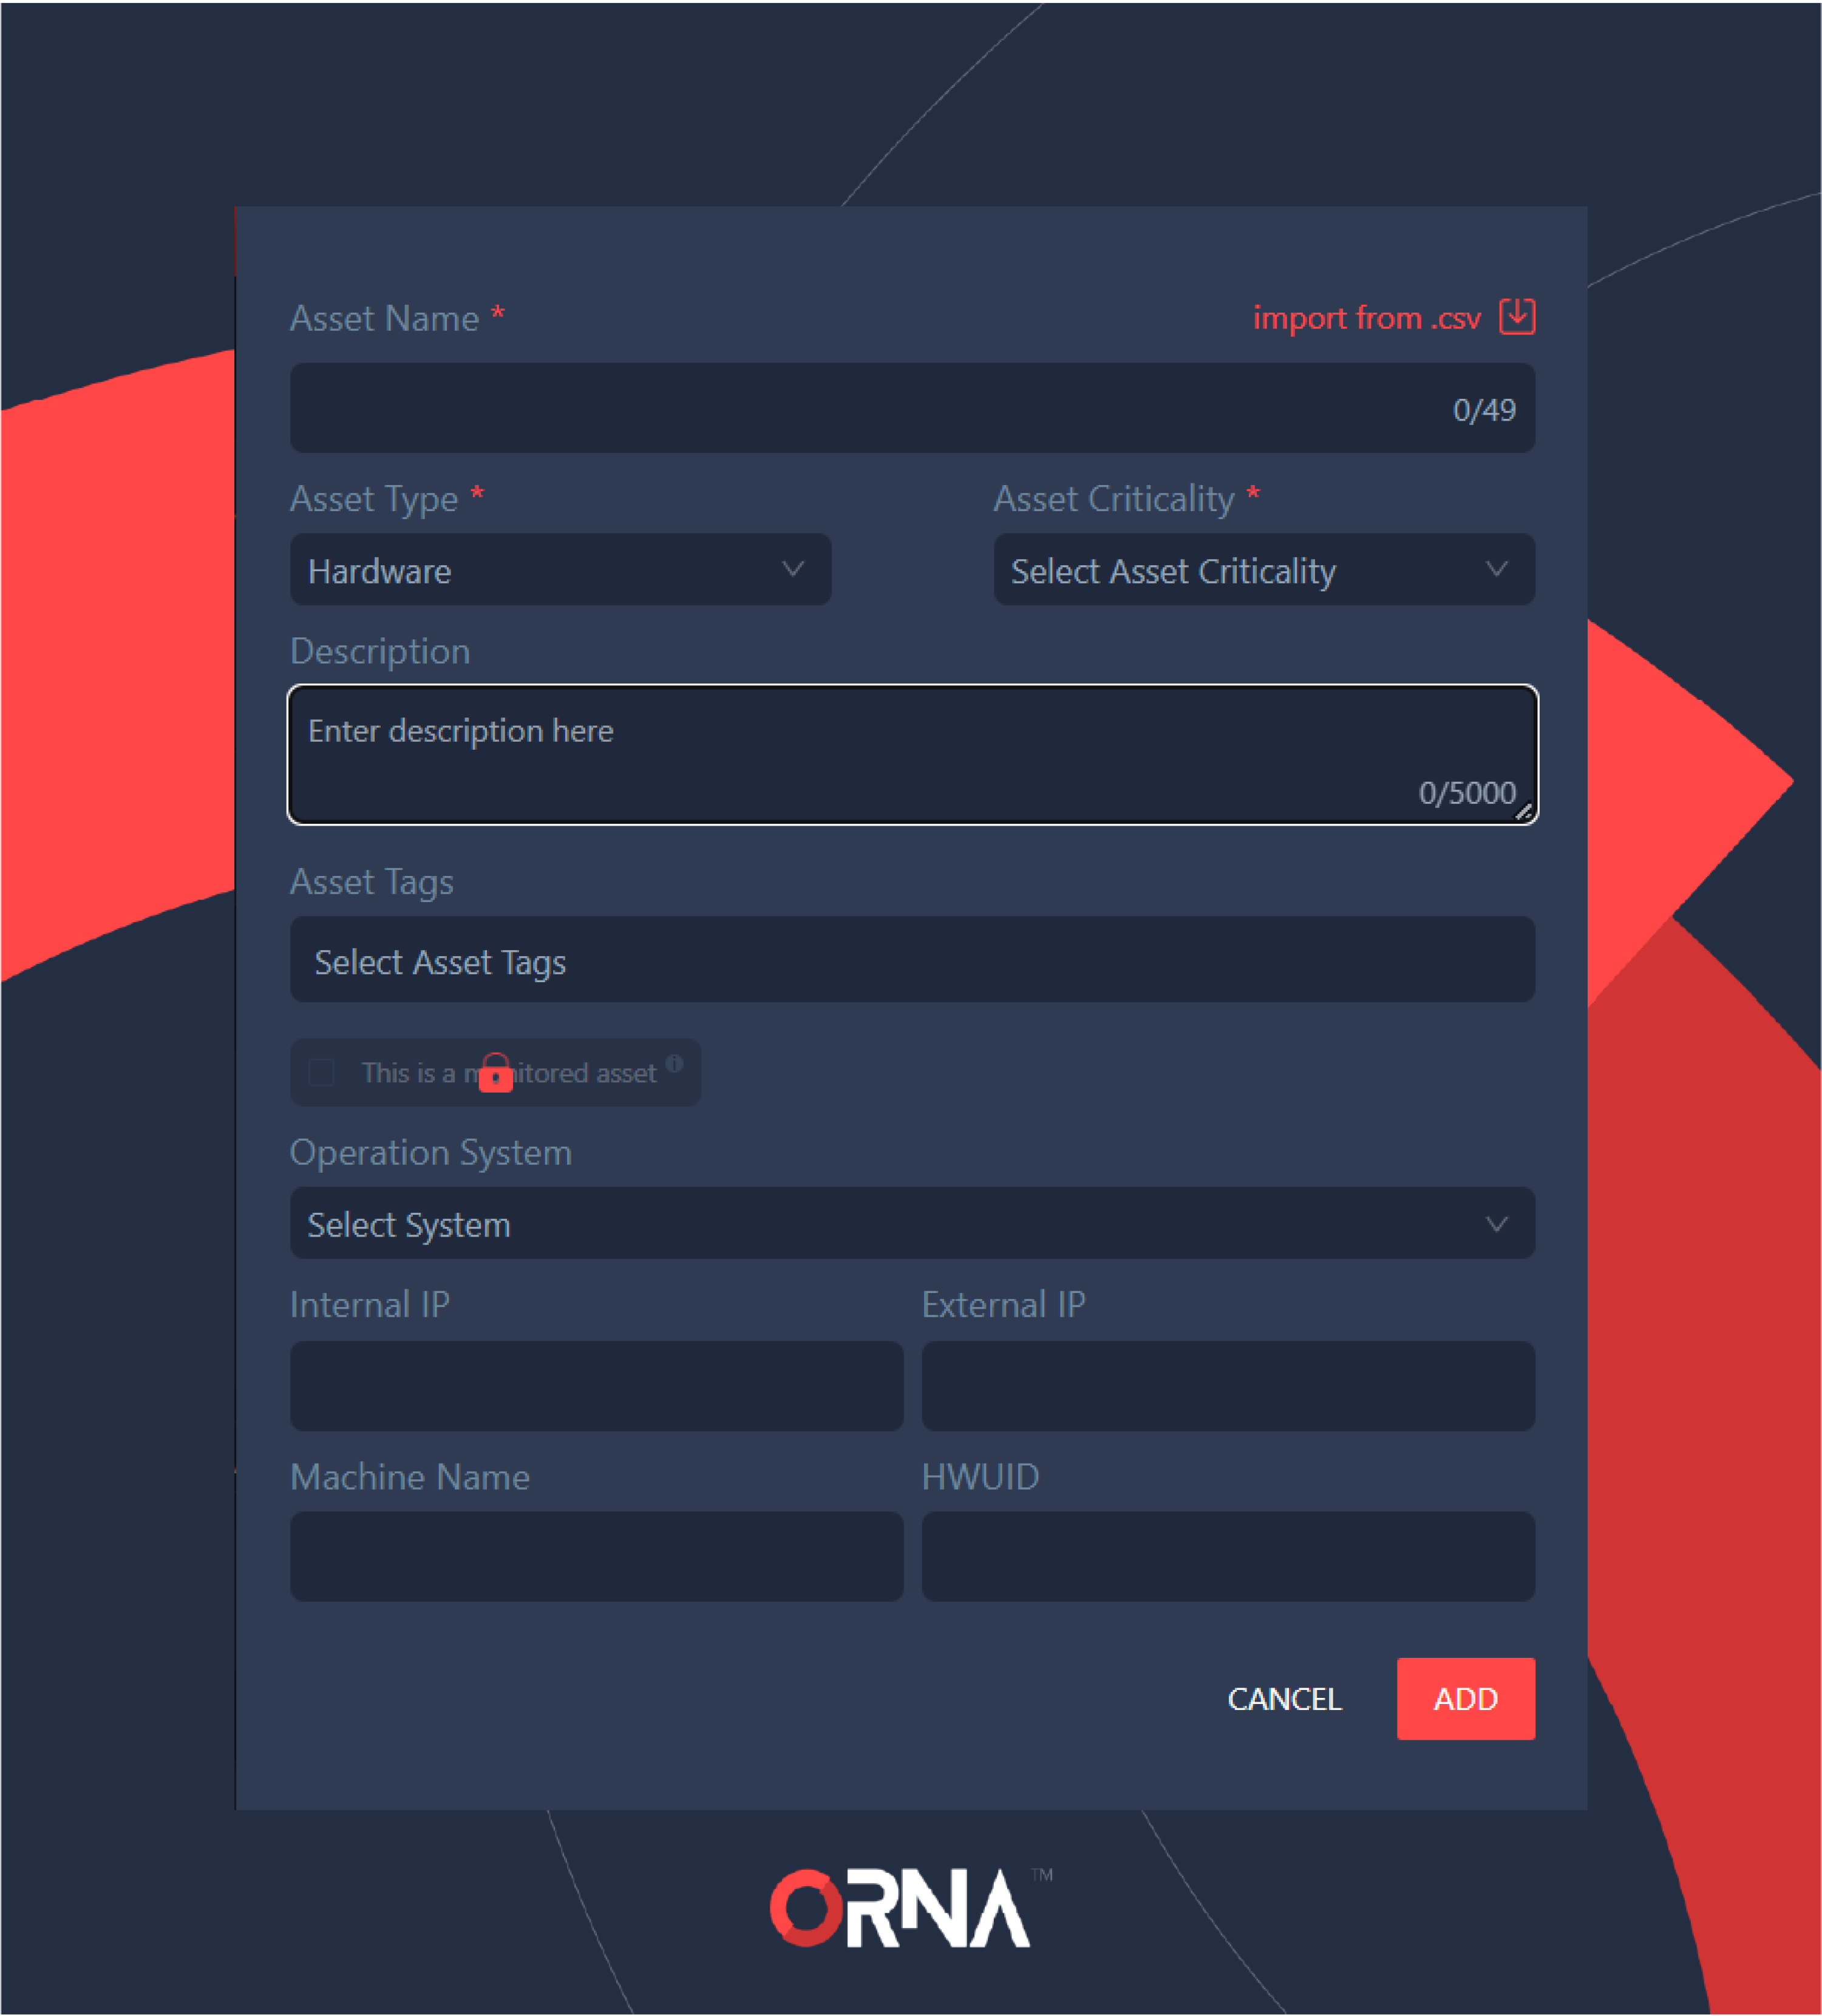
Populating Asset details (Option 3)
- Assets that have a functional Scout agent installed and running are considered Monitored Assets, indicated by the green eye icon next to the name of the respective asset’s record row. Assets for which the telemetry cannot be received will have a white eye icon instead; you can contact your ORNA support team using the 24/7 chat functionality in the bottom right corner to investigate and resolve any issues. Finally, non-monitored assets will have neither green nor white eye icons next to their name.
Viewing and editing an Asset
To view and edit an asset's details, follow the steps below:
- Navigate to the Assets section on the platform’s sidebar.
- Find the asset you want to edit or view using the asset list.
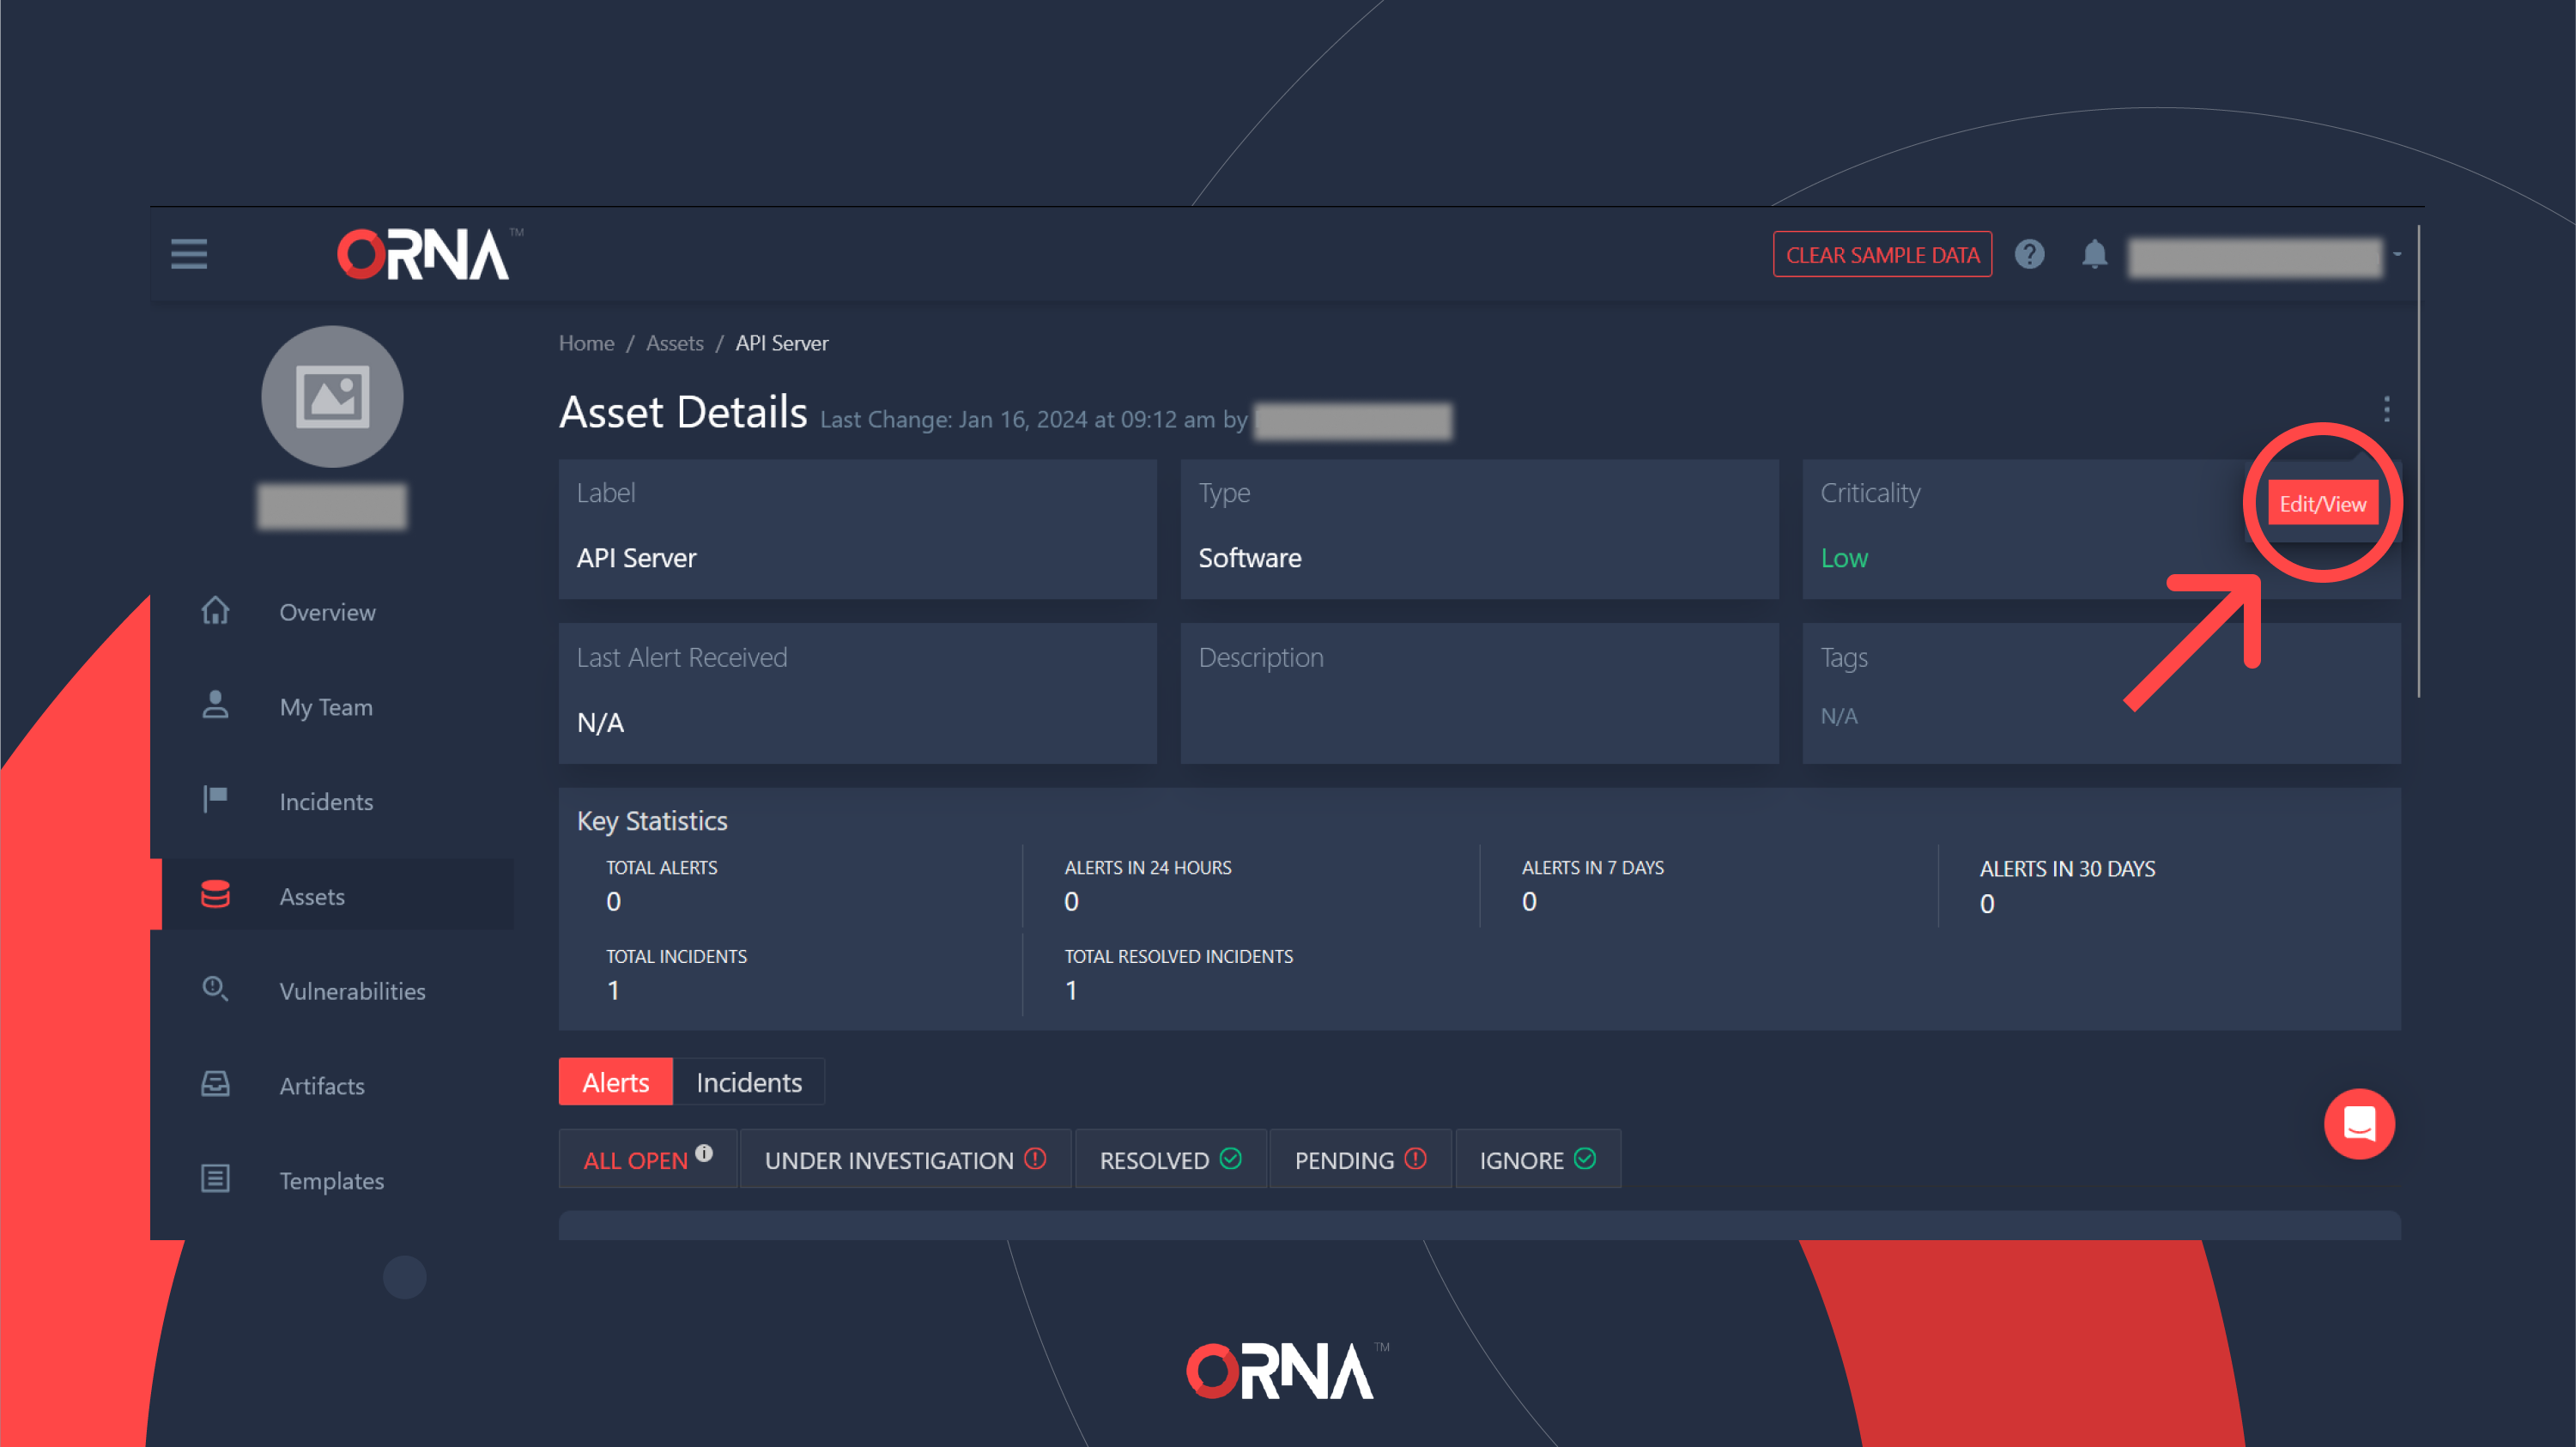
- Click on the asset’s record or row. This will take you to the Asset Details screen, displaying various details depending on the Asset Type. For example, Hardware assets may contain optional information, such as Operating System, Internal IP, External IP, and more, whereas an asset of type Person would not...for obvious reasons. Regardless of type, each asset record has a Label (name), Type, and Criticality. The Asset Details screen will also display all Alerts and Incidents linked to this particular asset (i.e., where this asset is indicated as an affected asset), if any.
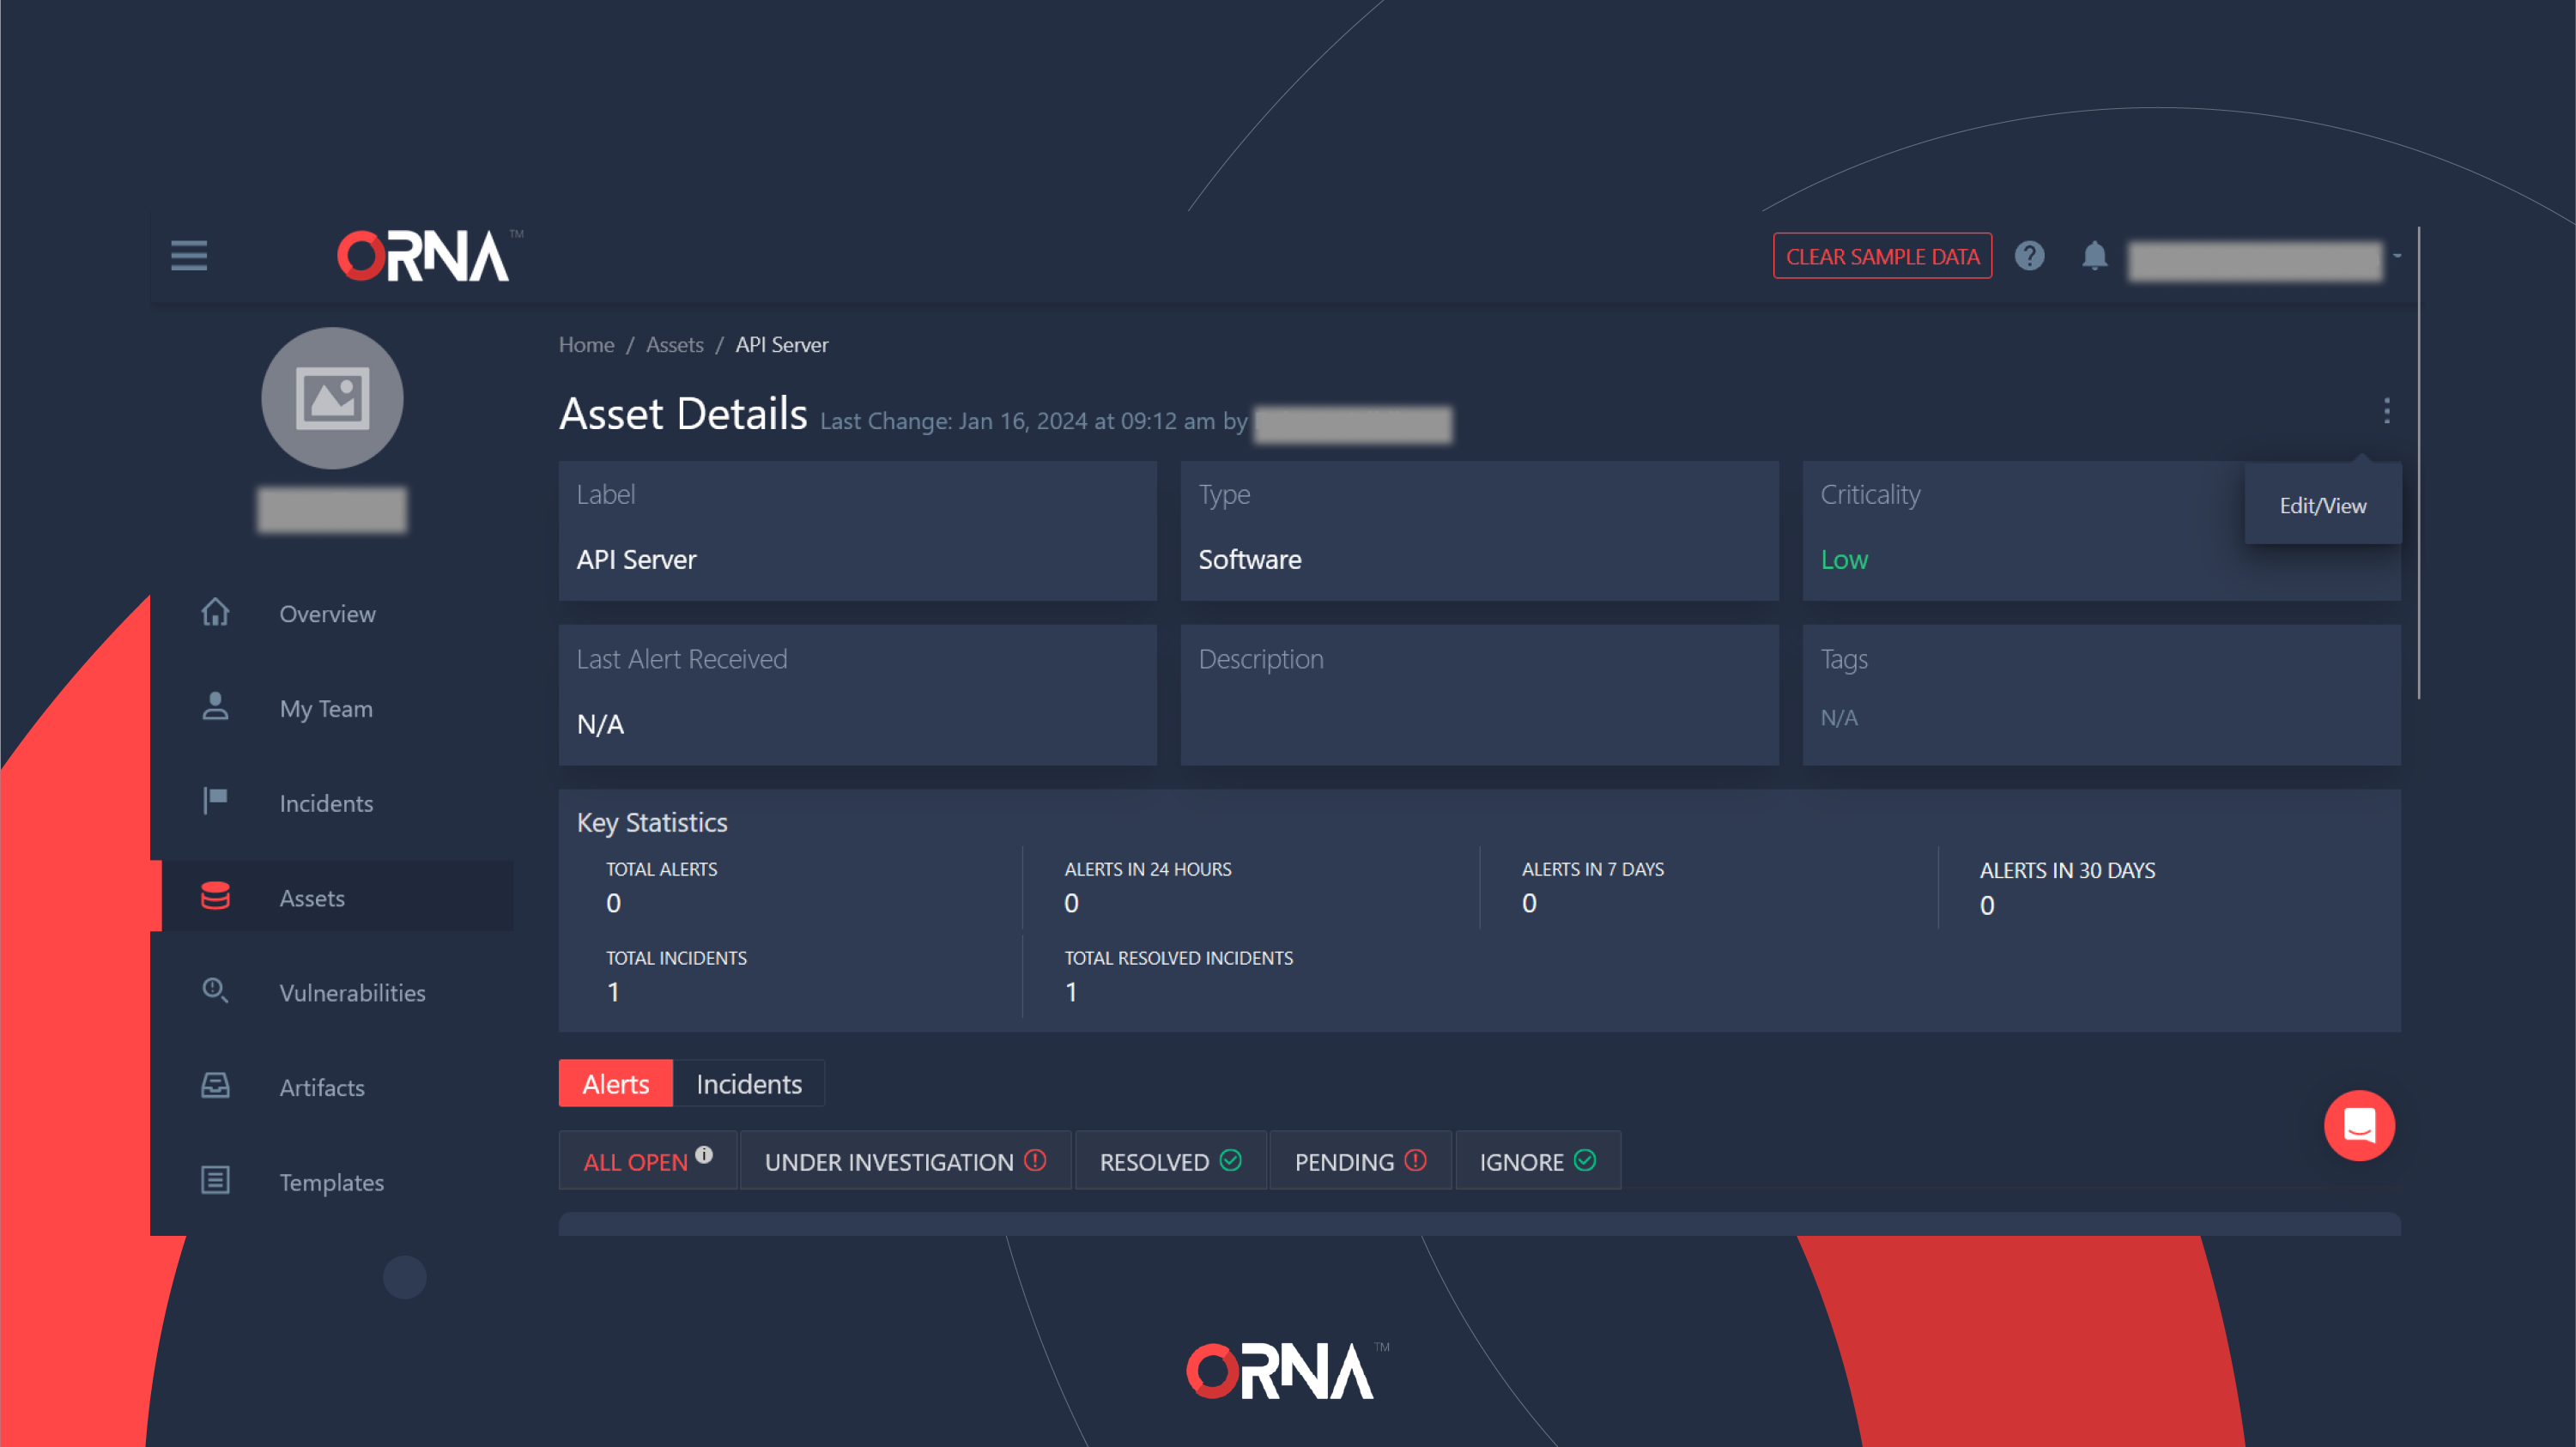
Asset details (partial)
- Click the “...” Options button in the top right-hand corner of the Asset Details screen and select Edit/View from the list.
Editing Asset details
- Edit the desired details.
- Click Update to save your changes.
Removing an asset
To remove an asset, follow the steps below:
- Navigate to the Assets section on the platform’s sidebar.
- Using the Assets list, find the specific asset you want to delete.
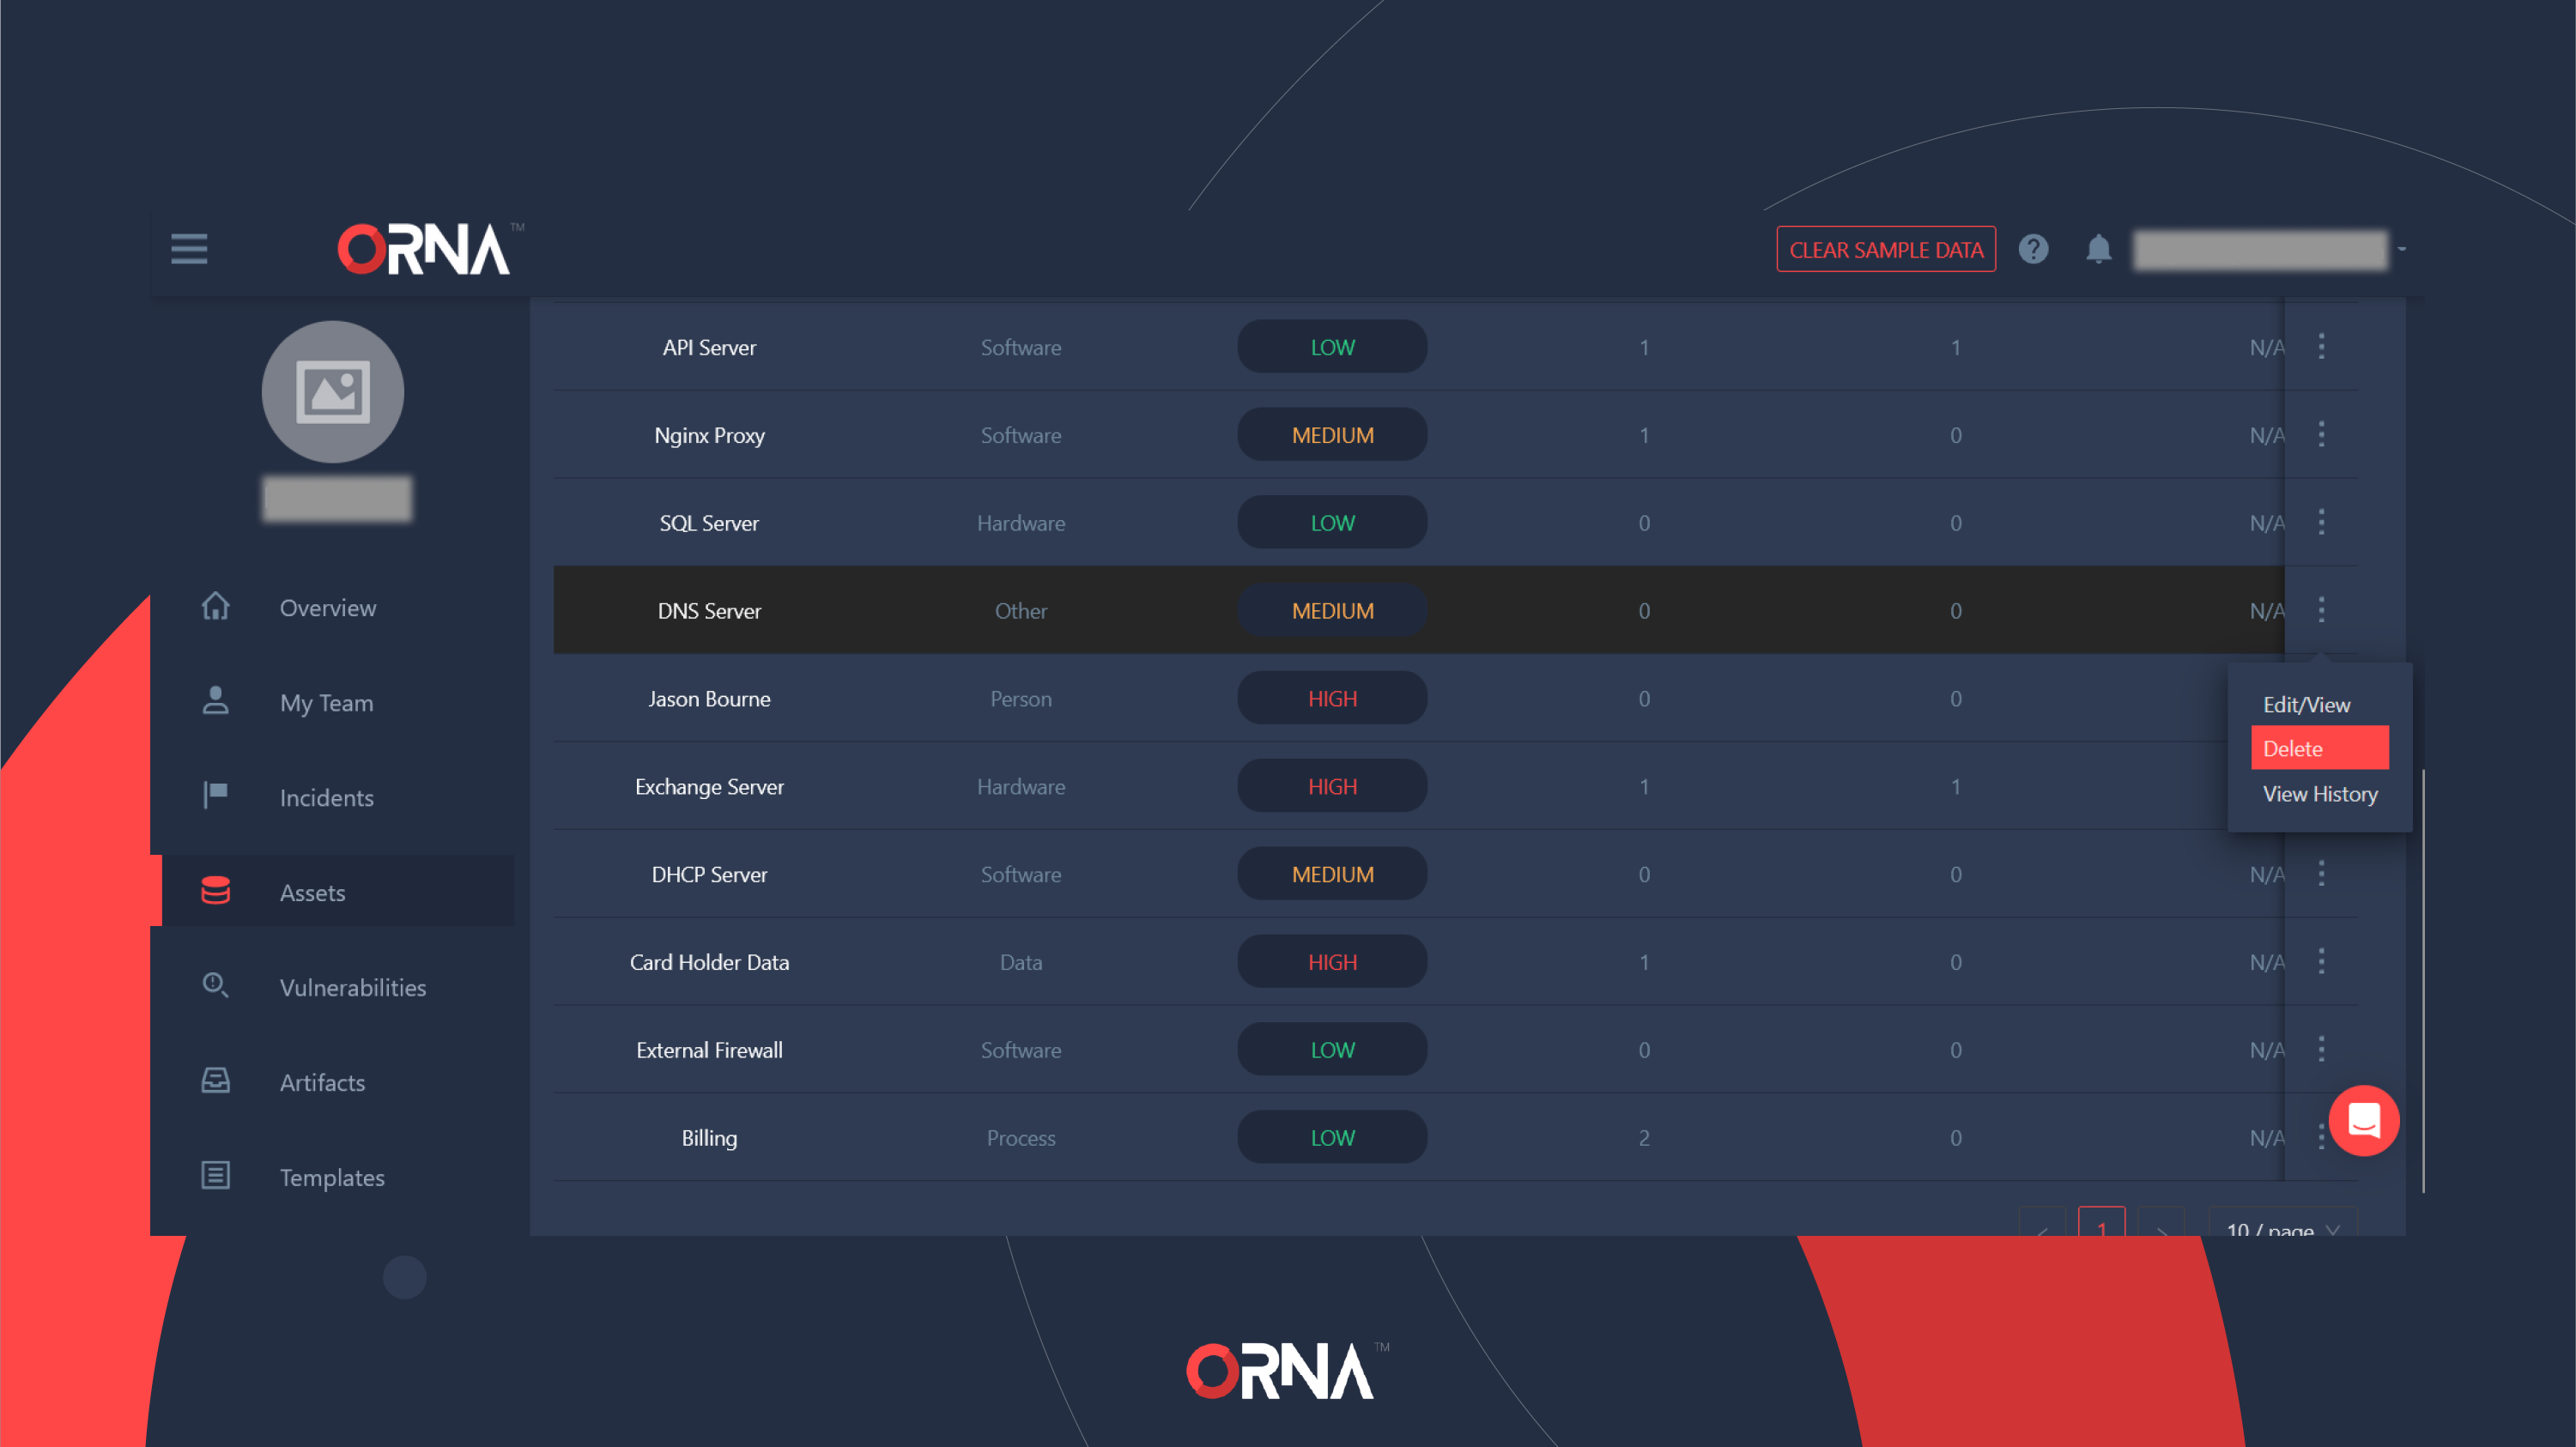
- Click the “...” Options button on the right-hand of the asset record and select the “Delete” option.
NoteYou cannot delete an asset linked to (i.e., currently marked as affected by) one or more incidents.
- Click the Delete Asset button within the dialog to confirm. This action cannot be undone.
Deleting an Asset
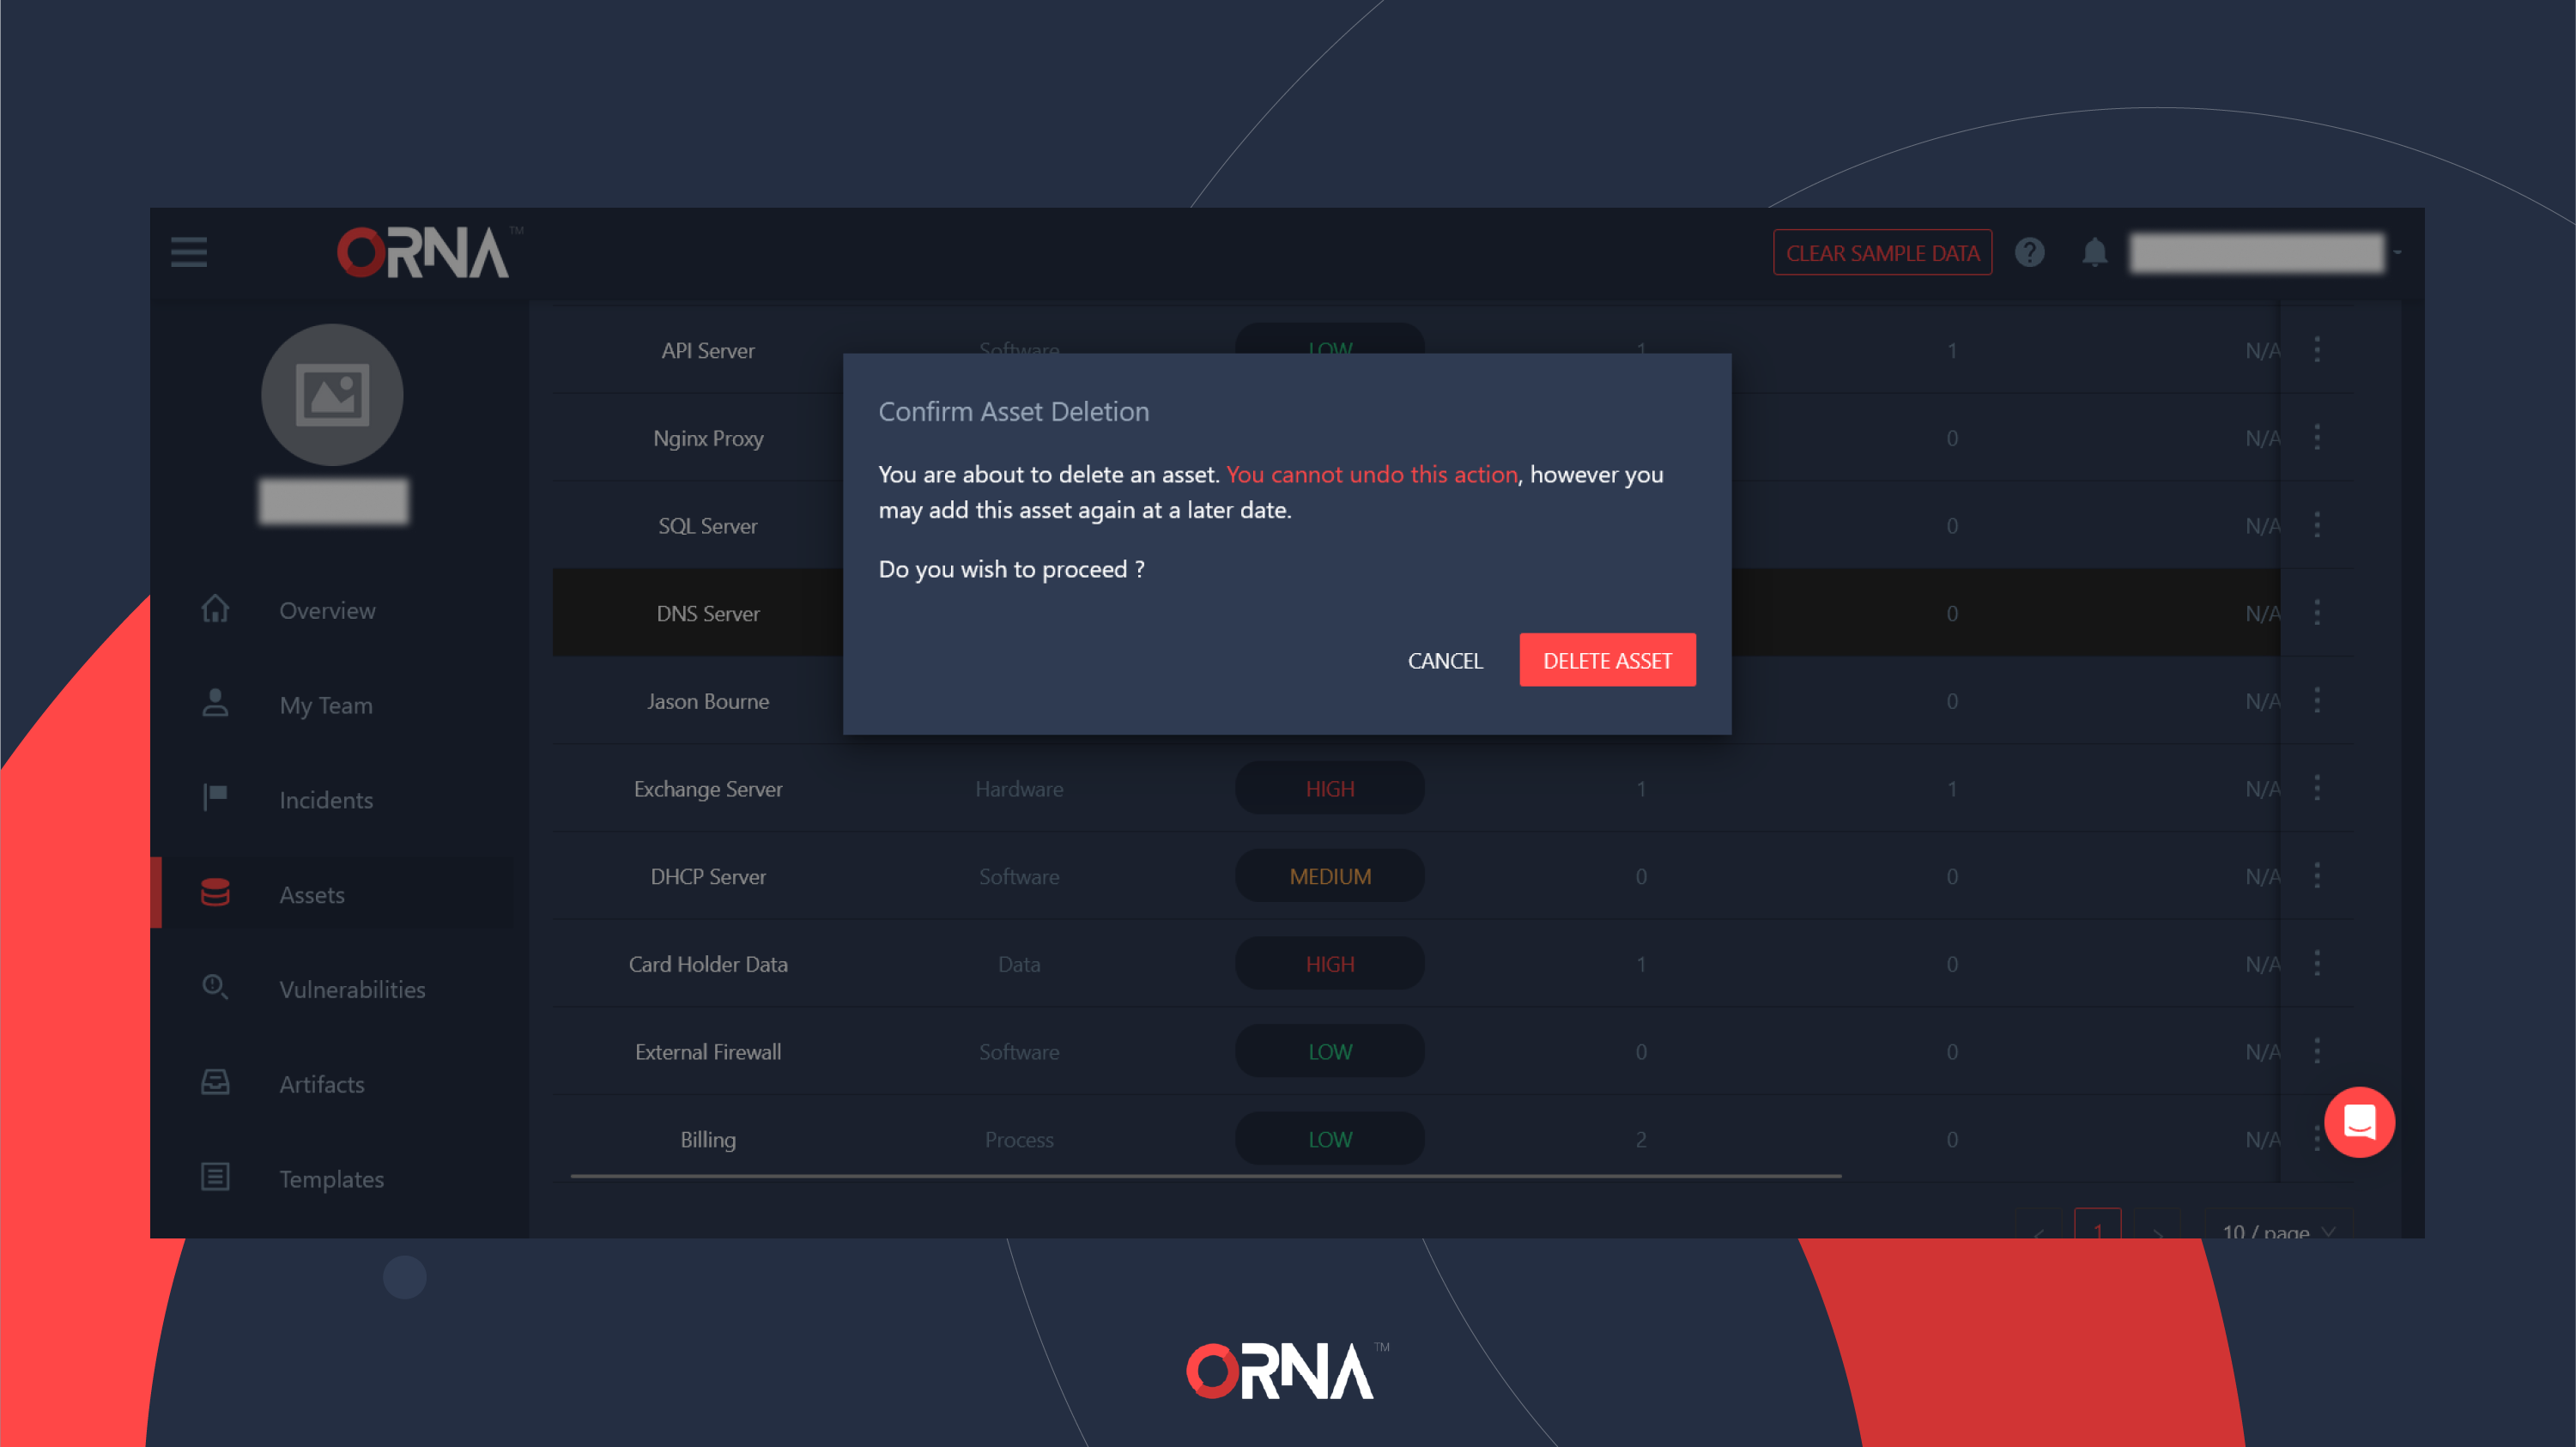
Confirming Asset deletion
Updated 10 months ago